Booking a session for a client
Every way to add a session yourself, what each field on the form does, how repeating sessions work, what your client is sent, and how to change, cancel or back-date a session.
Updated 4 November 2026
This covers adding a session yourself, one-off or repeating, in person, by phone or on video, then changing or cancelling it later, and recording a session that has already happened. Sessions clients book themselves are covered in letting clients book online.
Where to start a booking
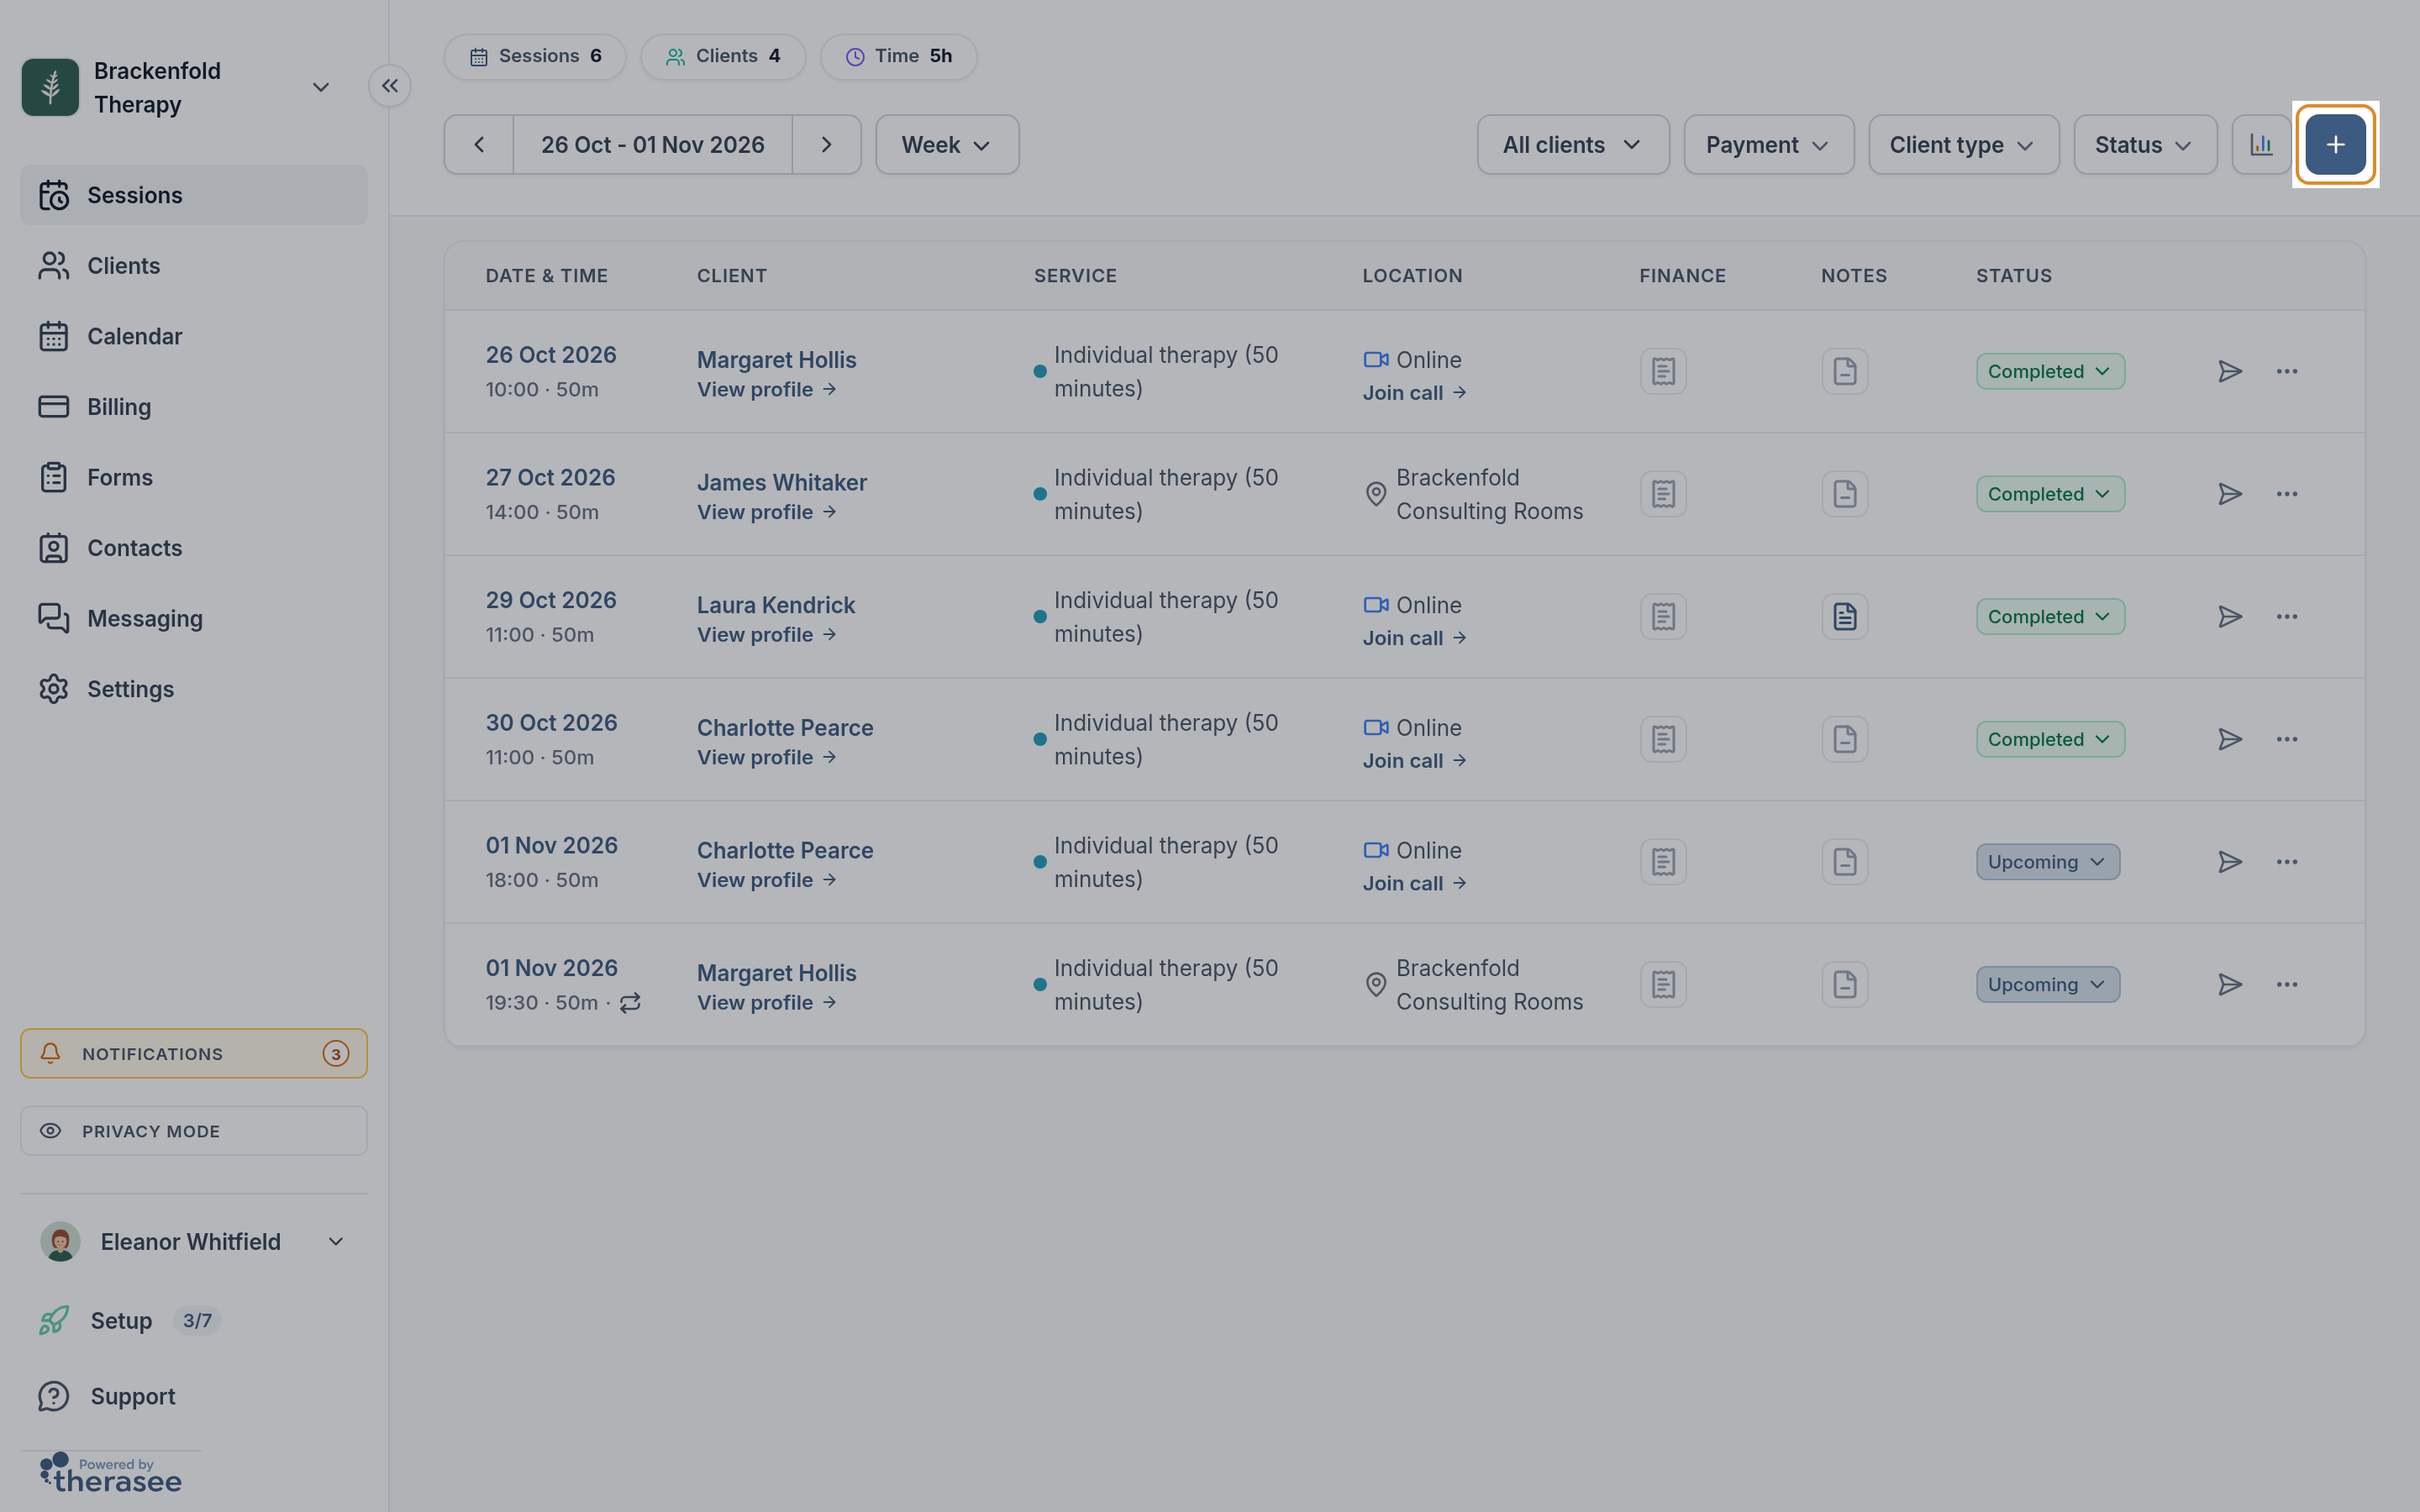
There are four ways in, and they all open the same Create new event panel on the right of the screen.
- From the calendar, on a slot. On the Calendar, click an empty slot in the day or week view. The form opens with that date and start time already filled in. In the month view, clicking a day fills in 09:00. Dragging across several slots only sets the start: the length always comes from the service.
- From the calendar, with the plus button at the top right. The date is today and the start time is blank until you pick one.
- From the Sessions list, with the New session button (the plus) at the top right of Sessions.
- From a client. On Clients, use the Add appointments calendar icon in the client's row, or open their record and click Schedule. The client is filled in and cannot be changed.
Filling in the form
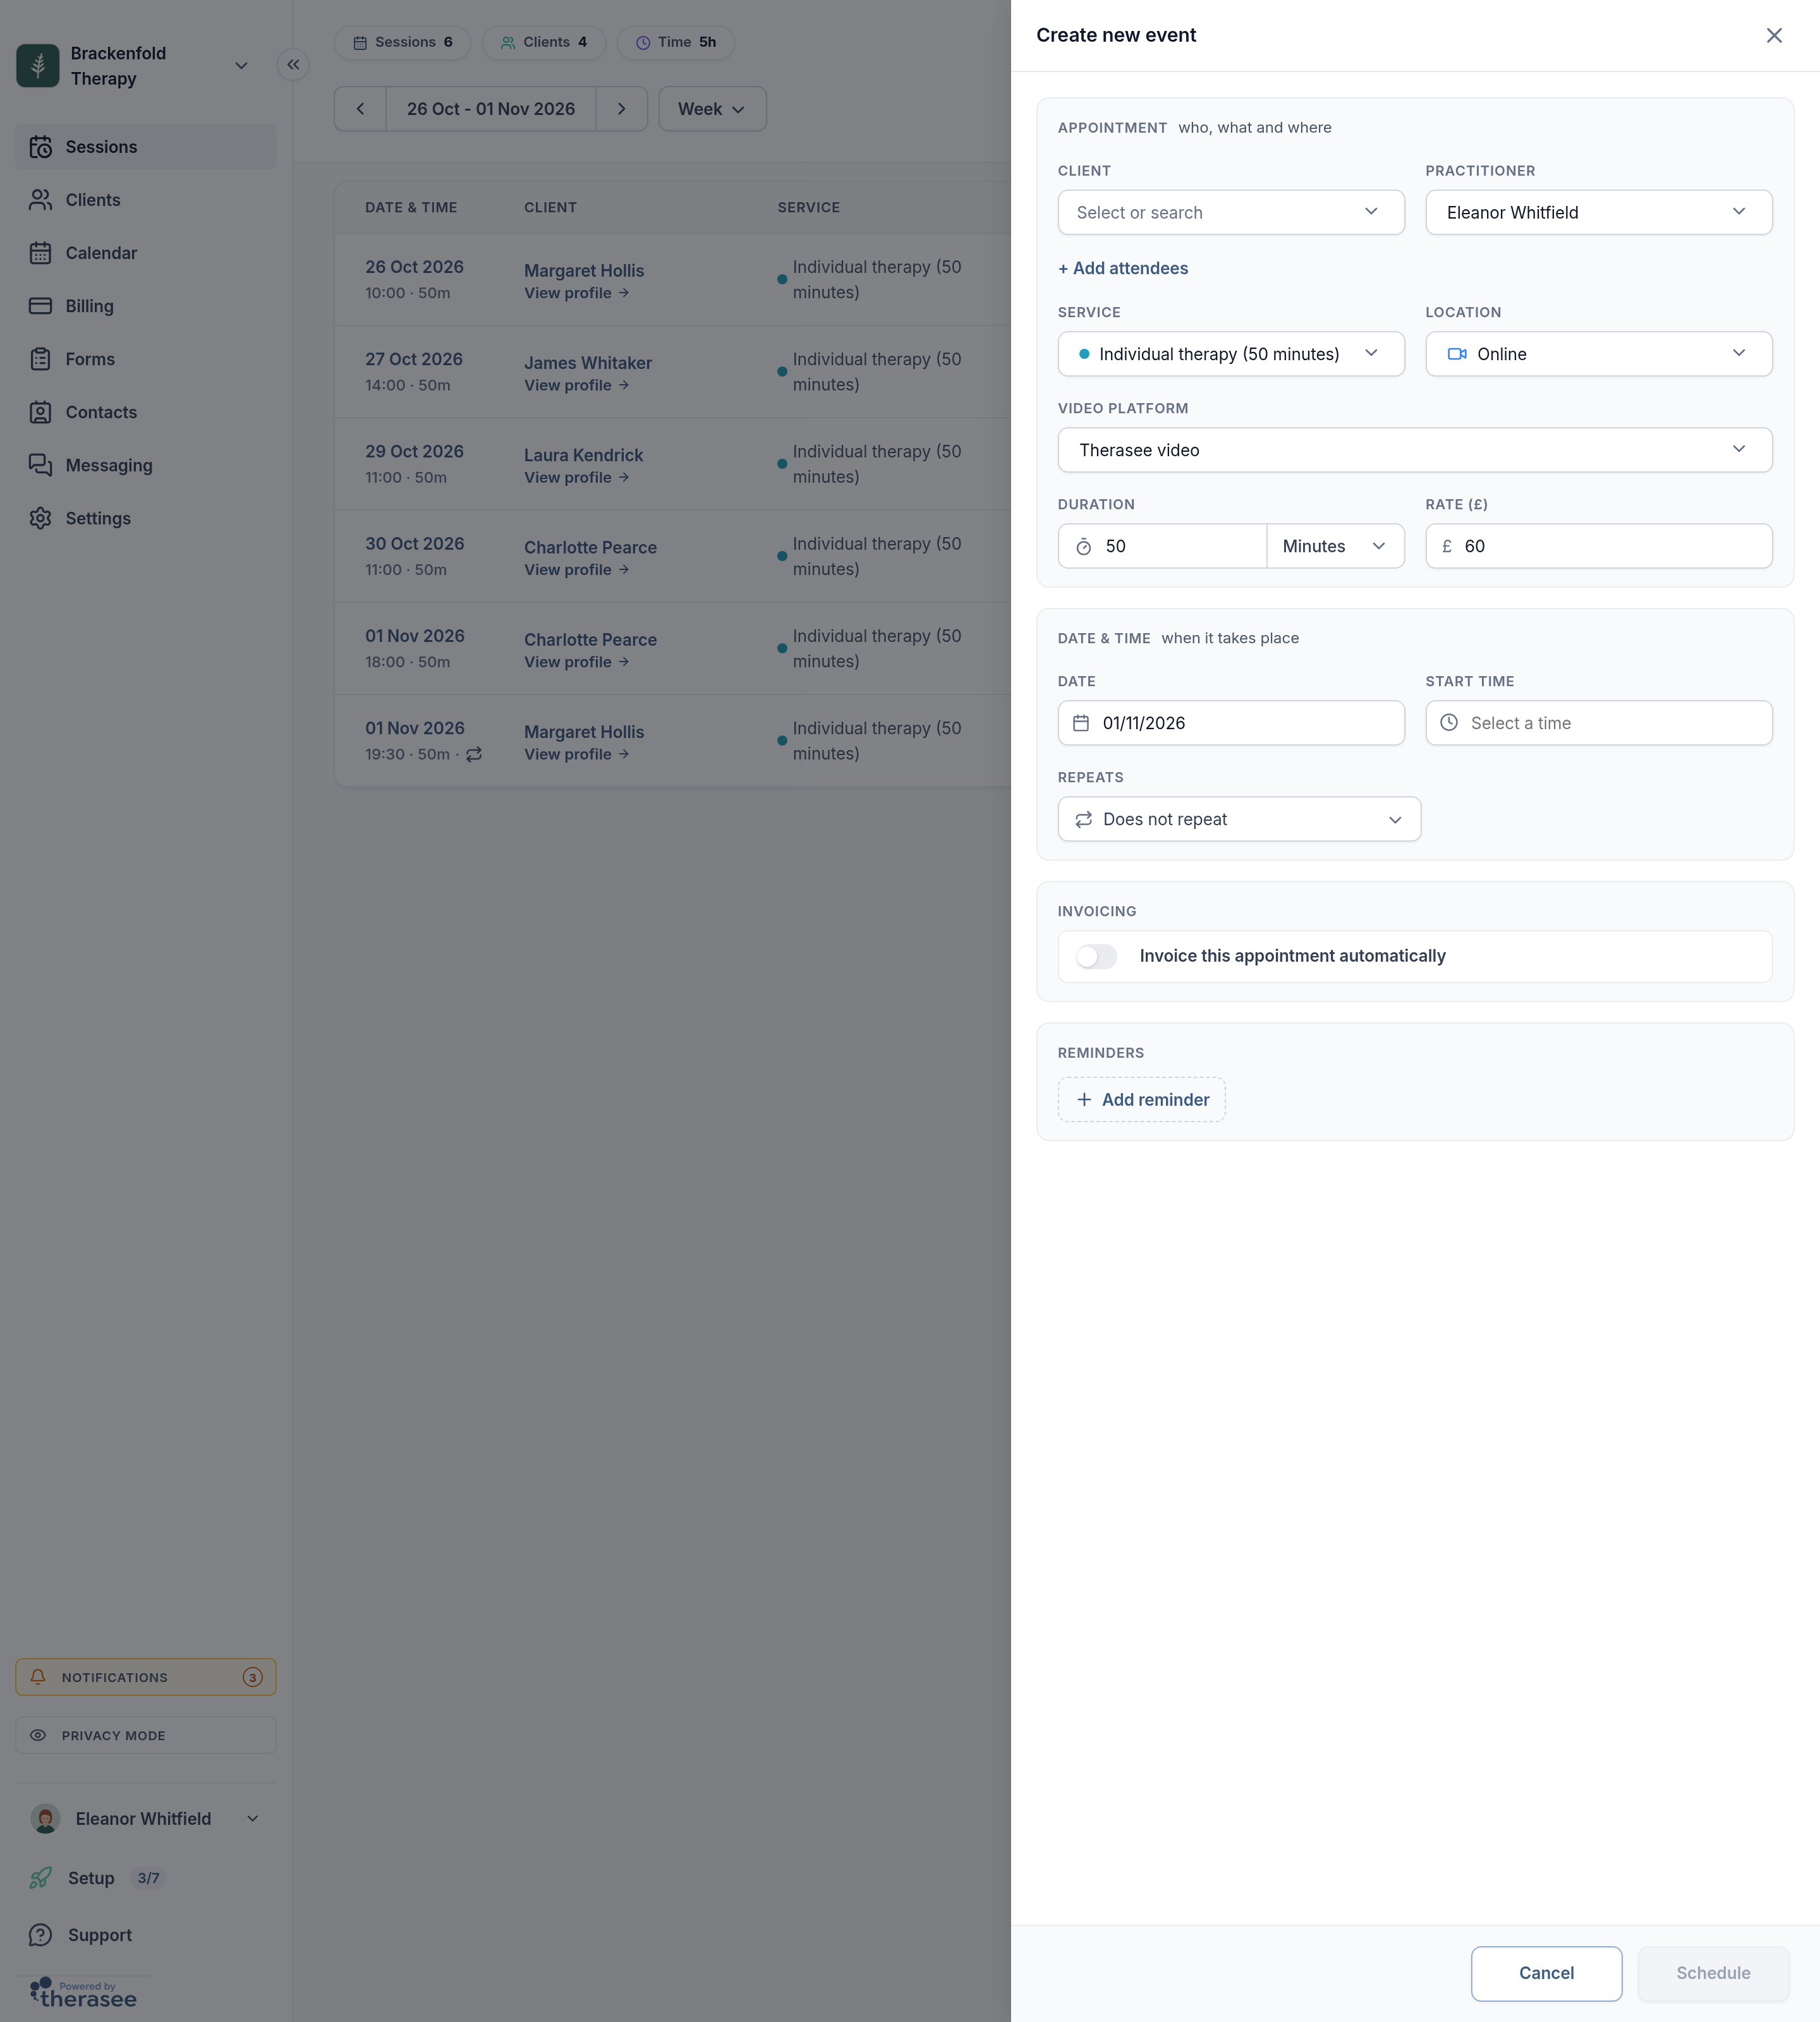
- Client. Start typing a name under Select or search and pick the client. You can only choose someone already on your client list; see below if they are not.
- Practitioner. This fills itself in: with the client's assigned practitioner if they have one, otherwise with you. Changing it to a colleague needs permission to manage everyone's appointments; without it the field is greyed out.
- Service. The client's usual service is preselected, otherwise the service of their last session, otherwise the first service in your list. Choosing a service sets the Duration and the Rate below it. If you have set a different fee for this client, the Rate uses it.
- Location. The location of the client's last session is preselected, otherwise your last-used location. The list holds your rooms, your video option and, if you have switched it on, telephone. If the service is only offered at some locations, the form starts at one of them and lists them first, with the rest under Other locations. You can still pick any location here; the pairing you set on a service only limits online booking.
- Duration and Rate. Both can be changed for this booking. A new rate applies to this booking only and never changes the service itself.
- Date and Start time, in the Date & time card. Times are offered in 15-minute steps.
- Leave Repeats on Does not repeat for a one-off session, or set a pattern (next section).
- Check the Invoicing and Reminders cards, then click Schedule.
Video, phone and in person
- Video. Choosing your video location adds a Video platform field. Therasee video creates a private link for this session automatically. If you have added another provider under Settings, My settings, Online sessions, choosing it uses the link you saved there instead.
- Telephone. Clients are sent the call instructions saved on your phone location. To change them, edit the phone location under Settings, Practice profile, Locations.
- In person. Nothing extra: the room's name and address go into the confirmation.
More than one person in the room
Click + Add attendees to add a partner, parent or interpreter. The list only offers people already linked to this client as contacts, so link them on the client's record first. See working with couples and working with dependants.
Repeating sessions
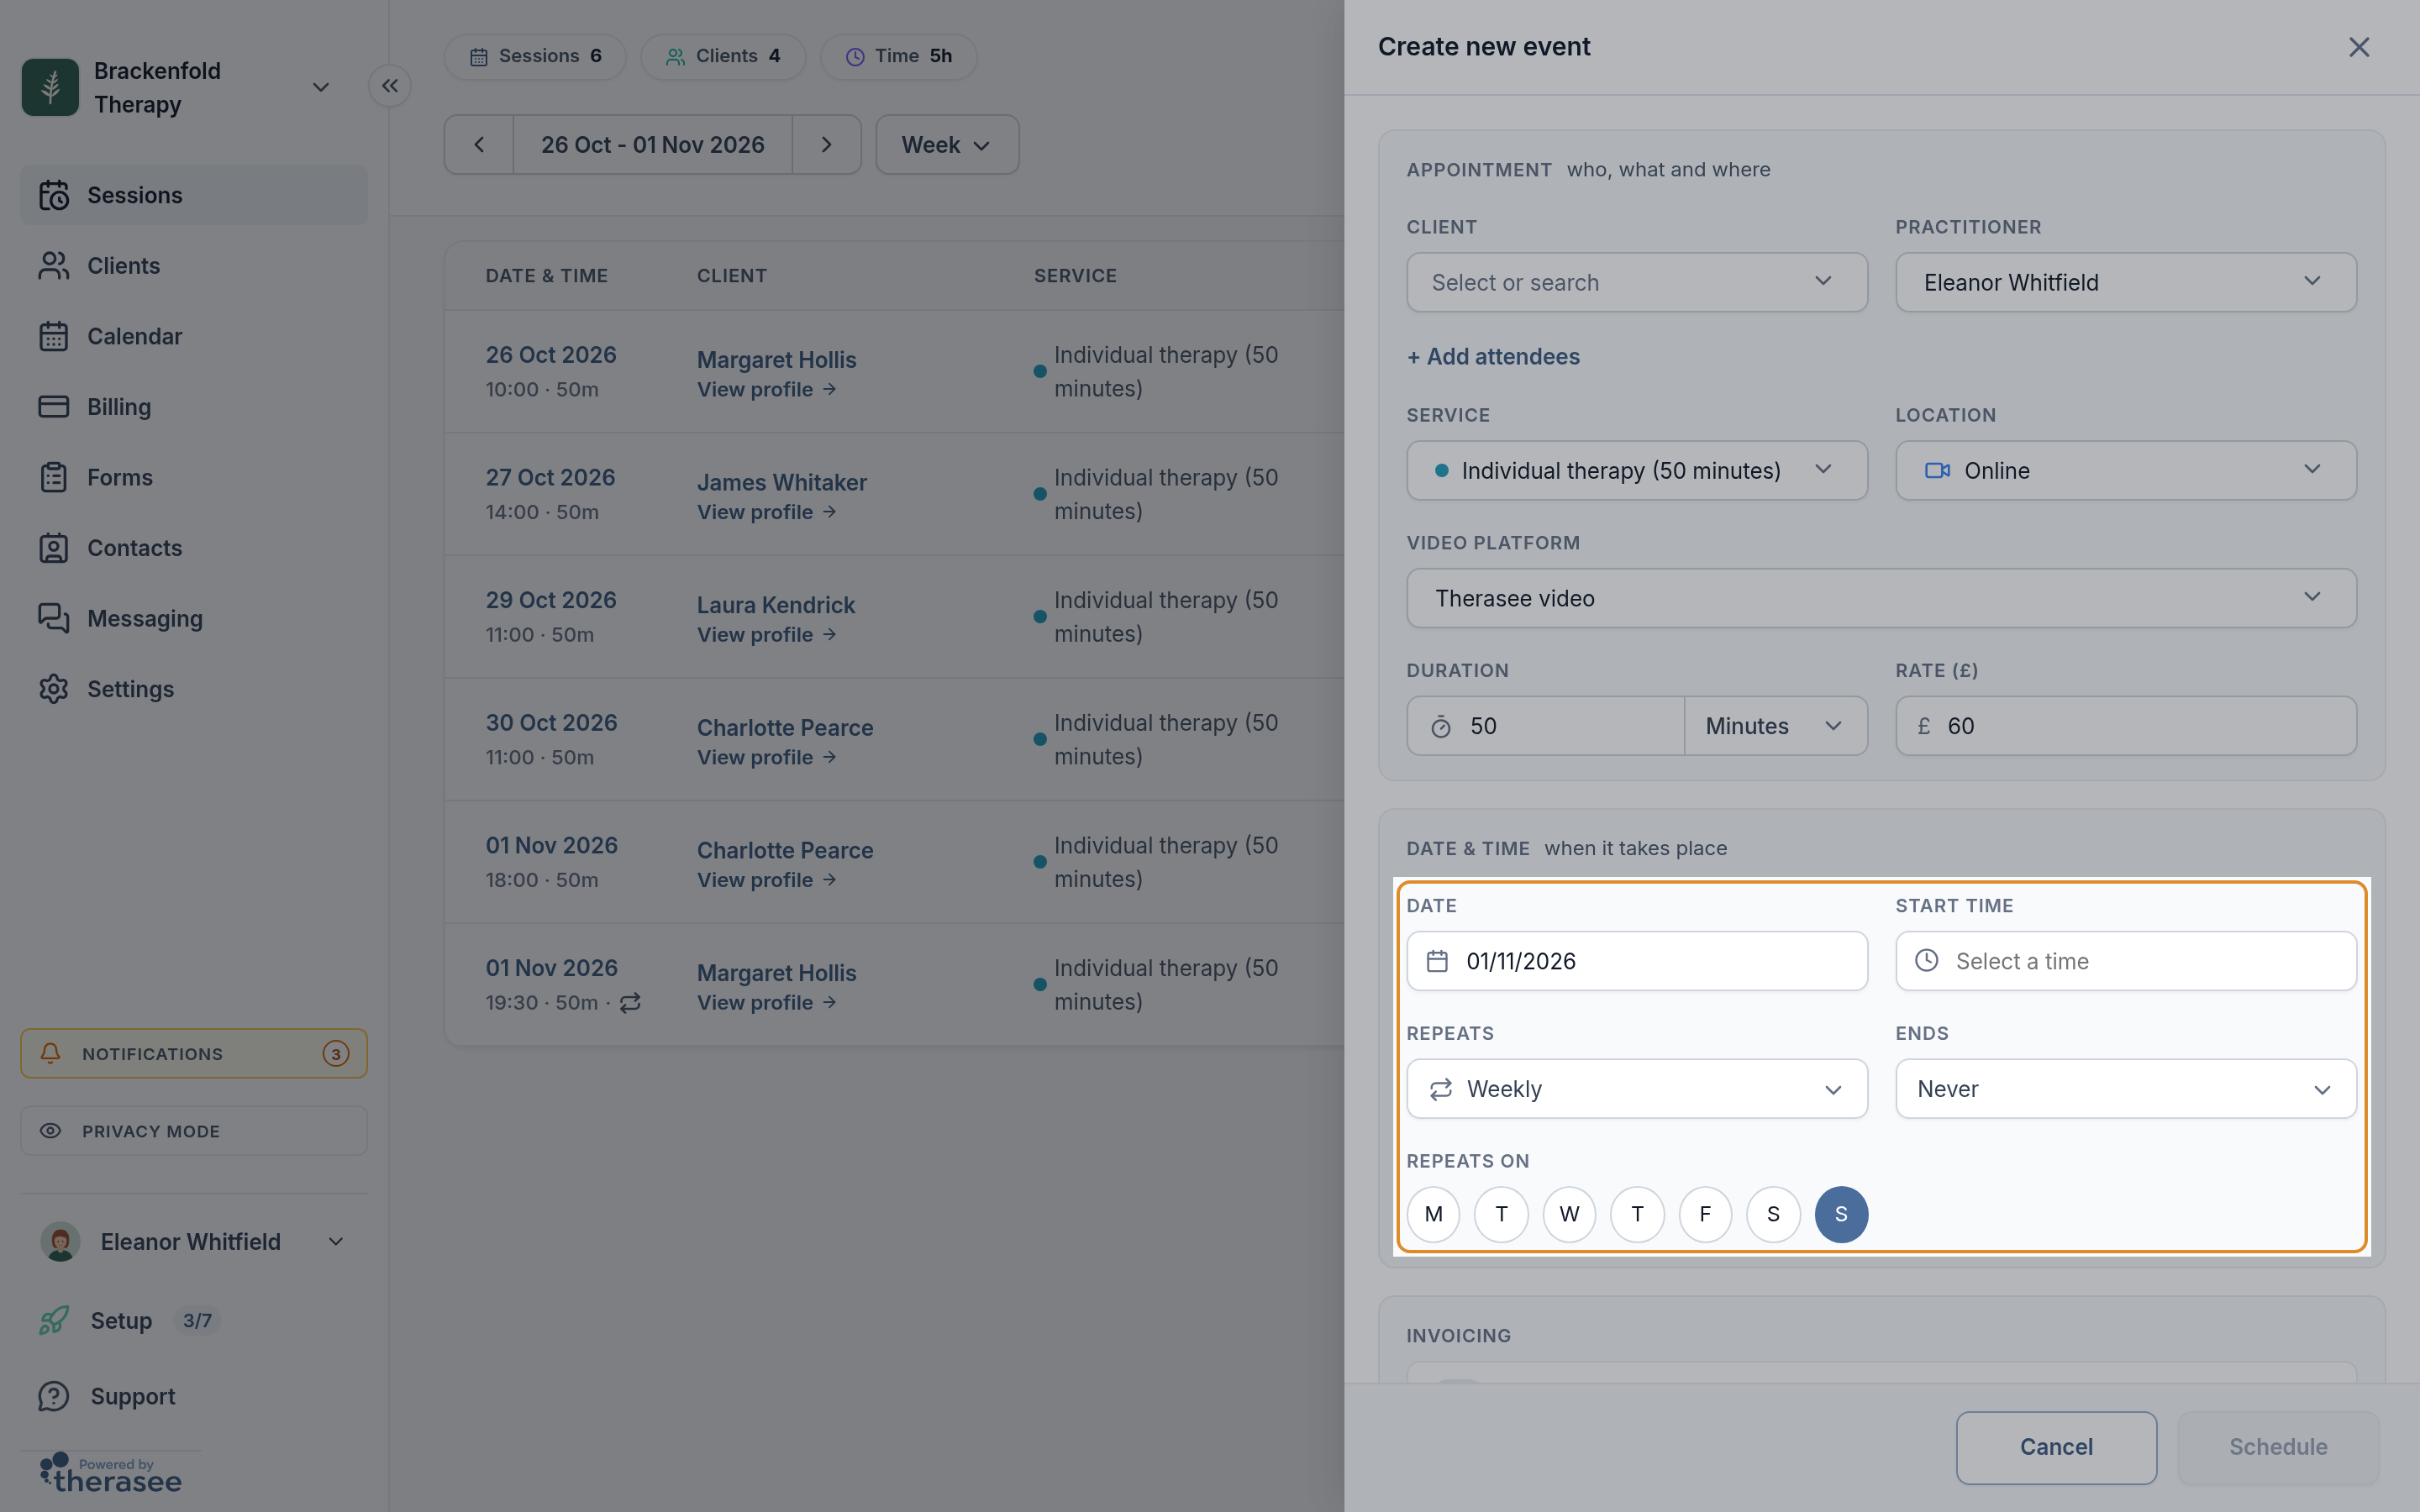
- Open Repeats and choose Weekly, Every 2 weeks, Monthly on the date you picked (for example Monthly on the 14th), Daily, Every weekday (Monday to Friday) or Custom.
- For Weekly and Every 2 weeks, Repeats on shows the day. Tapping a different day moves the first session to that day in the same week, so the date and the pattern always agree.
- Custom gives Repeat every (1 to 10 days, weeks or months) and, for weeks, lets you pick several days.
- Set Ends: Never, On a specific date (then pick it under End on), or After 2 times up to After 10 times.
A series is one booking with a pattern, not a stack of copies. Reminders move on to each session in turn, and the whole series keeps the same service, location, rate and practitioner.
A new series includes every date from its first session, so start it from the date of the next session. To record sessions that have already happened, see Recording a past session below.
Invoicing and reminders
- Invoicing. With Invoice this appointment automatically on, an invoice is raised the moment you schedule. For a series the switch reads Invoice each session automatically: the first invoice is raised now, then one an hour after each session finishes. Tick Email or SMS to send it, or untick both to create it quietly. Nothing is raised when the rate is zero. See creating and sending an invoice.
- Reminders. Your practice's reminder defaults are filled in. You can change them for this booking, remove them, or use Add reminder to have up to two, each by email, SMS or both.
What you choose on either card applies to this booking only.
Sending the confirmation
Clicking Schedule does not book straight away. A Send confirmation? box opens, restating the service, practitioner and time.
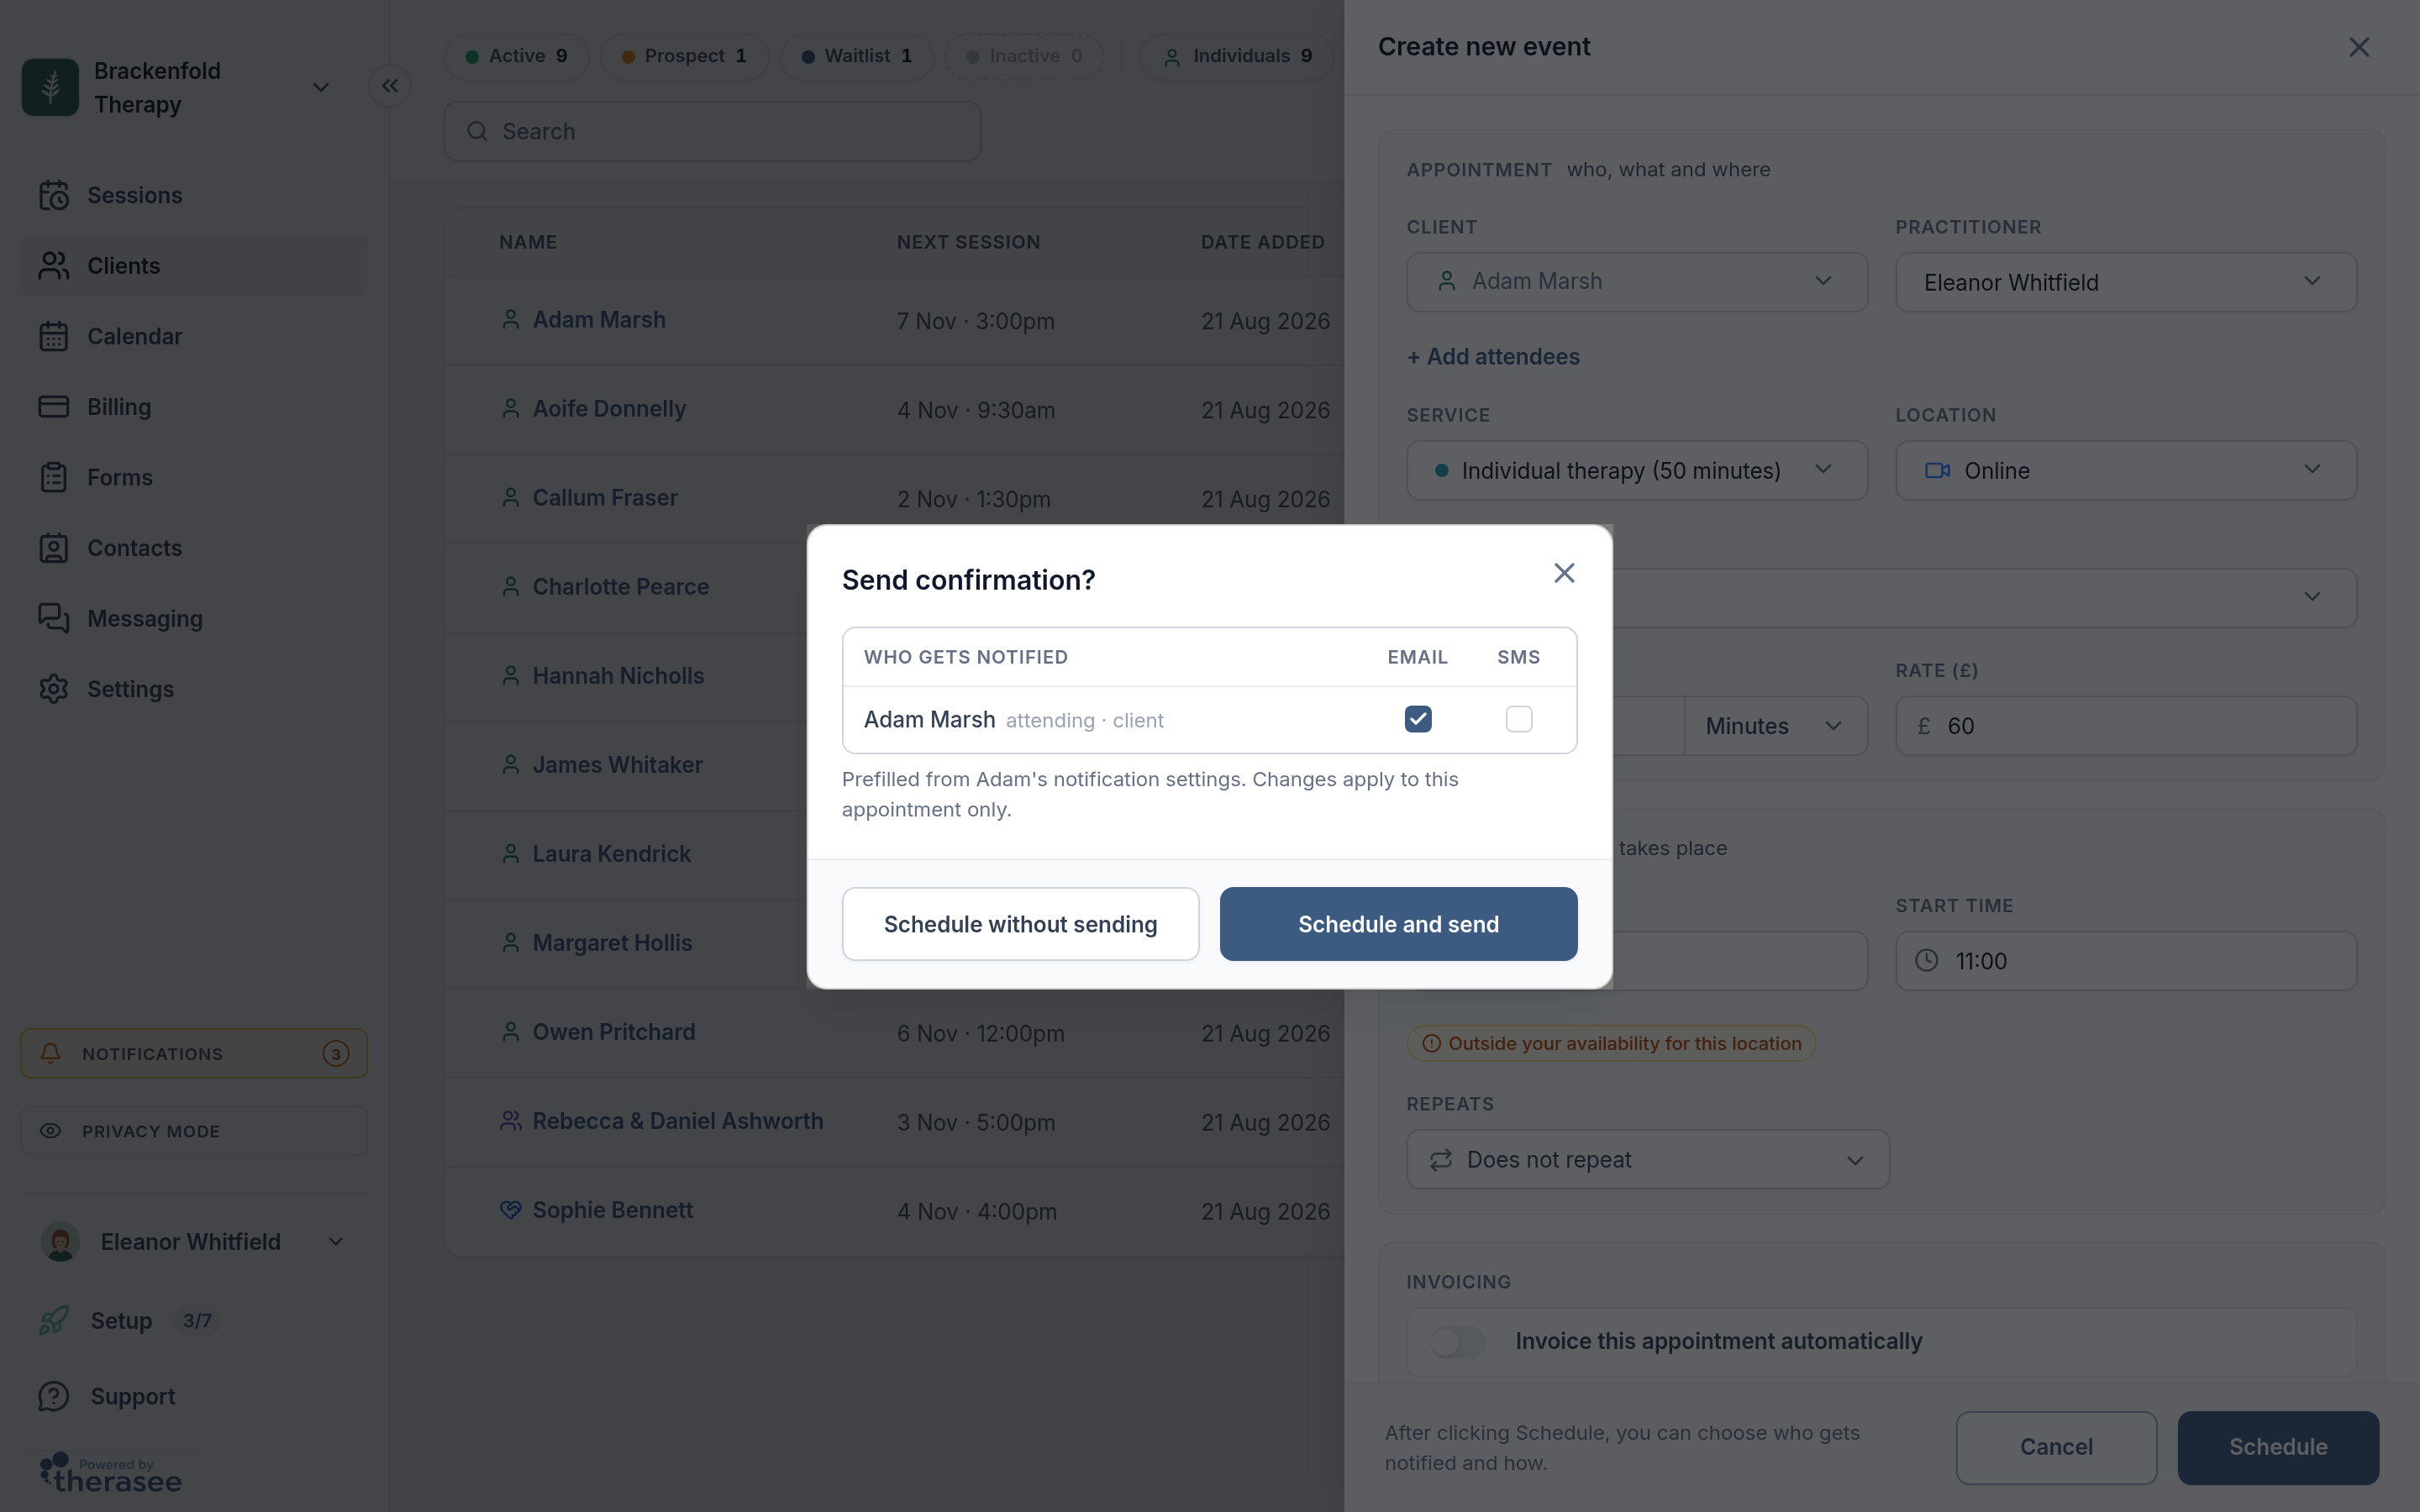
- The Who gets notified list shows the client, anyone else on their record who receives their notifications, and anyone you added under Attending, each with an Email and an SMS tick. Attendees from outside the record are sent email only.
- The ticks start from your practice's confirmation settings under Settings, Practice settings, Notifications and the client's Notifications card. A tick is greyed out when that person has no email address or mobile number. Changes there apply to this booking only.
- Schedule and send books the session and sends the confirmation. Schedule without sending books it silently.
You then see Appointment created and the session appears on the calendar straight away.
What your client receives
- A confirmation email, subject "Appointment confirmed", saying they are booked in with you, with the date and time and a calendar invite they can add to their own calendar. For video sessions it has a Join session button. For a series it says how it repeats.
- A text, if SMS was ticked, along the lines of "Appointment with (your first name) is confirmed for (date) at (time)", followed by the video link, the room's address or your phone instructions.
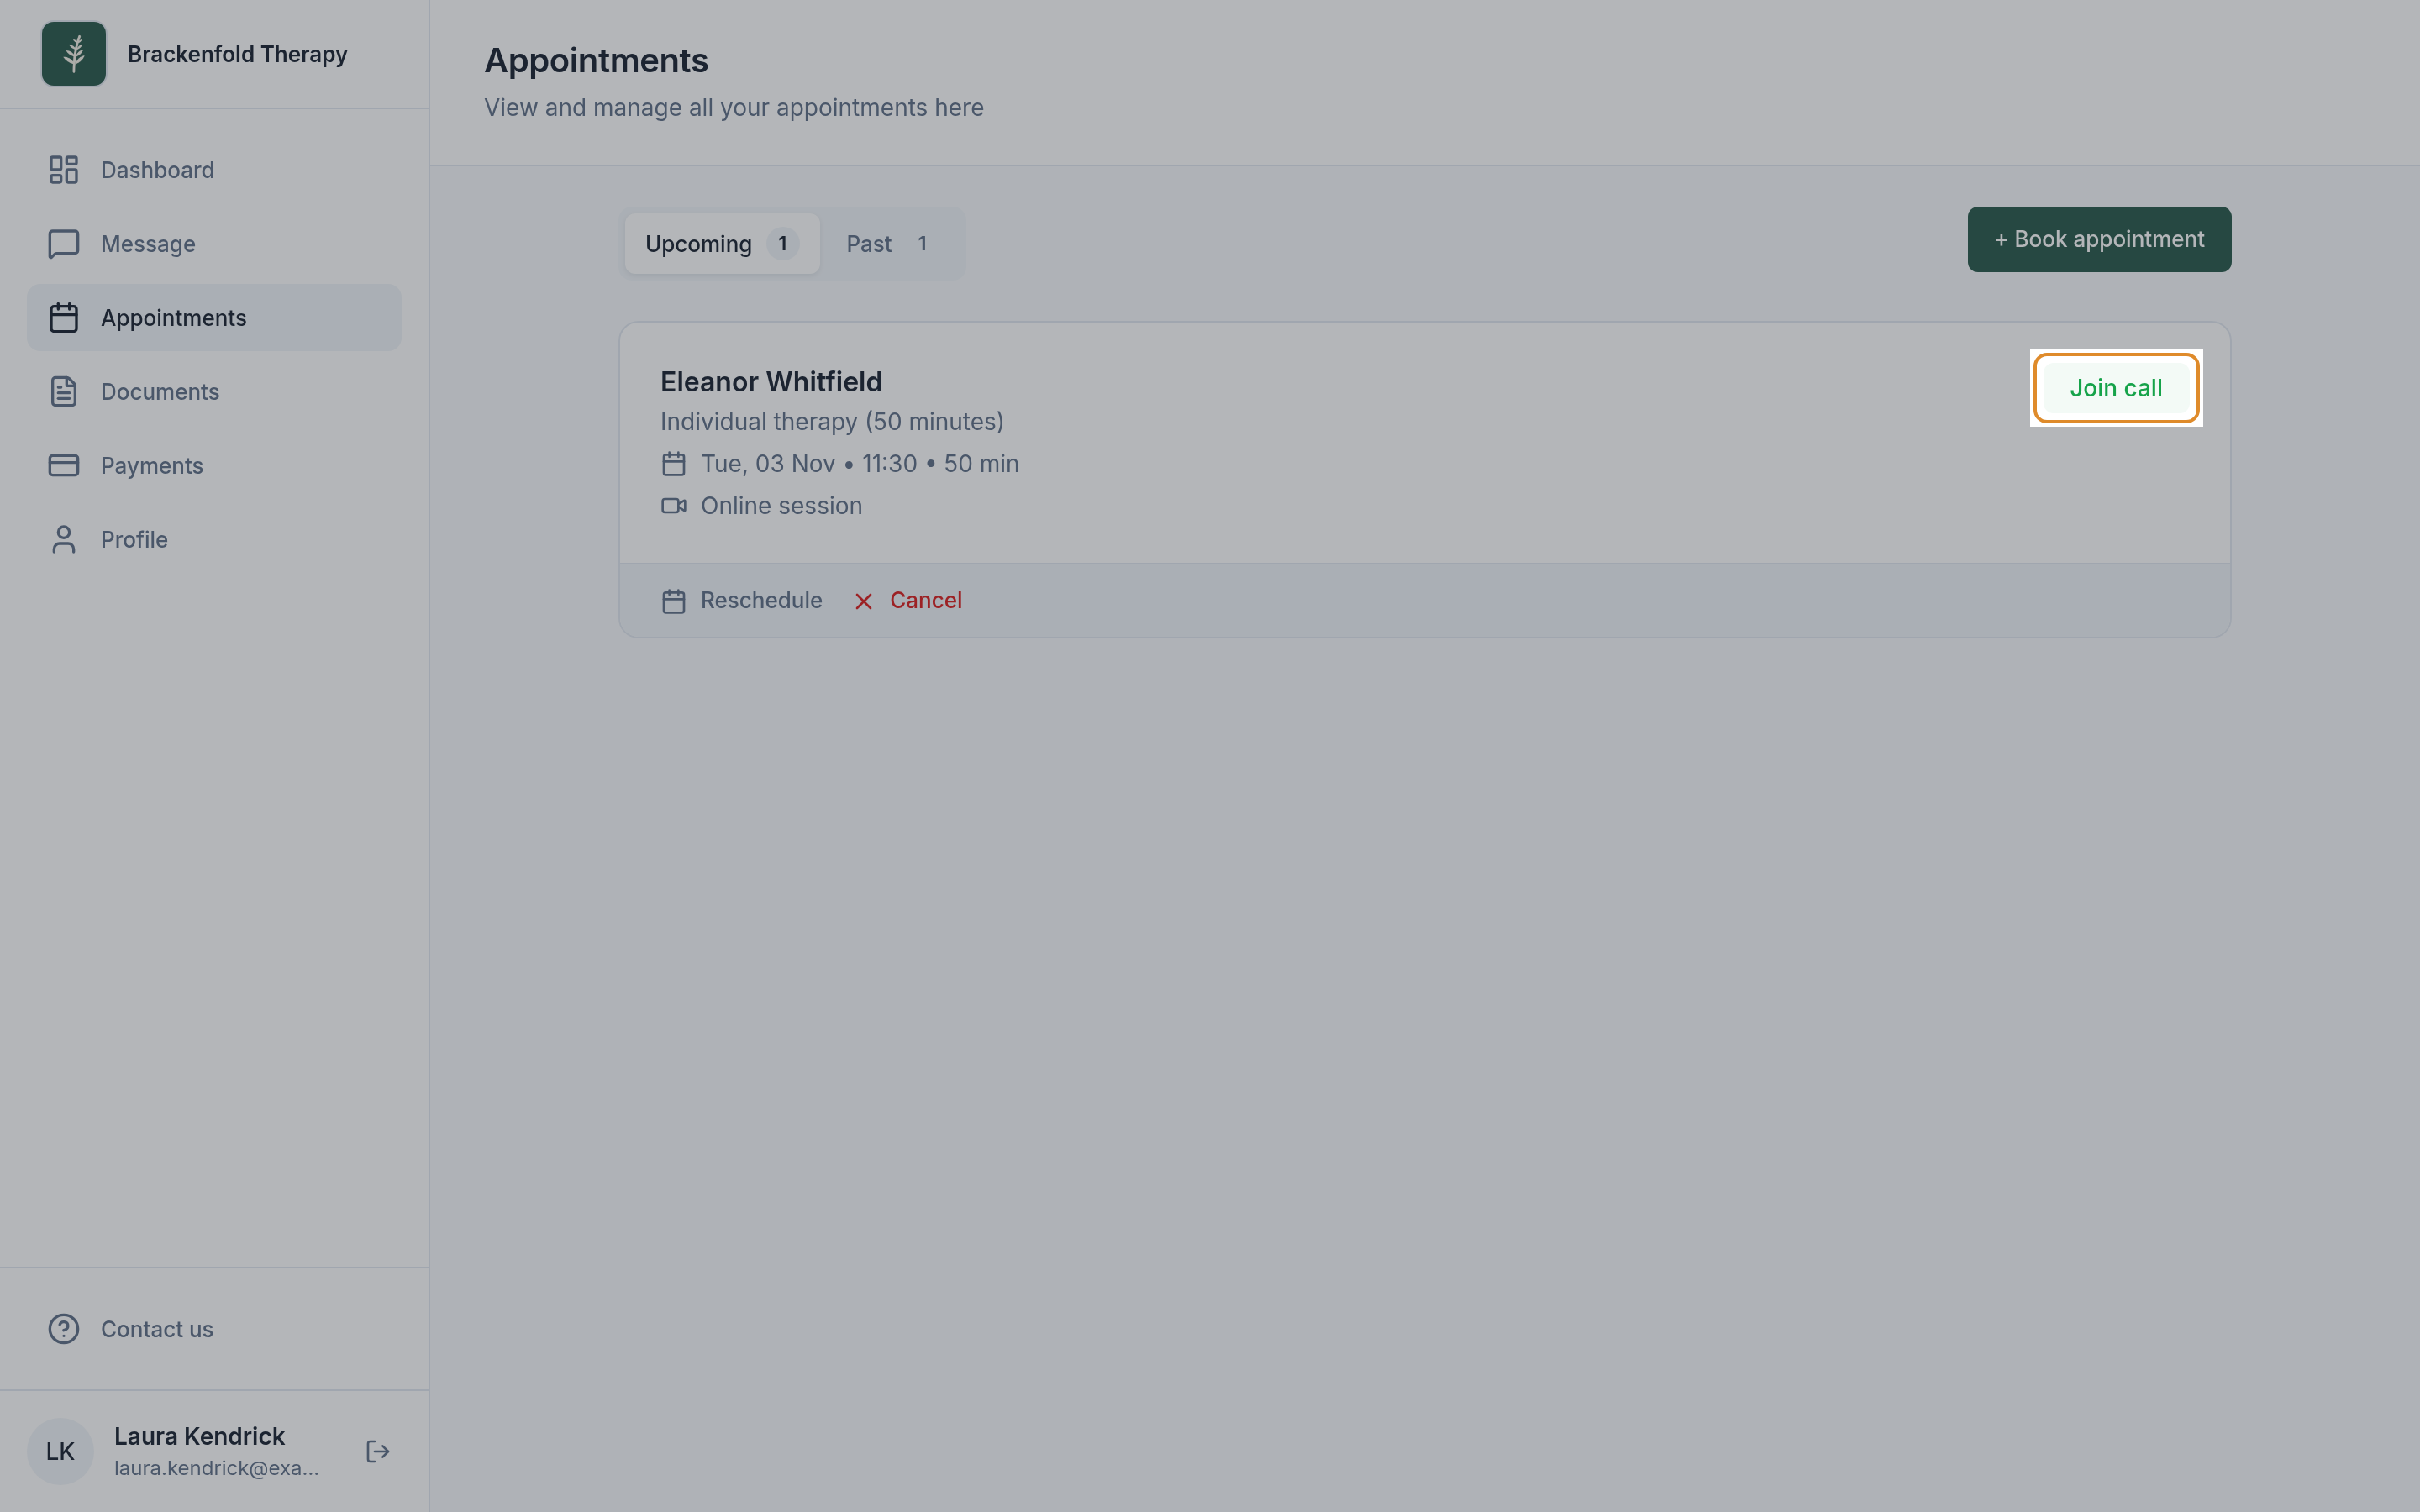
- The session in their client portal, if they have portal access. It is listed under Appointments, Upcoming, as an online, telephone or in-person session, and video sessions have a Join call button. This happens whether or not you sent a confirmation. See turning on the client portal.
- Attendees with an email address get their own invitation email, with their own join link, when their Email tick is left on and you choose Schedule and send.
- Reminders and invoice emails follow their own cards. Schedule without sending only holds back the confirmation: reminders you left on will still go, and so will an invoice set to send.
Each confirmation sent is logged on the client's record. If your calendar is synced with Google or Outlook, the session appears there too, but the client is not invited from that calendar. The wording of these messages is fixed; see what your clients are sent.
Changing a booked session
- Open the session by clicking it on the Calendar or in Sessions.
- Click Edit event, the pencil at the bottom left of the panel. The Edit appointment panel opens with the same cards as when you booked it.
- Make your changes and click Save.
- Choose whether to tell the client (below).
Changing the service
Pick the new service under Service. As when booking, this fills in the new service's Duration and Rate, and you can adjust either for this session.
If the session already has an invoice, you are asked Update the invoice too?, showing the invoice's current service and fee next to the new ones:
- Update the invoice renames the invoice line, sets the new fee and recalculates any tax. Nothing is re-sent to the client; you can share it again from Billing.
- Keep the invoice as it is leaves the invoice unchanged.
A paid invoice always keeps its original details.
The Client and Practitioner are fixed once a session is booked. To move a session to someone else, cancel it and book a new one.
Changing one session in a series
When the session is part of a series, clicking Save opens Edit recurring event, which asks how the change applies:
- This event: only this session changes.
- This and following events: this and every later session change. Earlier sessions stay as they are.
- All events: every session in the series changes.
Moving a session to a different date offers This event and This and following events. Changing the pattern itself (for example weekly to every 2 weeks) offers This and following events and All events.
You can also turn a one-off session into a series: set Repeats on it and the panel notes This appointment becomes the first session.
Telling the client about a change
After Save, you are asked Who should hear about this change?, with an Email and an SMS tick for each person and an Optional message. Choose Send or Don’t send. Update messages only go out when the date, time or location has changed, so changing just the service or the rate sends nothing.
Cancelling one session or a whole series
- Open the session from the Calendar, or find it in Sessions.
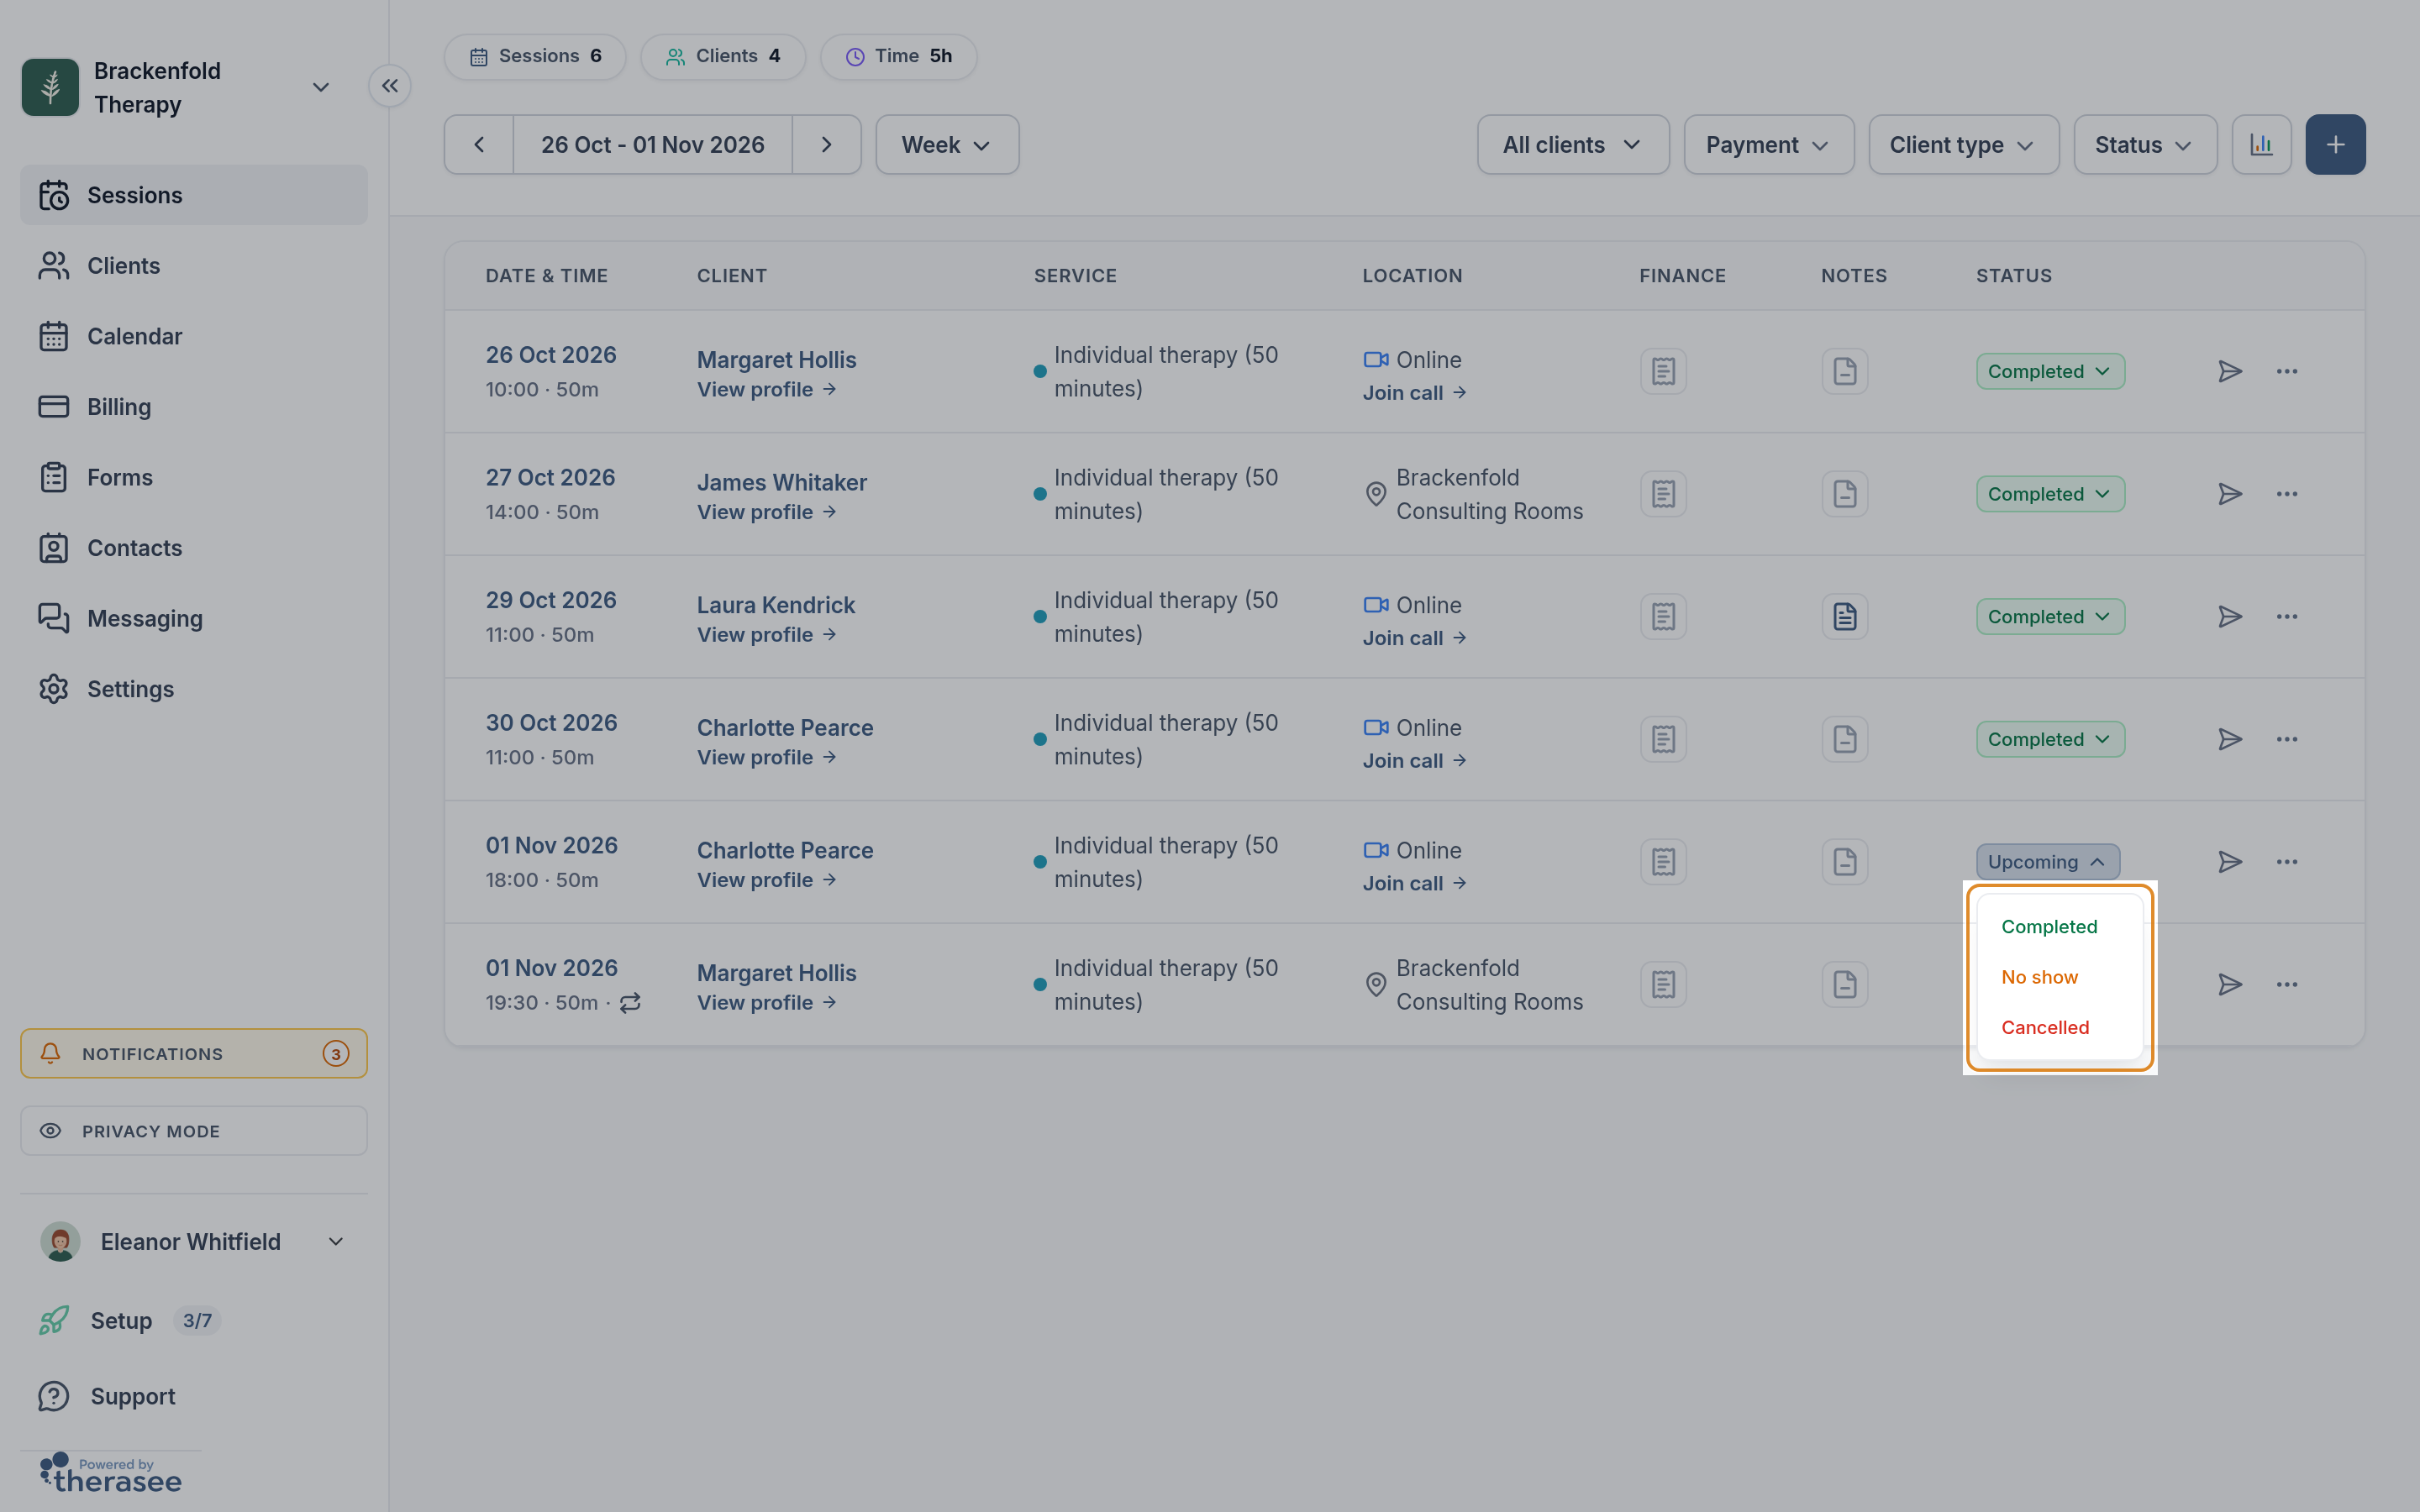
- Click its status badge (Upcoming for a future session) and choose Cancelled.
- If the session is part of a series, Cancel recurring event asks which sessions to cancel: This event, This and following events or All events. To cancel a single week and keep the rest, choose This event.
- Check the summary of what will be cancelled and click Cancel appointment (for several sessions, the button gives the number).
- In Who should hear about this cancellation?, tick who is sent a cancellation message and how, add an optional note, and click Send or Don’t send.
- This and following events ends the series at this session. Sessions before it keep their place and their status.
- All events covers the whole series, past sessions included. A past session with no status then shows as cancelled instead of completed. Sessions already marked Completed, No show or Cancelled keep their status.
- Session notes and invoices are kept. The summary names any invoices affected so you can review them in Billing.
The bin icon, Delete event, is different: it removes the session entirely, as if it had never been booked. Cancel instead if you want to keep a record. For cancellation fees, no-shows and what clients can cancel themselves, see cancellations and no-shows.
Recording a past session
If you forgot to book a session, or saw a client before you moved your practice here, you can add it after the fact:
- Start a booking in any of the usual ways and fill in the client, service and location.
- Under Date, pick the day the session took place. Past dates can be chosen here. Set the Start time.
- If you have already invoiced the client for it, switch the Invoicing switch off so a second invoice is not raised.
- Click Schedule, then Schedule without sending, so the client is not sent a confirmation for a session that has already happened.
No reminders are sent for a time that has already passed. The session appears on your calendar and shows as Completed in the Sessions list. If the client did not attend, click the badge and choose No show. Open the session and use Add note to record your notes against it; see writing session notes.
Booking someone who is not a client yet
To book someone new, add them as a client first:
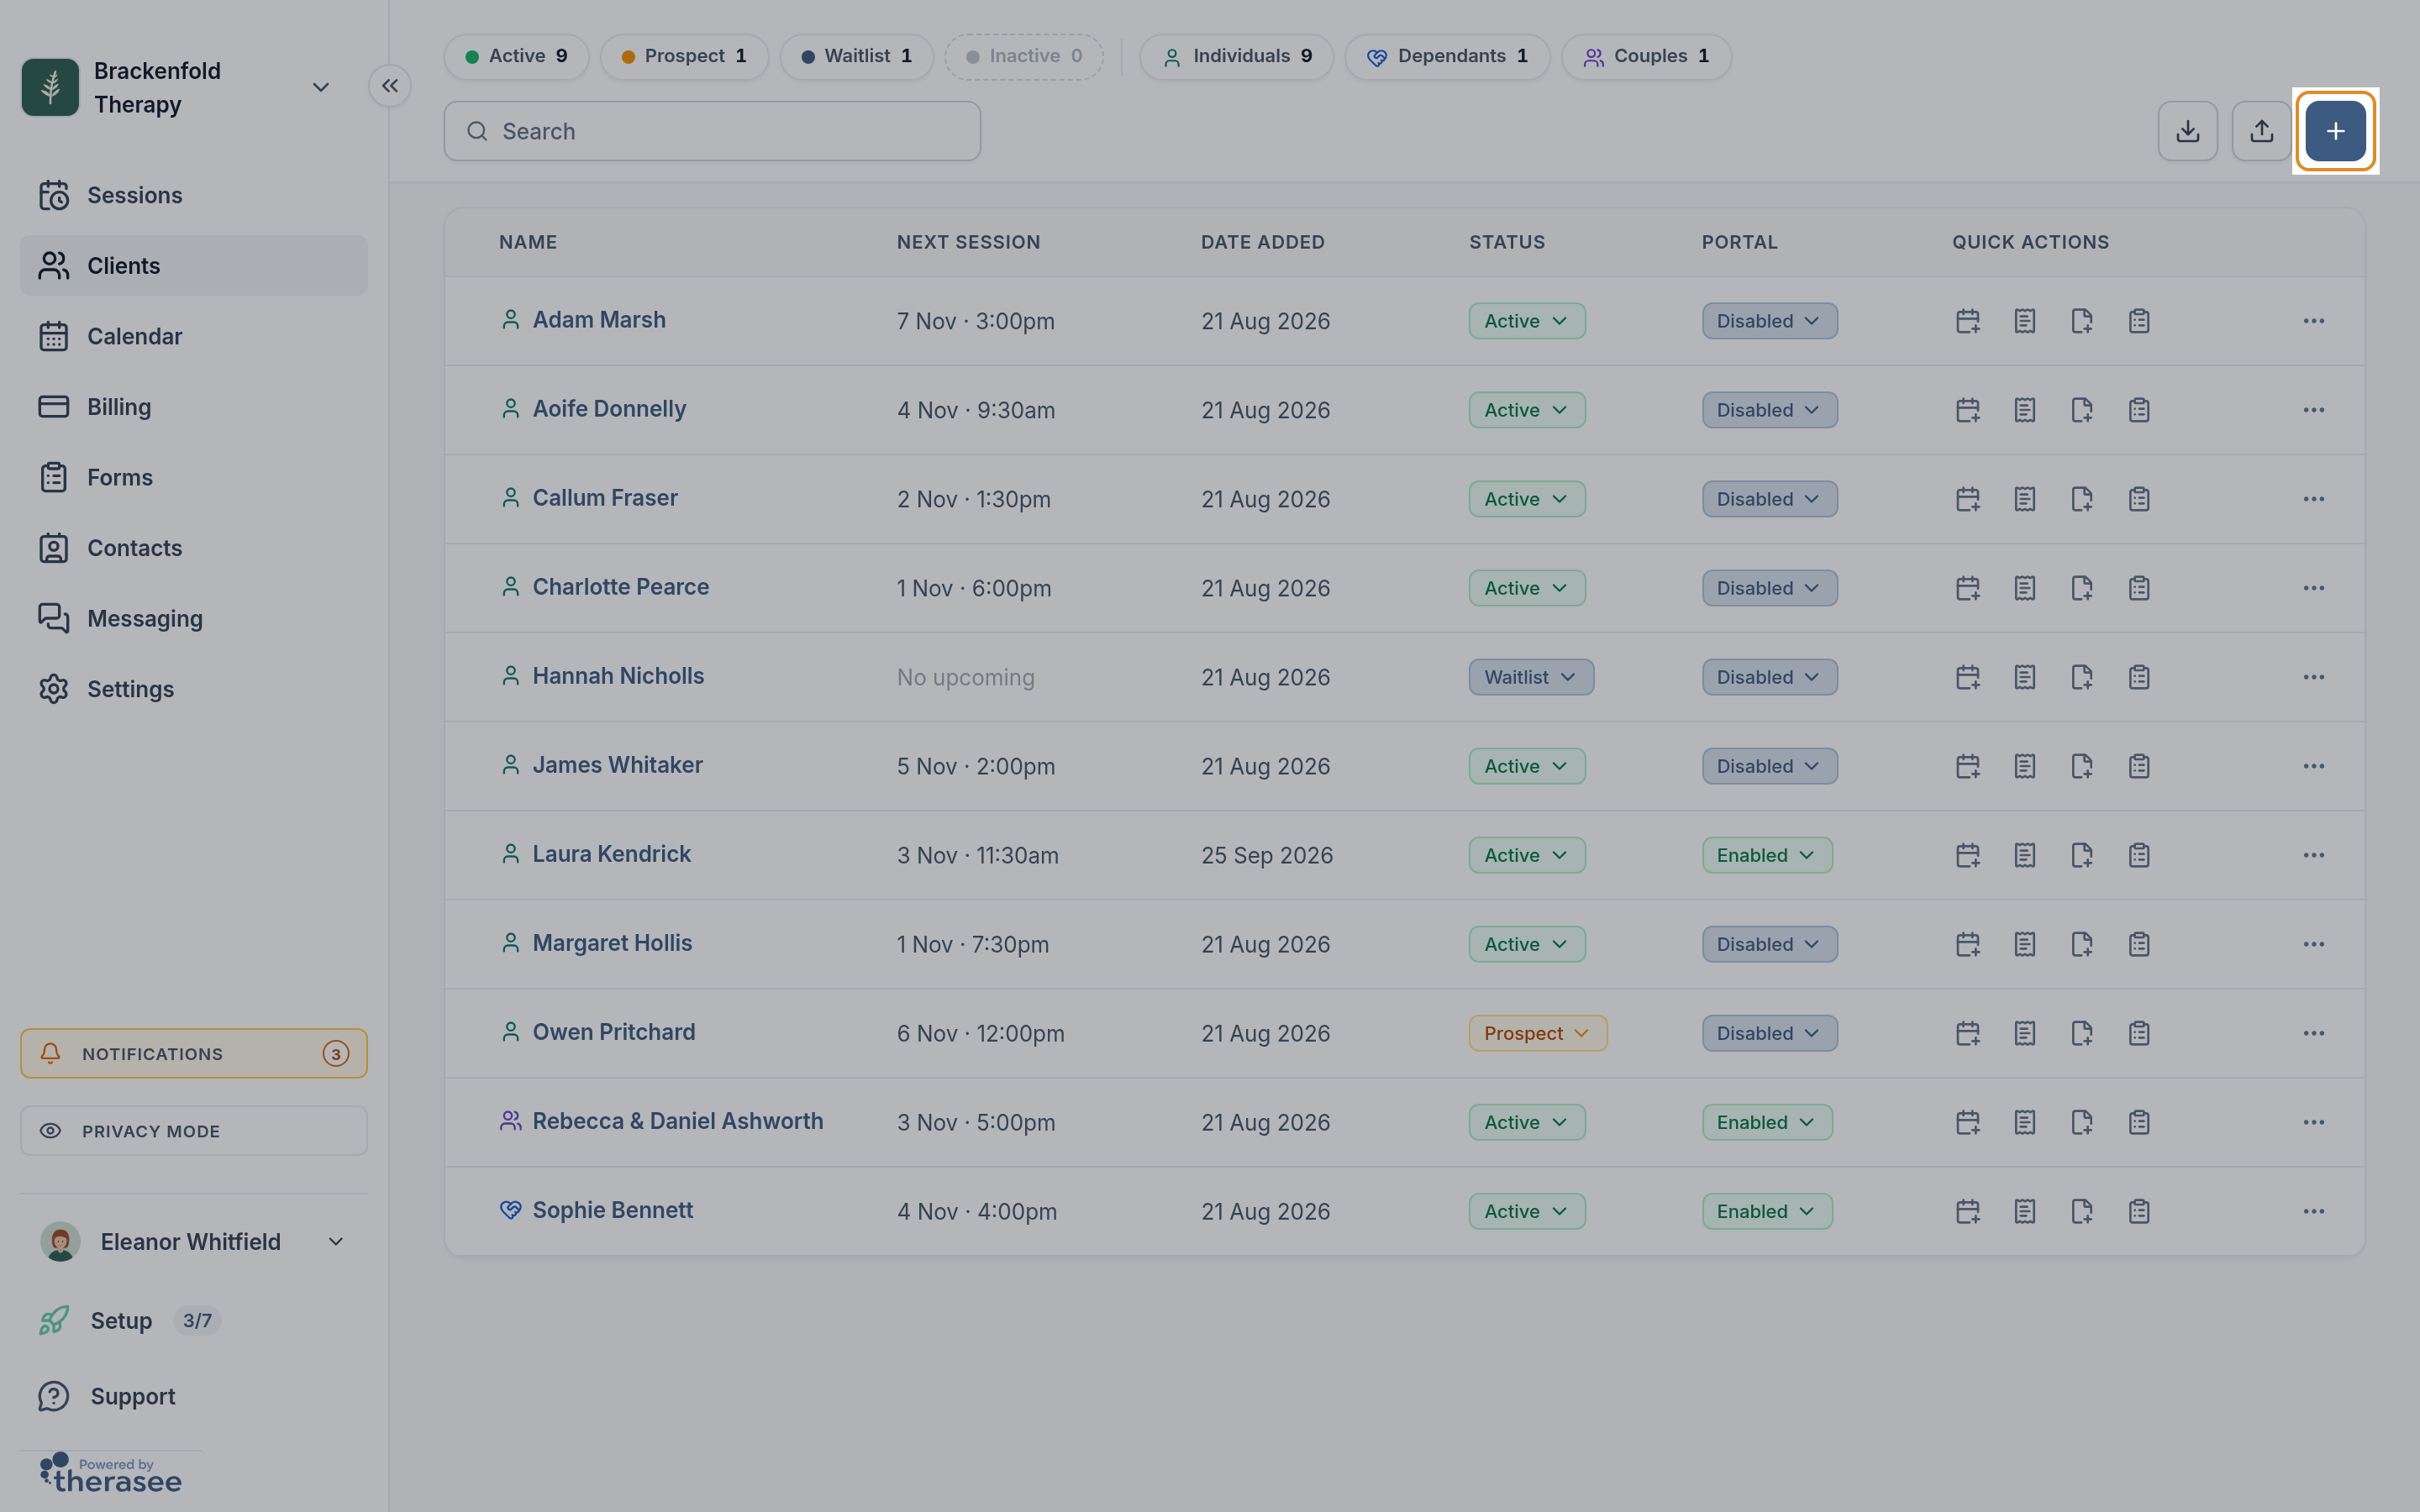
- Go to Clients and click the plus button at the top right.
- Fill in their details and click Register. Add an email address or mobile number if you want them to get a confirmation.
- Book from their row or record as above, or start from the calendar and search for them.
More on this in adding a client.
Your availability does not limit you
Your working hours, blocked time and custom hours only control what clients can book online. You can book a session at any time, including over blocked time or outside your hours. The form warns you but never stops you:
- Outside your availability for this location means the time is outside your hours for that location, or blocked.
- Overlaps with another appointment names the session it clashes with.
See blocking out time and changing your availability for one week.
If Schedule stays greyed out
Schedule stays disabled until five things are filled: Client, Service, Location, Start time and a number in Duration. The usual causes:
- No start time. From a plus button the start time is blank until you choose one.
- No services. Add one under Settings, Practice profile, Services. See setting up your services.
- No location. Add one under Settings, Practice profile, Locations.
- Duration left empty. The field shows Enter a valid time.
You do not need Stripe connected to book a session or raise its invoice. Stripe only matters if you want clients to pay online; see connecting Stripe.
Was this helpful?