Turning on the client portal and inviting clients
Switch on your practice's client portal, choose which sections clients see, invite clients to sign in and turn access off for one client when you need to.
Updated 4 November 2026
The client portal is a private, sign-in protected space where your clients can see their appointments, message you, fill in forms and pay invoices. It carries your practice's name and branding. This article covers switching it on, choosing what clients see, inviting clients and turning access off again.
Switch the portal on for your practice
- Go to Settings > Practice profile > Client Portal.
- In the Secure client portal card, turn on the switch at the top right. The badge beside it changes from Disabled to Enabled and you see the message Client portal enabled. The change saves straight away; there is no Save button.
- Under Portal URL you'll see your portal address, in the form
portal.therasee.com/your-practice. Select the copy icon to copy it (you see Portal link copied), or the open icon to view the page in a new tab. You can put this link on your website or in your email signature.
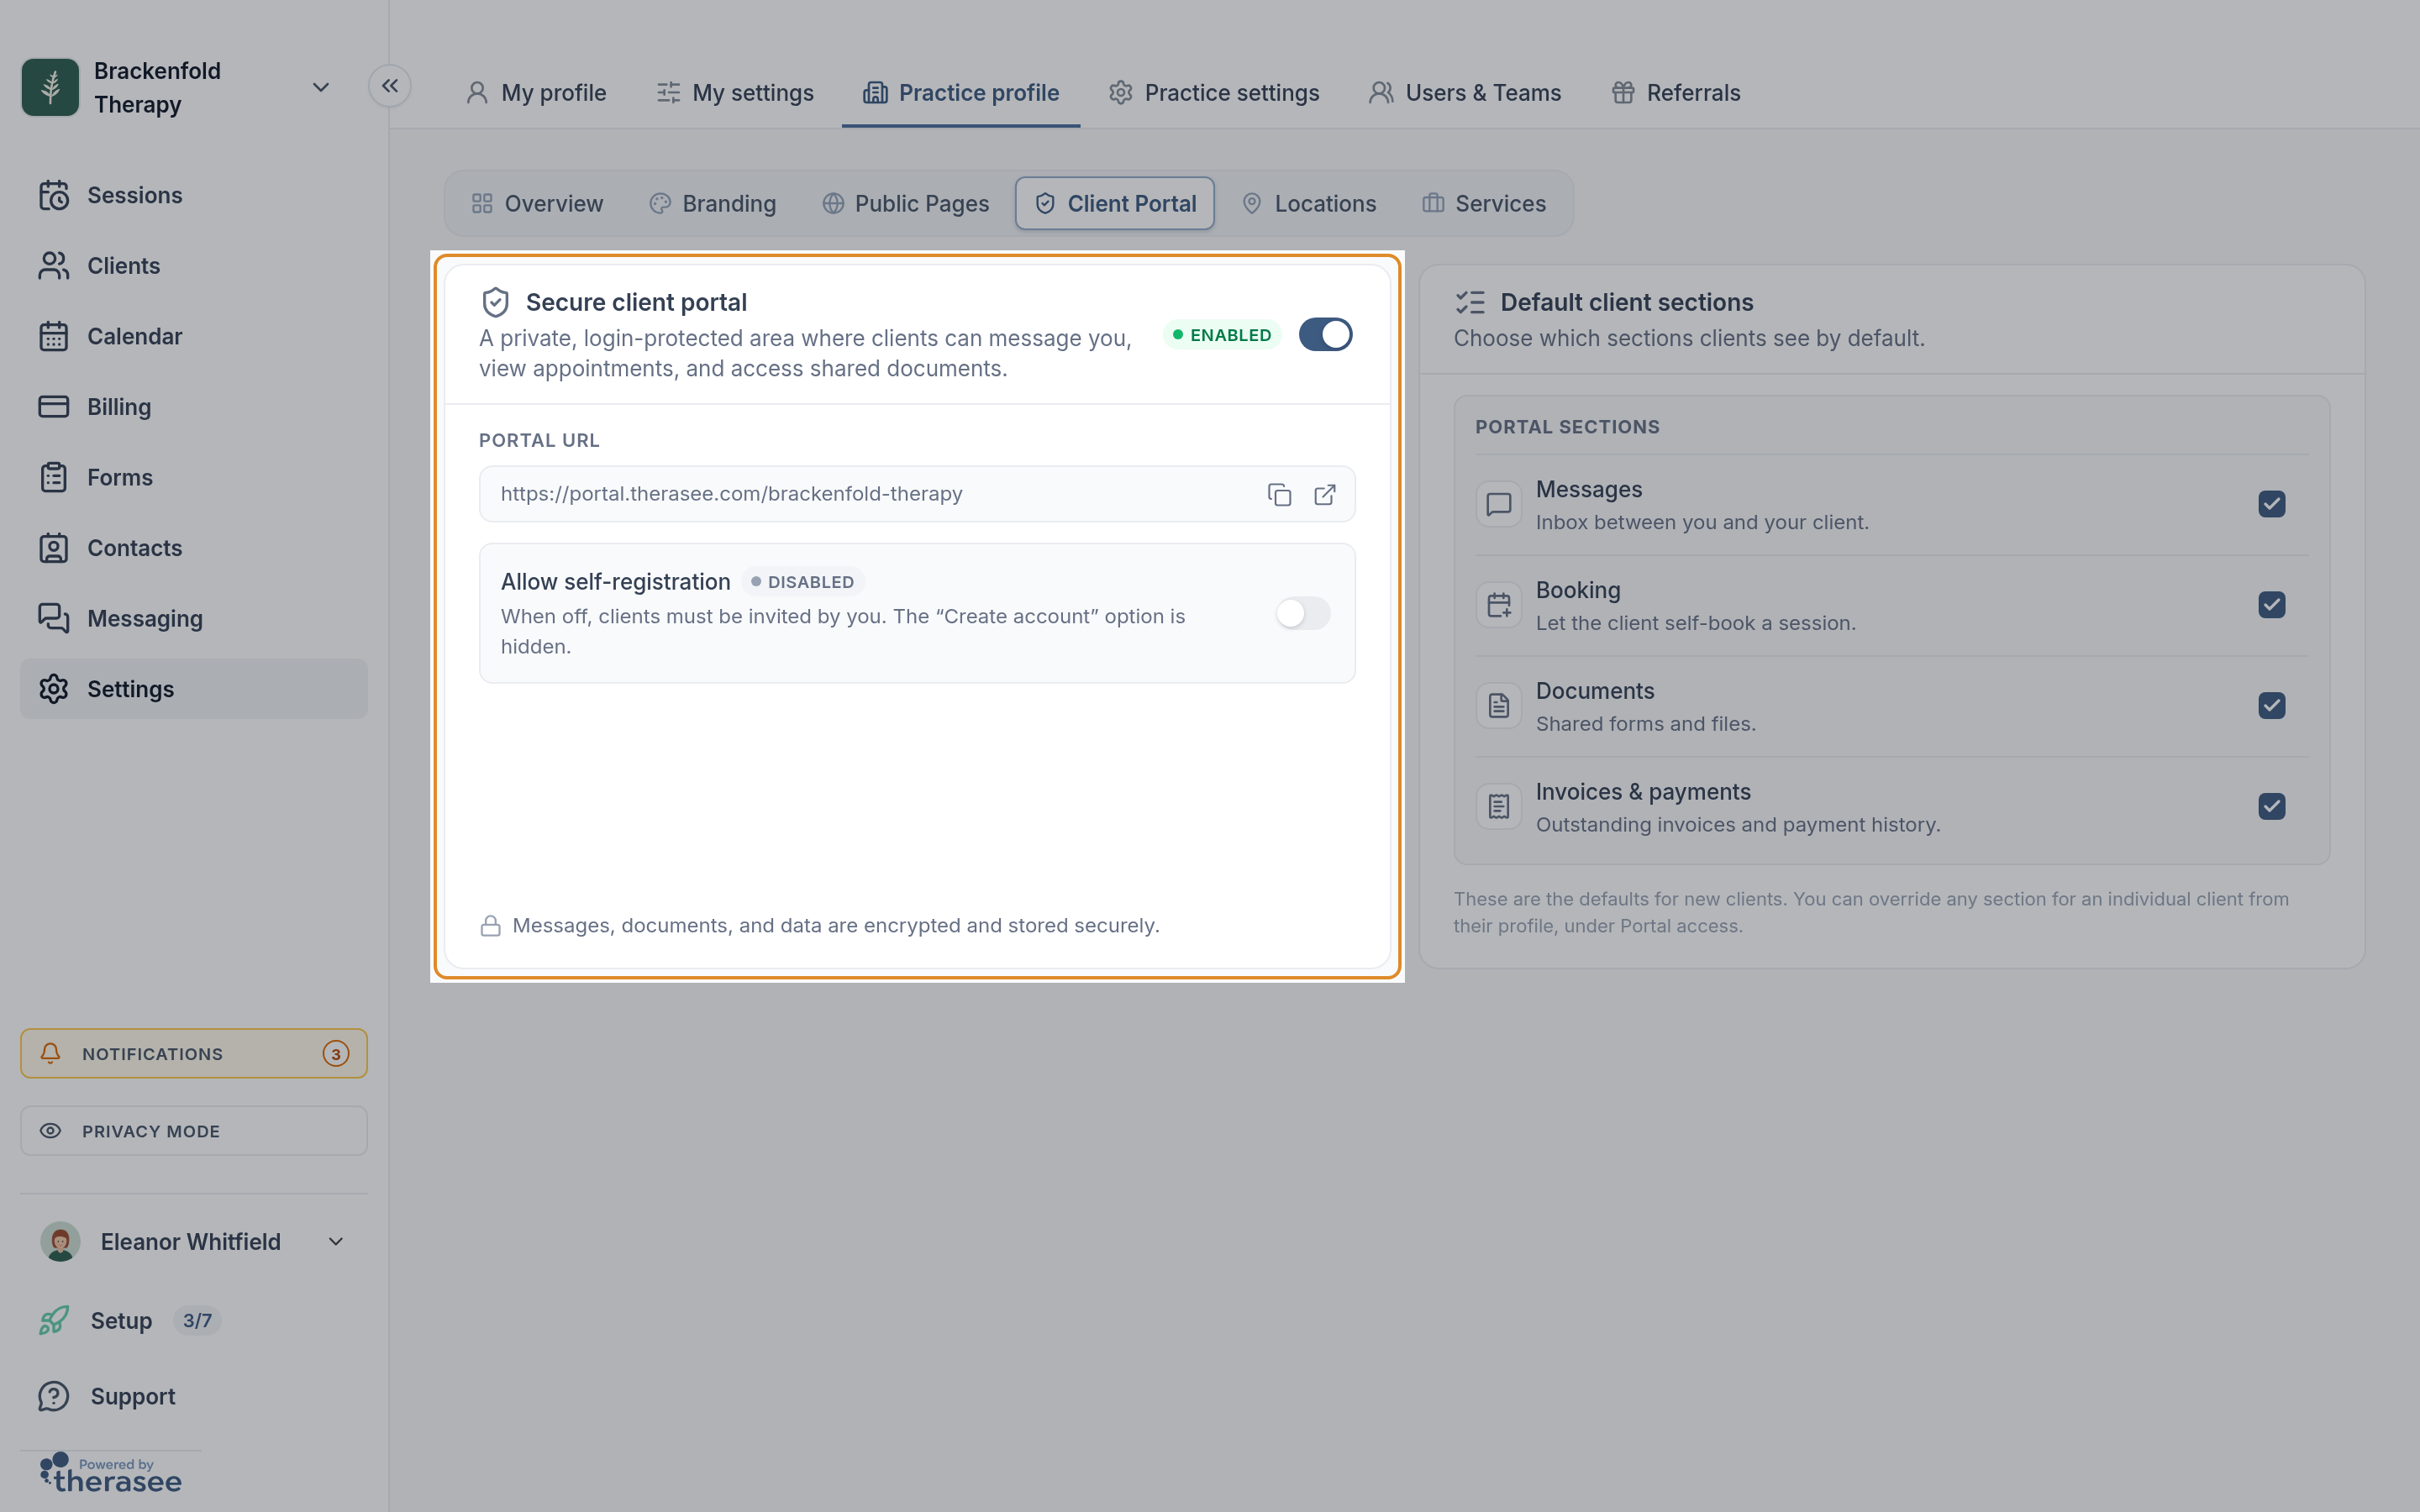
The last part of the address comes from your Practice URL, which you can change on the Overview tab of Practice profile. The same name is used for your booking page and contact form.
Once the portal is on, a Portal column appears in your client list, a Portal access card appears on each client's profile, and Inbox appears in the main menu.
If you turn the portal off again, clients can no longer reach the sign-in page or their portal pages until you turn it back on.
Choose the sections clients see
The Default client sections card lists the four parts of the portal you can show or hide:
- Messages: the inbox between you and your client.
- Booking: lets the client book a session themselves.
- Documents: shared forms and files.
- Invoices & payments: outstanding invoices and payment history.
All four are ticked to start with. Select a tick to hide that section; you see Default sections updated. Clients can always see their appointments, whatever you choose here.
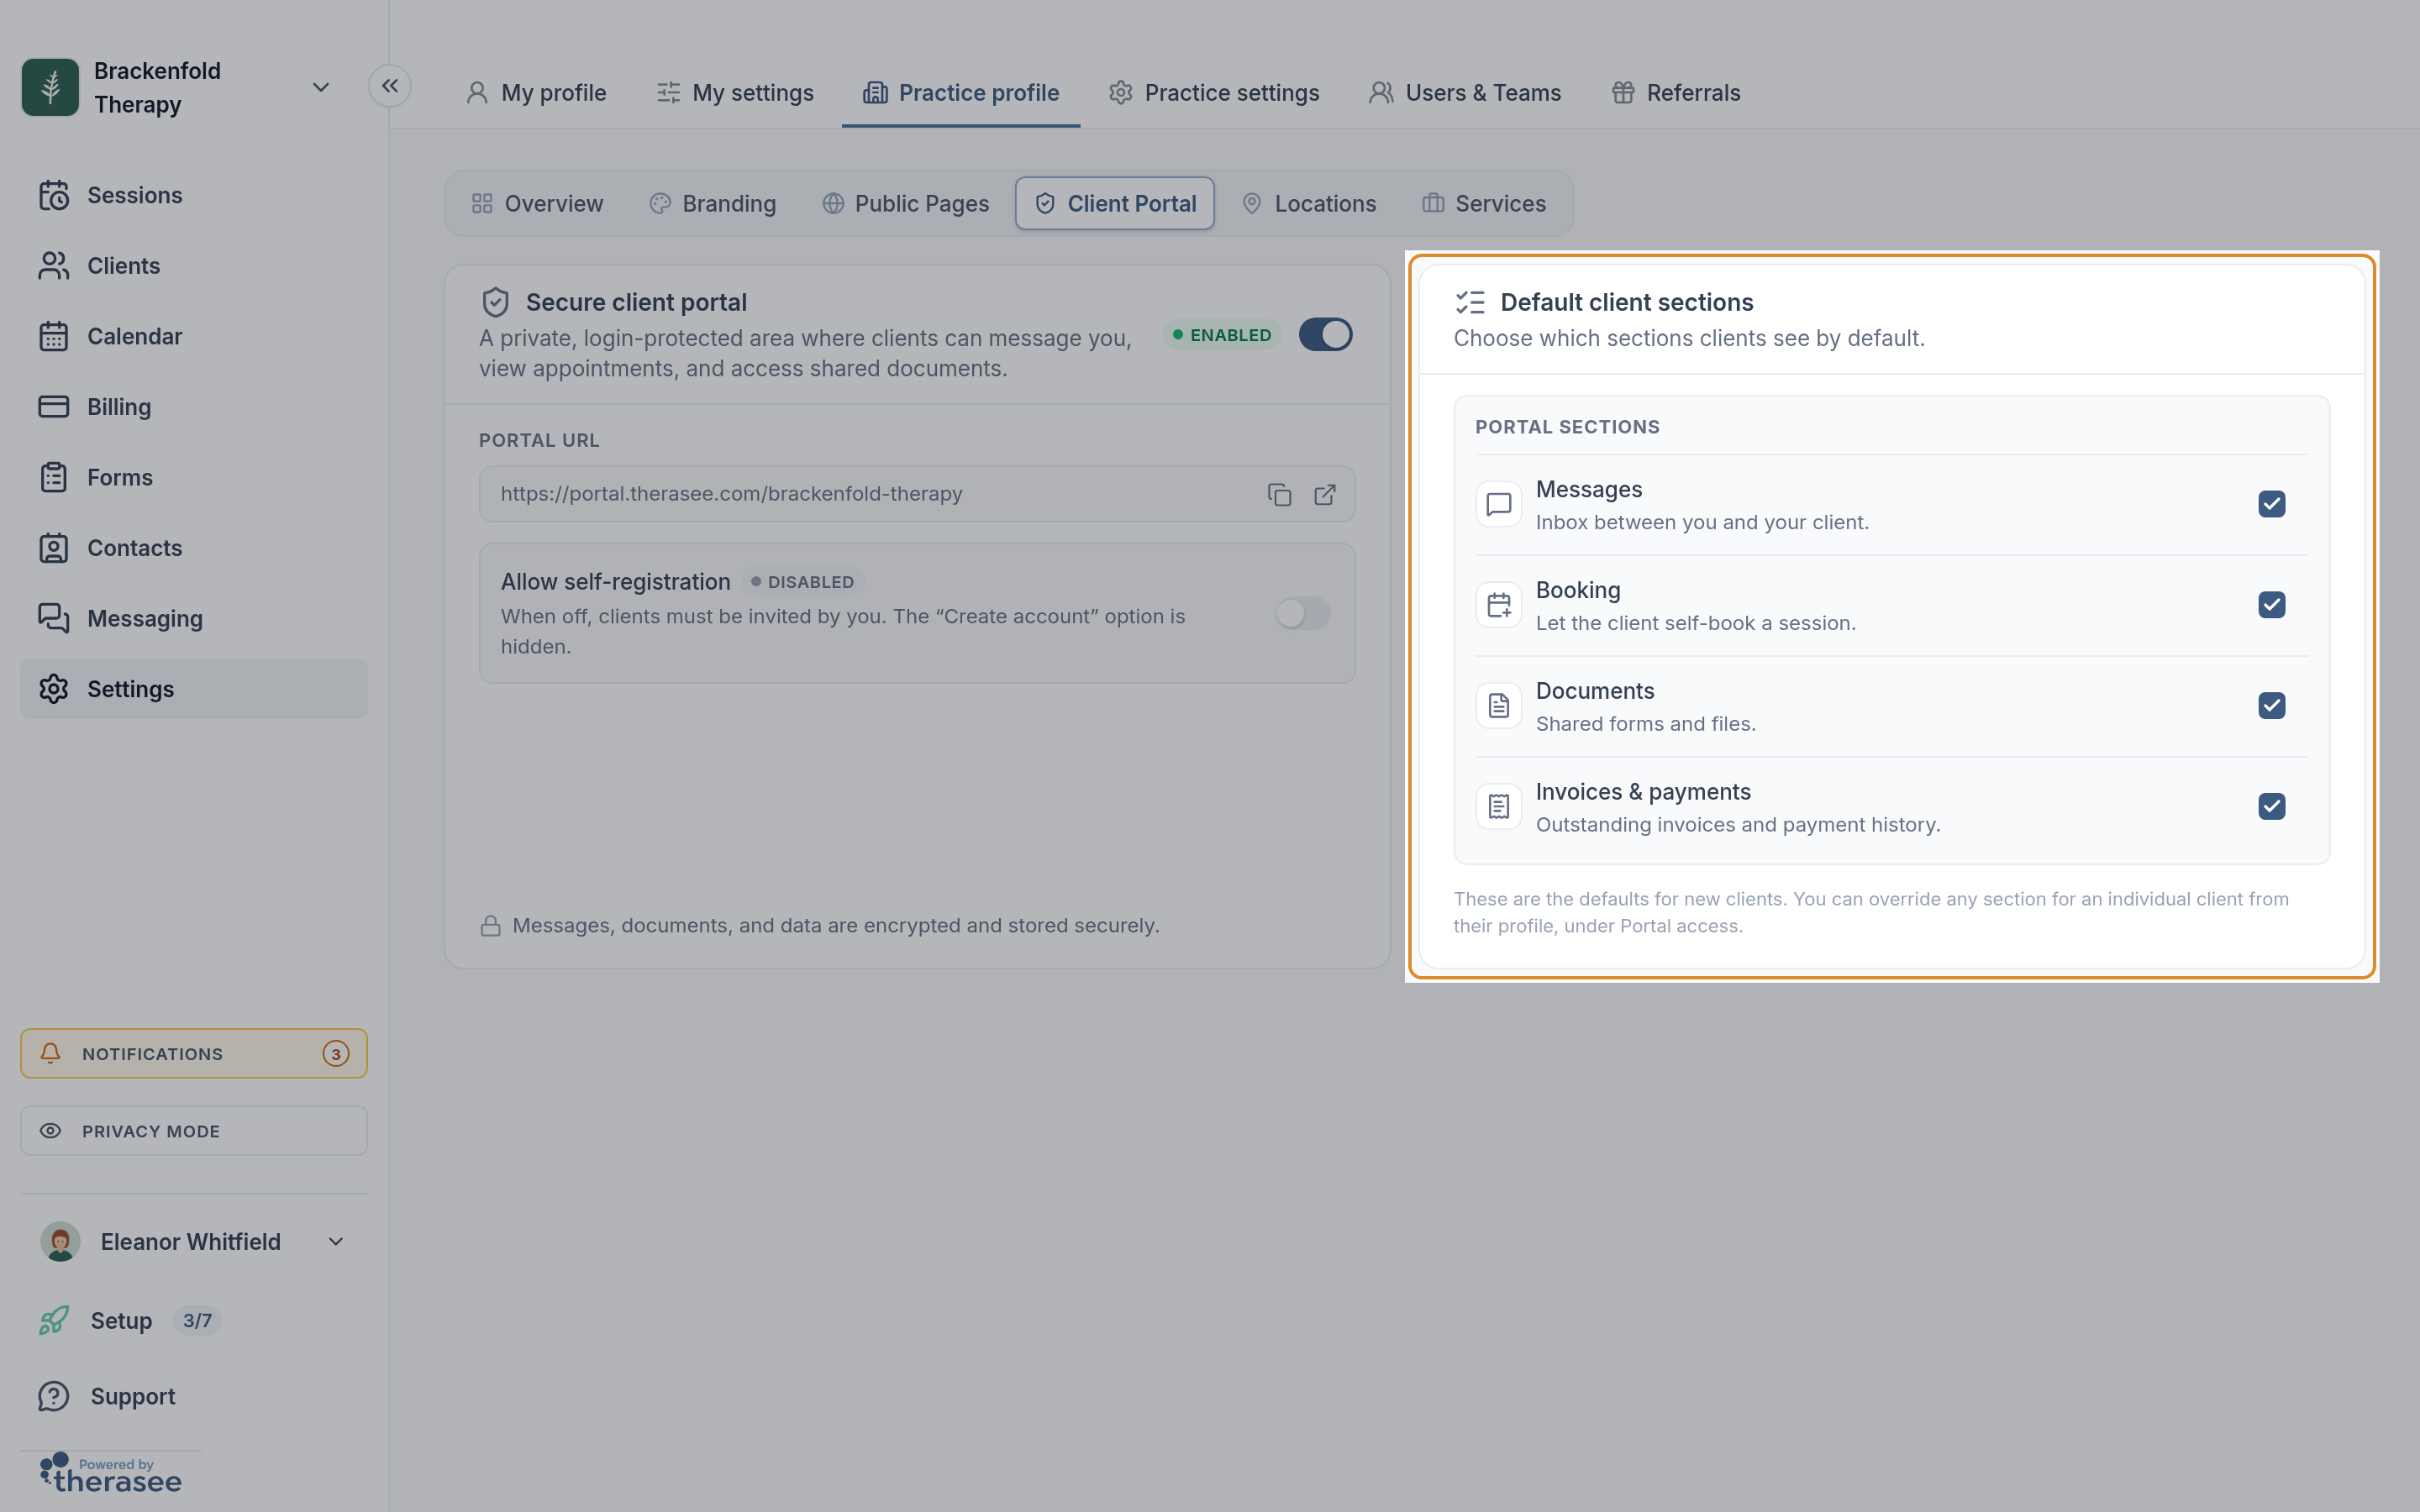
These defaults apply to every client who doesn't have their own setting for that section, so a change here reaches existing clients as well as new ones. For Booking to be useful, you also need online booking set up; see Letting clients book appointments.
Decide whether clients can register themselves
In the Secure client portal card, Allow self-registration controls who can get into the portal:
- Off (the usual choice): only clients you invite can sign in. The Create account option is hidden from the portal.
- On: someone who isn't yet your client can create an account from your portal. They are added to your client list with portal access already on. If their email or phone number matches a prospect you already hold, that record is used instead of a new one.
Self-registration can only be turned on while the portal is on. If you turn the portal off, self-registration is turned off with it. On the Free plan, which allows up to 3 clients, new sign-ups pause once you have 3 clients.
Invite a client
A client needs an email address or a mobile number on their profile before they can be given access. If they have neither, the switch is greyed out; add their details first (see Adding a client).
- Open the client from Clients by selecting their name. Their Client profile tab opens.
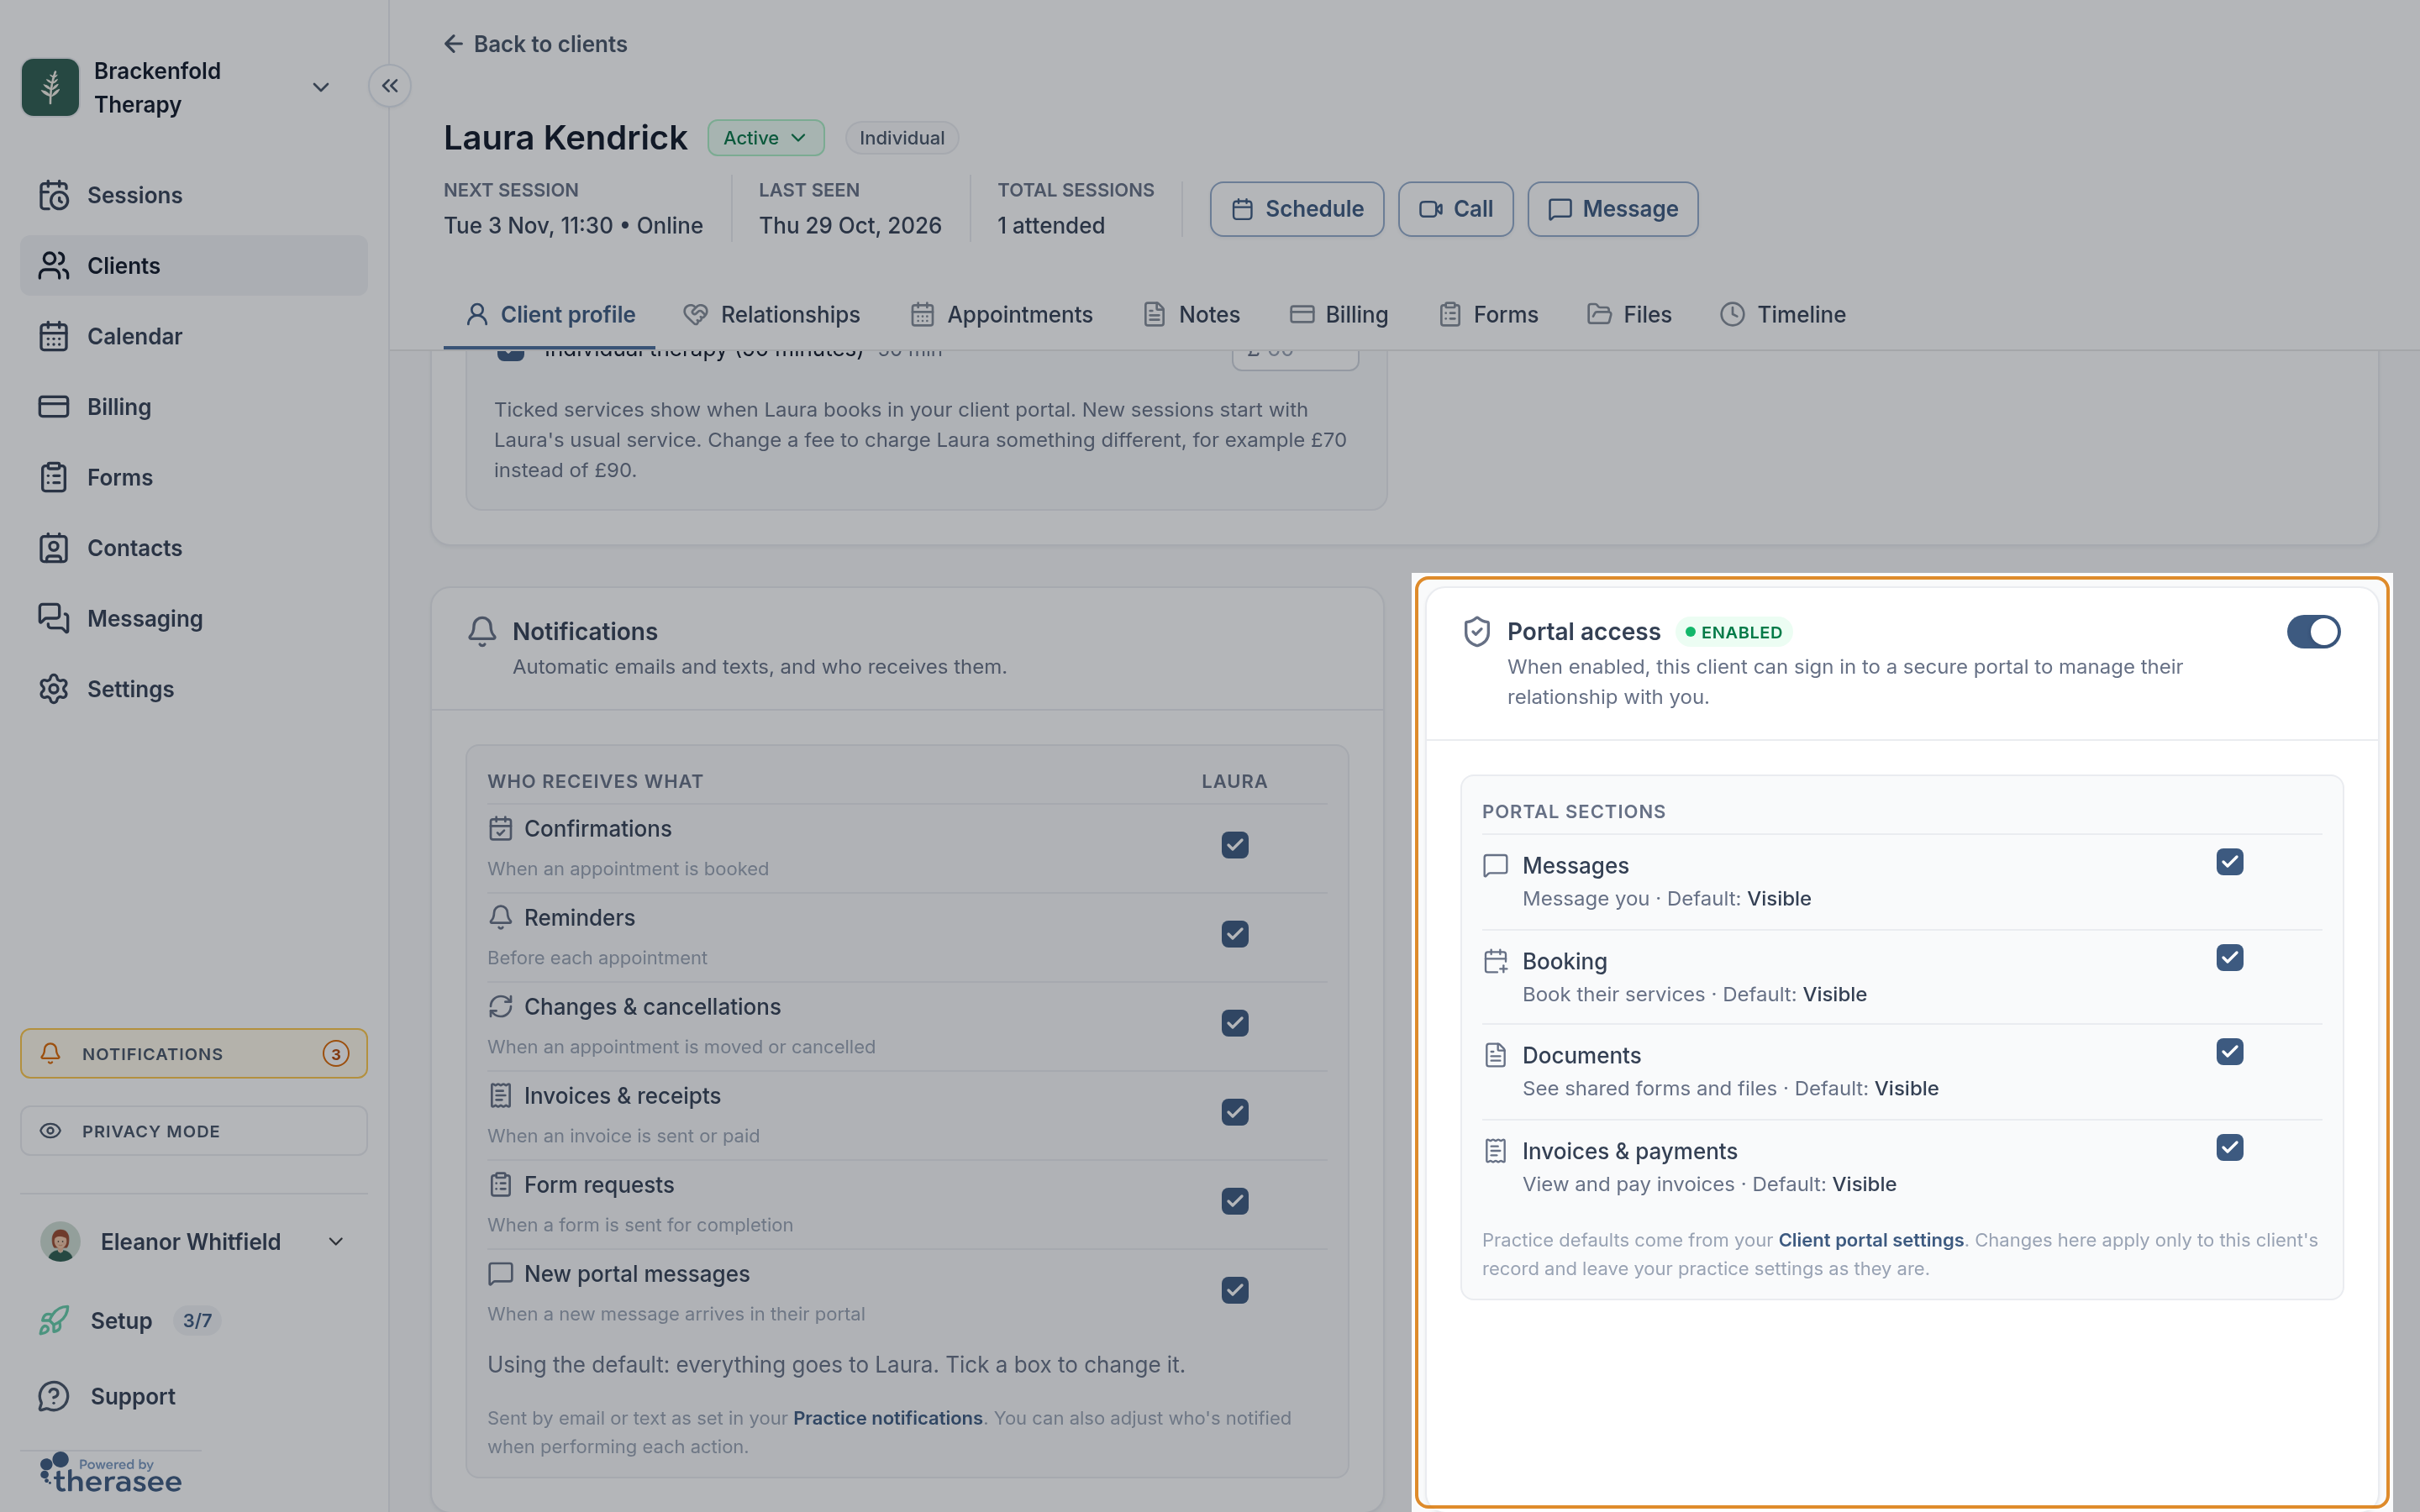
- Find the Portal access card. It shows Disabled and the message Portal access is off. Turn it on to invite [name] and configure what they see.
- Turn on the switch in the card. A window asks Let [name] know they can sign in?
- Choose how to send the invitation with Send as Email and Send as SMS. Each is on if you hold that detail for the client, and greyed out if you don't.
- Select Send. You see Portal access enabled and the card's badge changes to Enabled.
If you'd rather tell the client yourself, select Don't send instead. Their access is still turned on; nothing is sent to them.
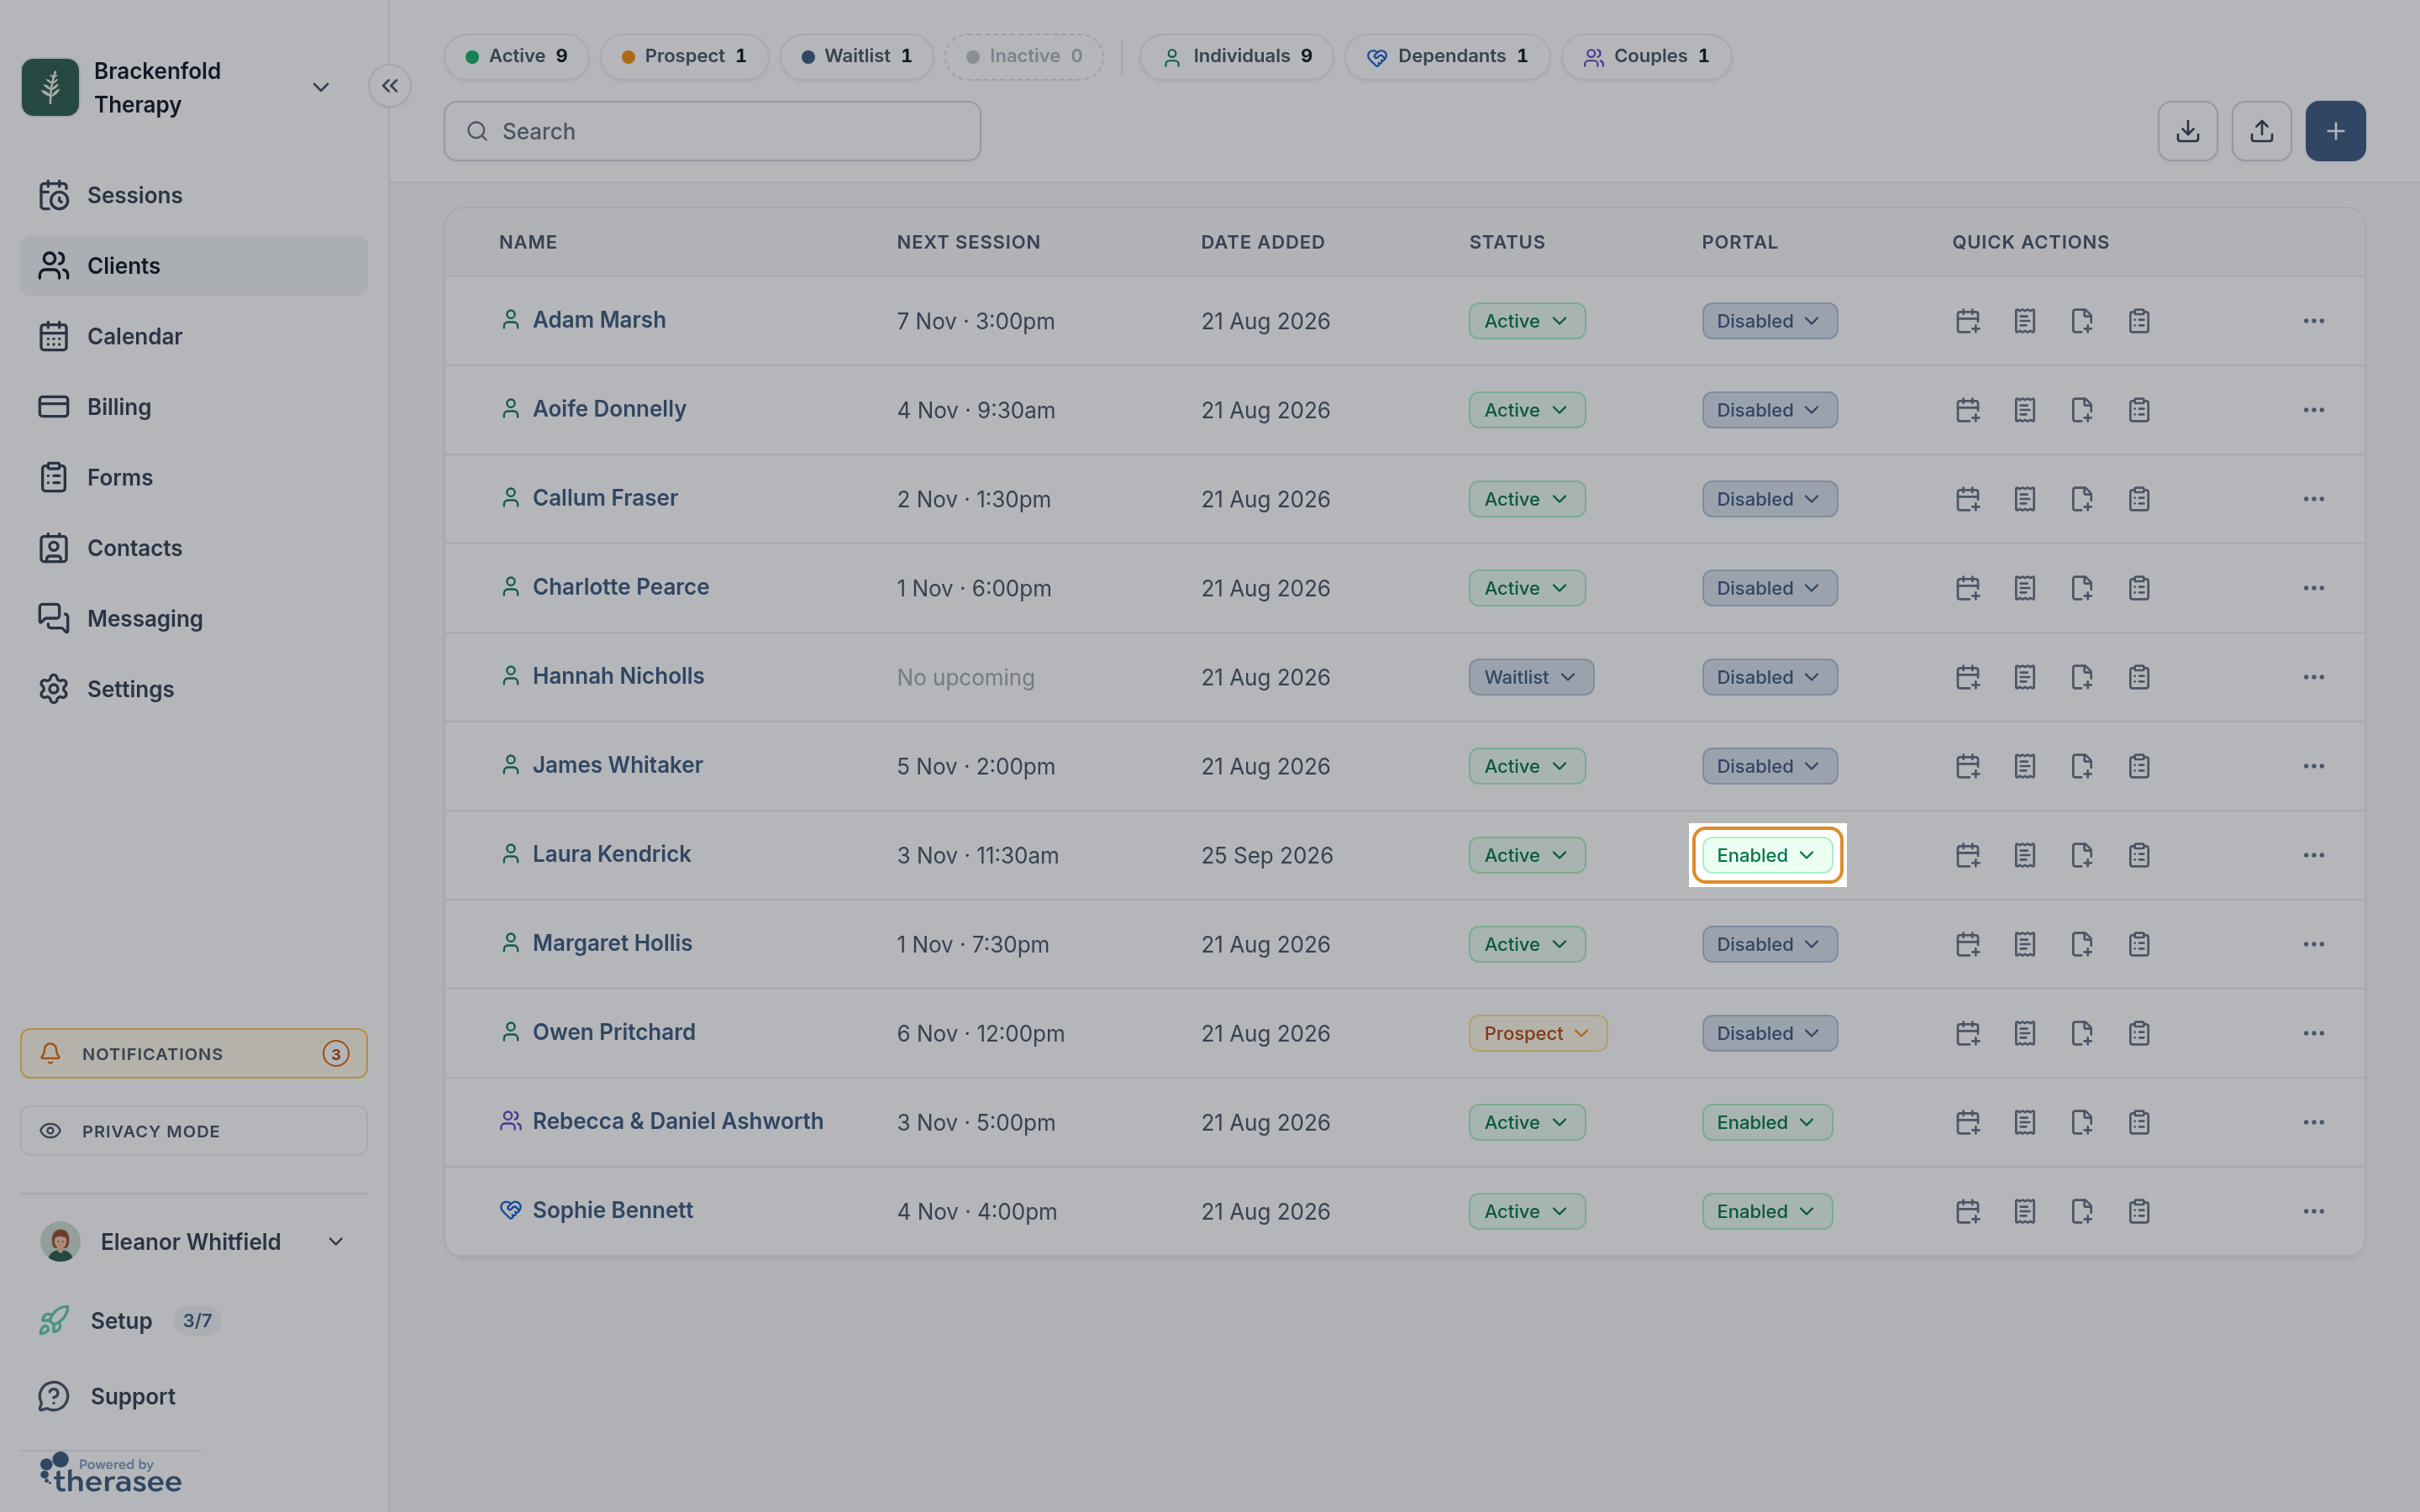
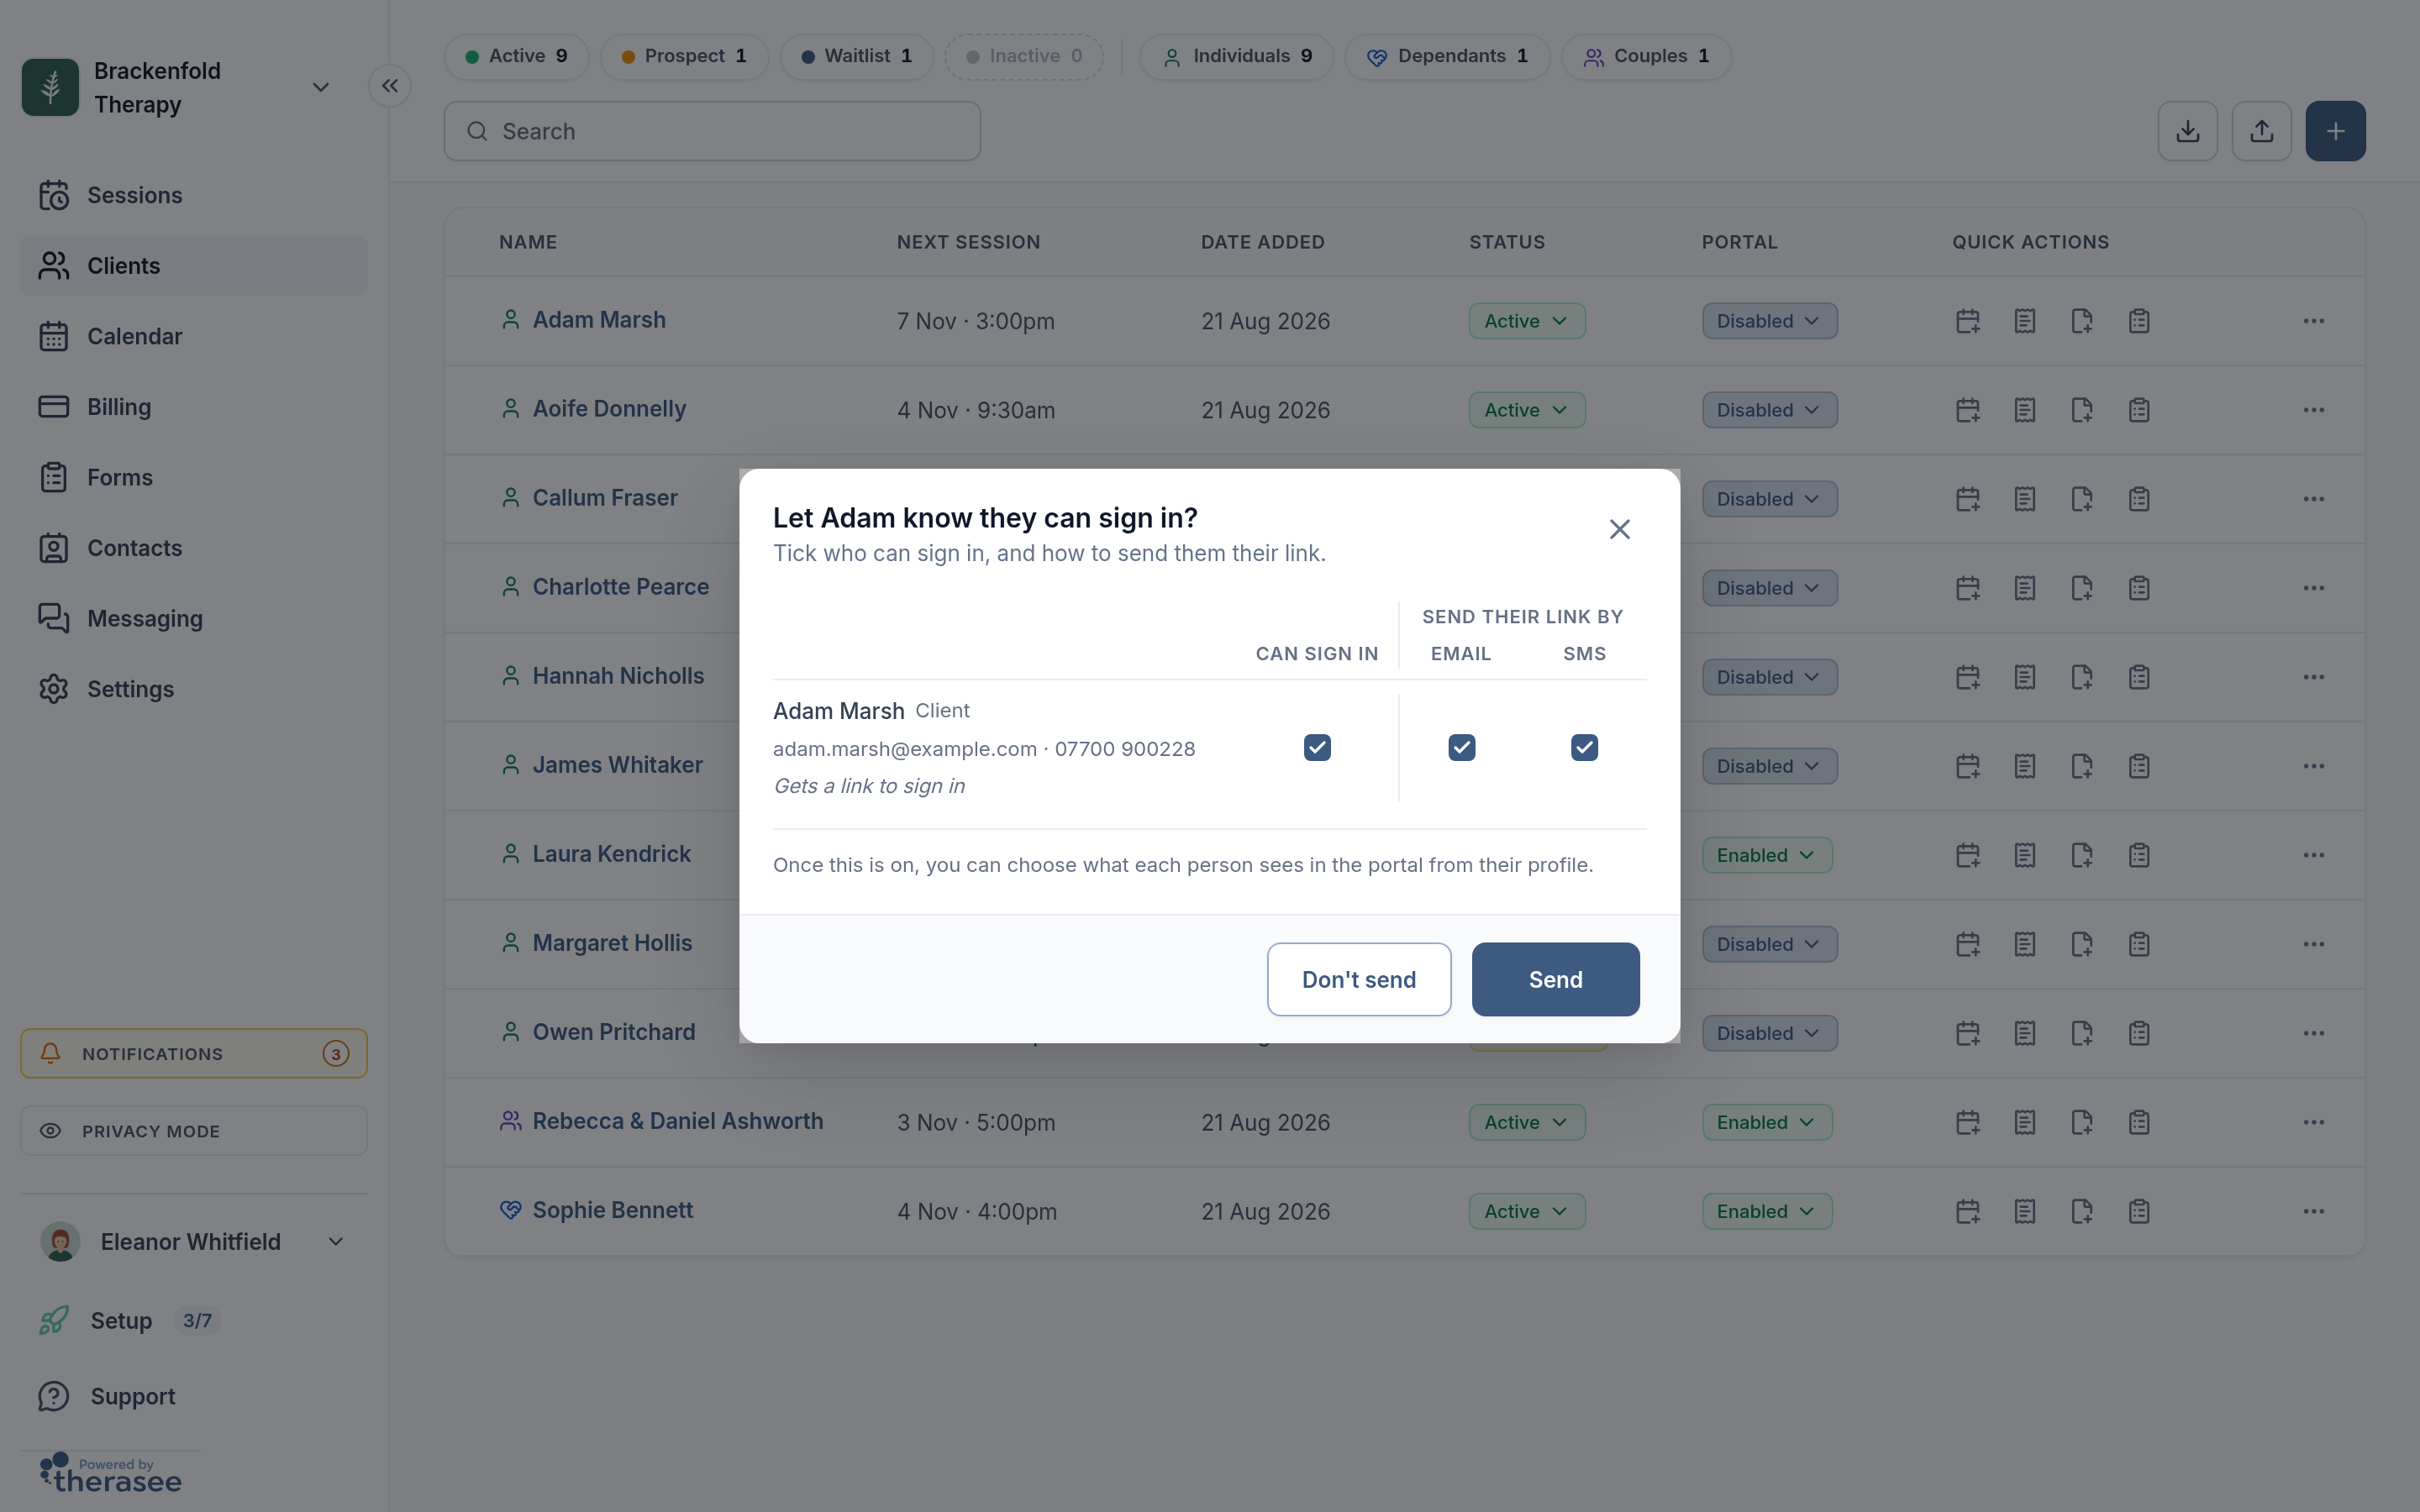
You can do the same from the client list. With the portal on, the Portal column shows Enabled or Disabled for each client. Select a client's Disabled badge and choose Enabled. A window lists the people on the record: tick Can sign in for each person who should have access, choose Email, SMS or both under Send their link by, then select Send, or Don't send to turn access on without telling them. The column shows whether access is on; it doesn't show whether the client has signed in yet.
What the client receives
- By email: a message from your practice with the subject [your practice name] - Your client portal is ready. It explains that they sign in with their email address or phone number, that a code is sent each time so there's no password to remember, and has a Sign in button that opens your portal's sign-in page.
- By text: a short message saying they now have access to your practice's secure client portal, with the sign-in link.
The invitation is also recorded on the client's timeline.
How clients sign in
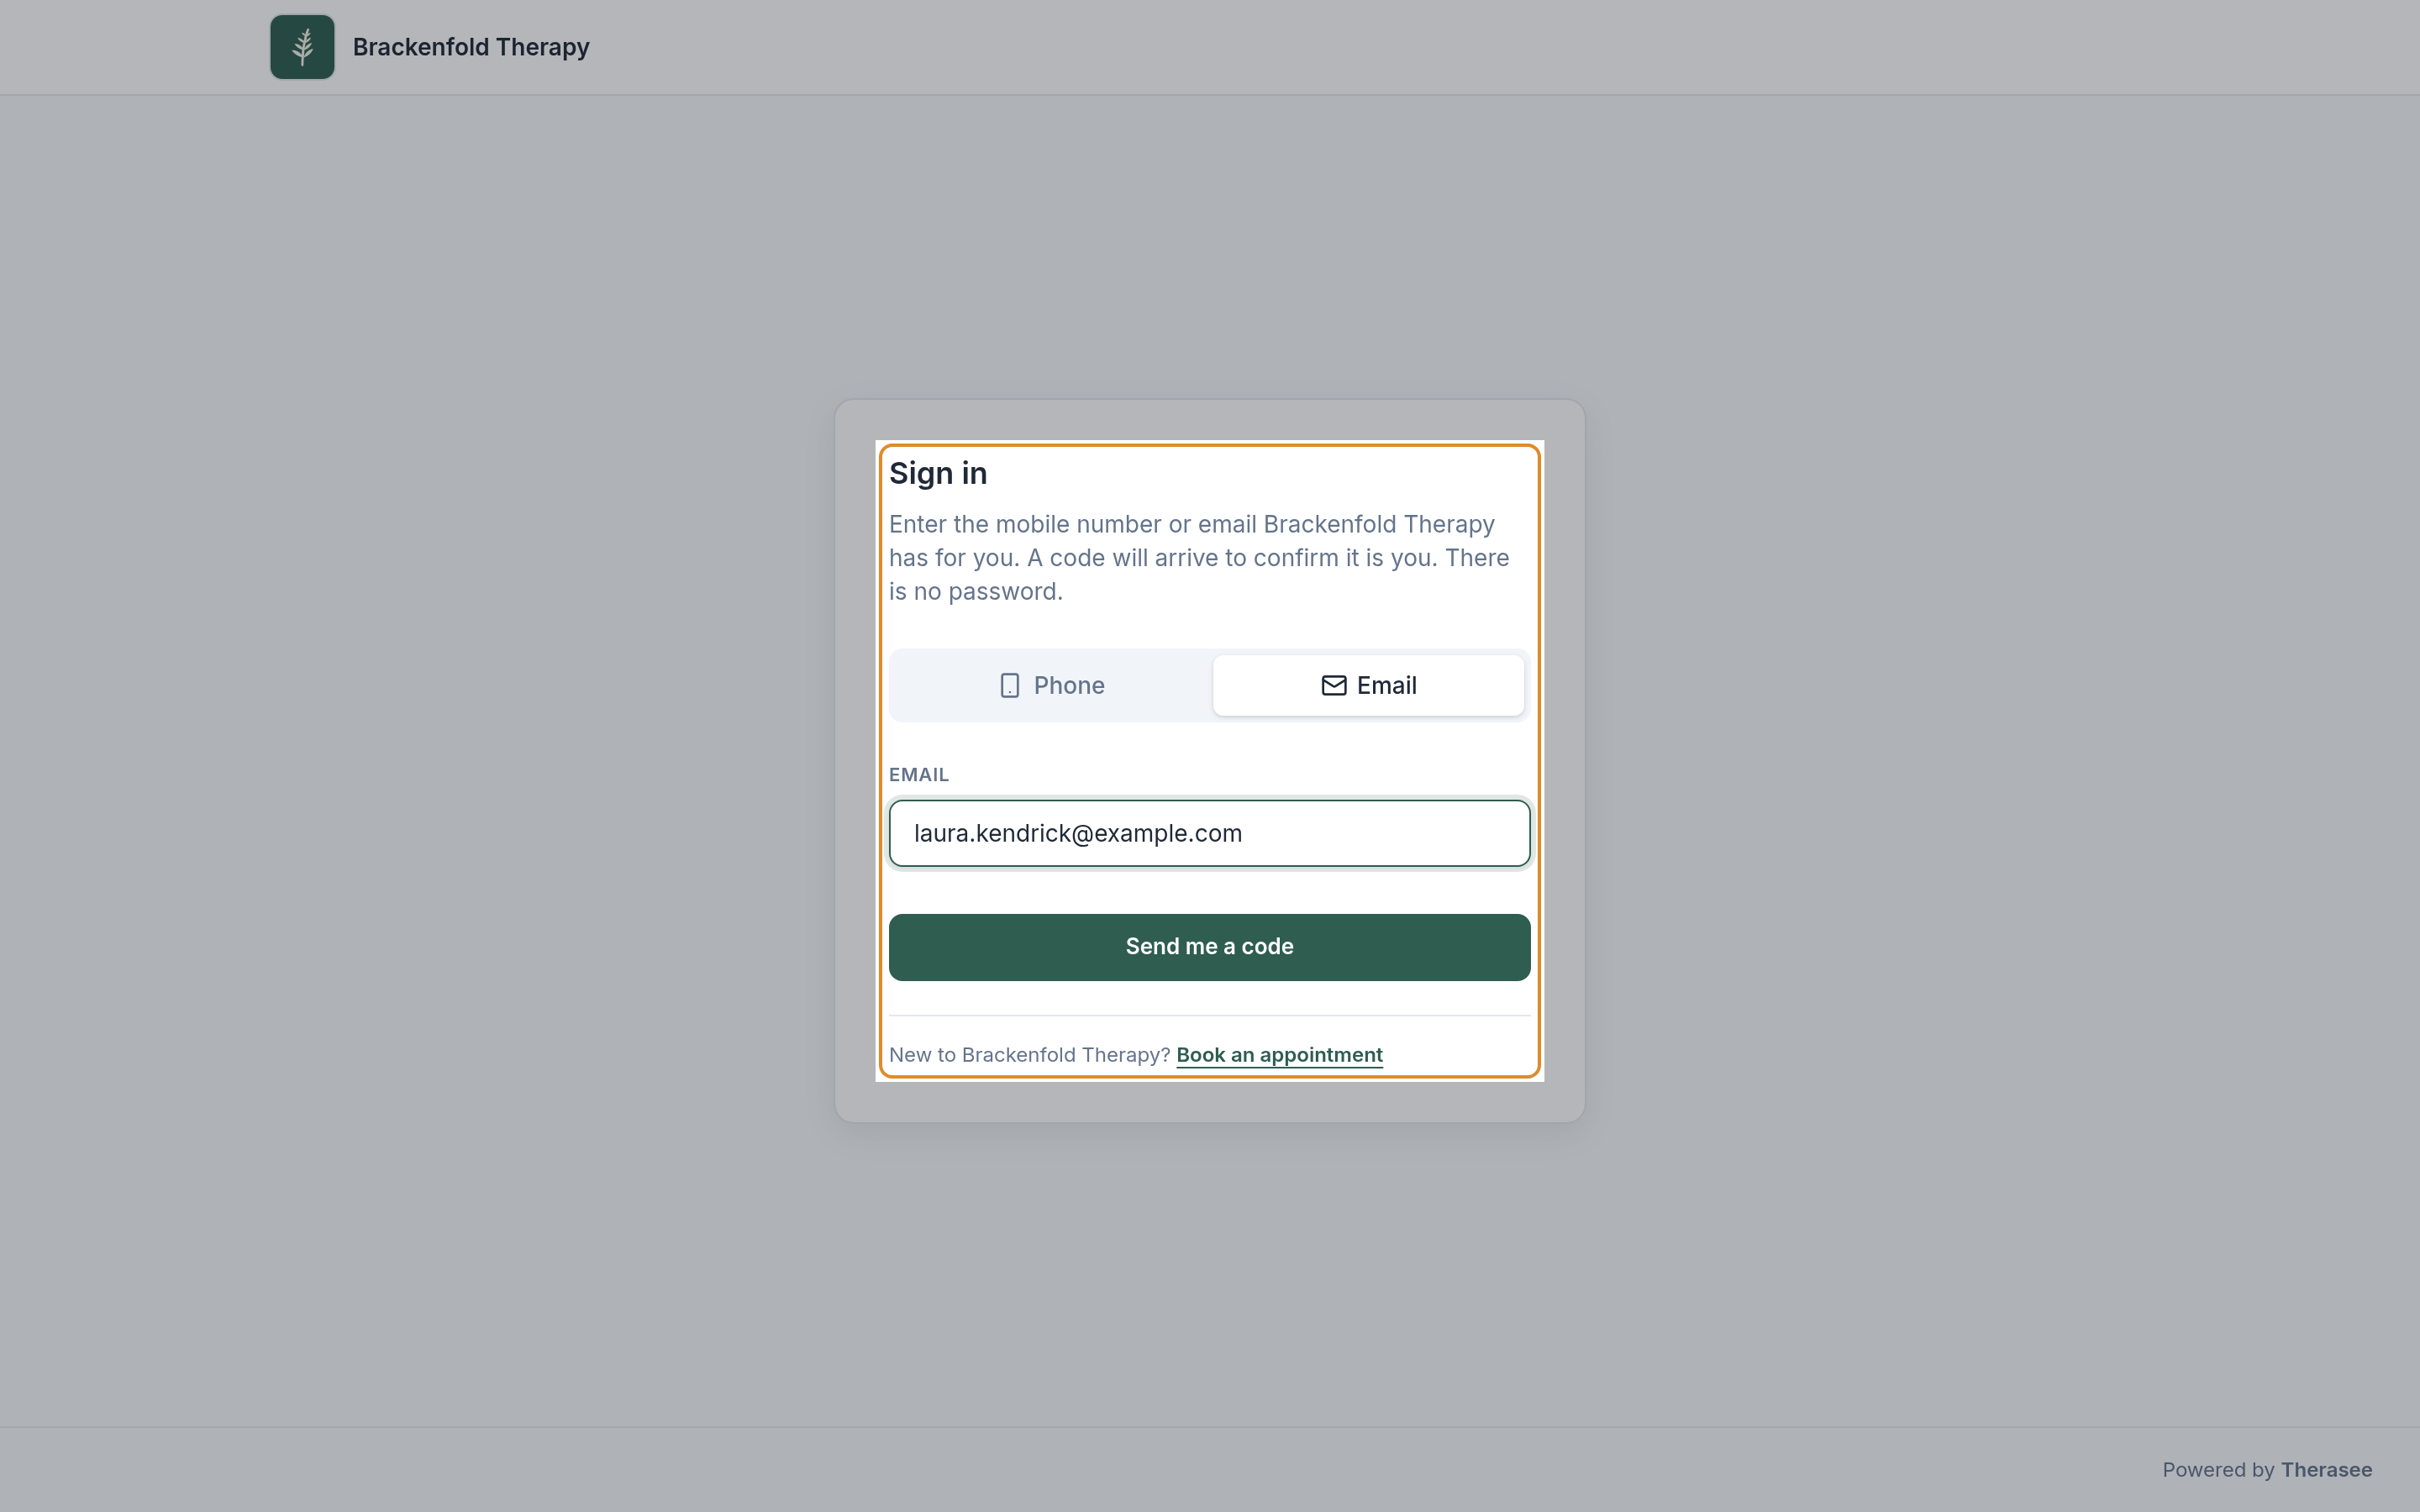
There is no password. On the sign-in page the client chooses Phone or Email, enters the phone number or email address you hold for them, and is sent a 6-digit code to type in. They must use the same details you have on their profile. The full client-side walk-through is in Signing in to your client portal, which you can share with clients.
What clients see
After signing in, clients land on a home page showing their next appointment, a to-do list of forms to fill in, invoices to pay and unread messages, and a menu for the sections you've left switched on. Sections you've hidden don't appear in their menu. For a tour you can send to clients, see Your client portal home page.
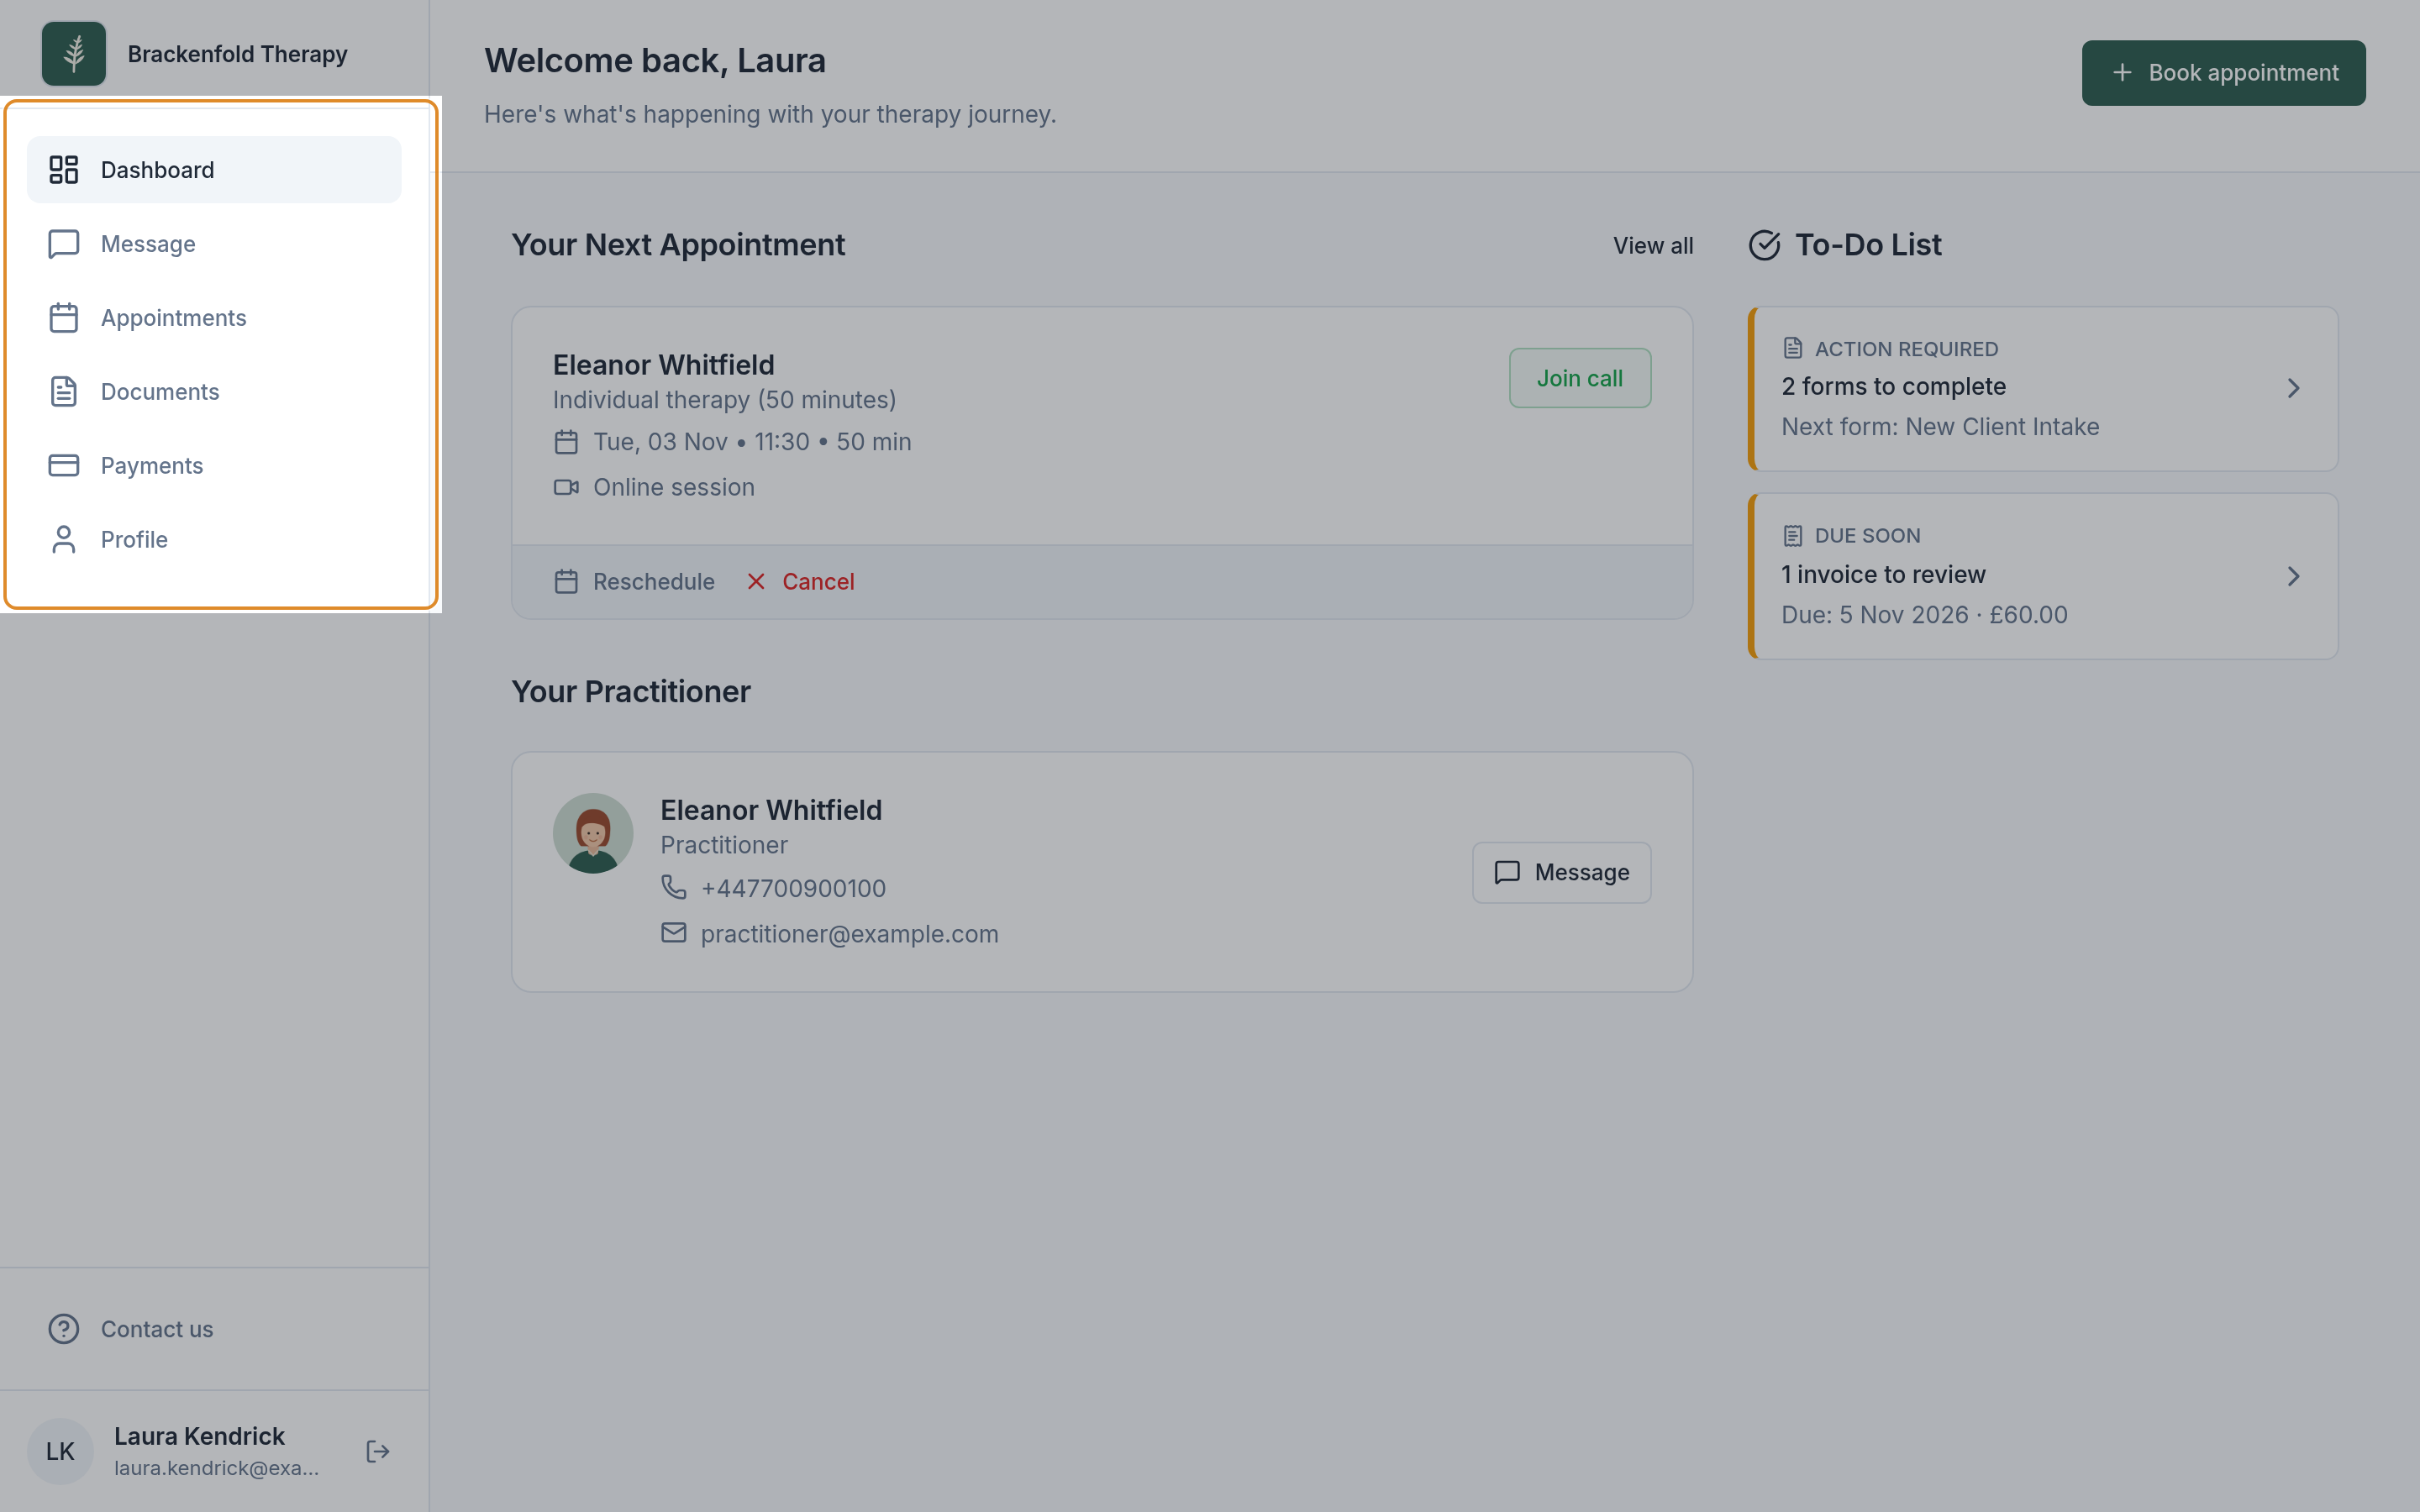
The portal shows your practice's name and logo rather than Therasee's. To change your brand colour and how your branding looks, go to Practice profile > Branding.
Change what one client sees
The Portal access card on a client's profile has its own Portal sections list. Each row shows the practice default (Default: Visible or Default: Hidden) and a tick for this client.
- Open the client's profile and find Portal access. Access needs to be on to change their sections.
- Select the tick beside a section to show or hide it for this client only. You see Portal sections updated, and the row is marked Overridden.
- To put a section back to the practice default, select its tick again so it matches the default. The Overridden label goes and the client follows your practice setting again.
Changes here affect only this client and leave your practice defaults as they are. For example, you might hide Booking for a client whose sessions you'd rather arrange yourself.
Turn off access for one client
- On the client's profile, turn off the switch in the Portal access card. (Or, in the client list, select their Enabled badge and choose Disabled.)
- A window asks Revoke portal access? and explains that they won't be able to sign in, and that you can turn access back on at any time.
- Select Revoke access. You see Portal access revoked.
If the client is signed in at that moment, they are signed out. Nothing is deleted: their appointments, forms, invoices and messages stay on their record, and they see them again if you turn access back on. The client isn't sent a message about the change. While a client has no portal access you can't send them portal messages from the Inbox; you can still reach them by email or phone. See Messaging a client.
Was this helpful?