Letting clients book online
Set up online booking so new and existing clients can book with you, choose the rules that decide which times they see, take payment at booking, and control whether clients can cancel or reschedule.
Updated 4 November 2026
Clients can book their own appointments online, from your public booking page or from inside their client portal. They only see times that fit your weekly availability, your booking rules and what is already in your diary.
What needs to be in place
Clients see bookable times only when all of these are set up. If a client can see no times, work down this list, then the checks under If clients see no time slots at the end of this article.
- The booking page is on. Go to Settings, Practice profile, Public Pages. The Booking page card has a switch and a status badge that reads Enabled, Disabled or At capacity. This switch controls online booking as a whole: while it is off, clients cannot book from the portal either.
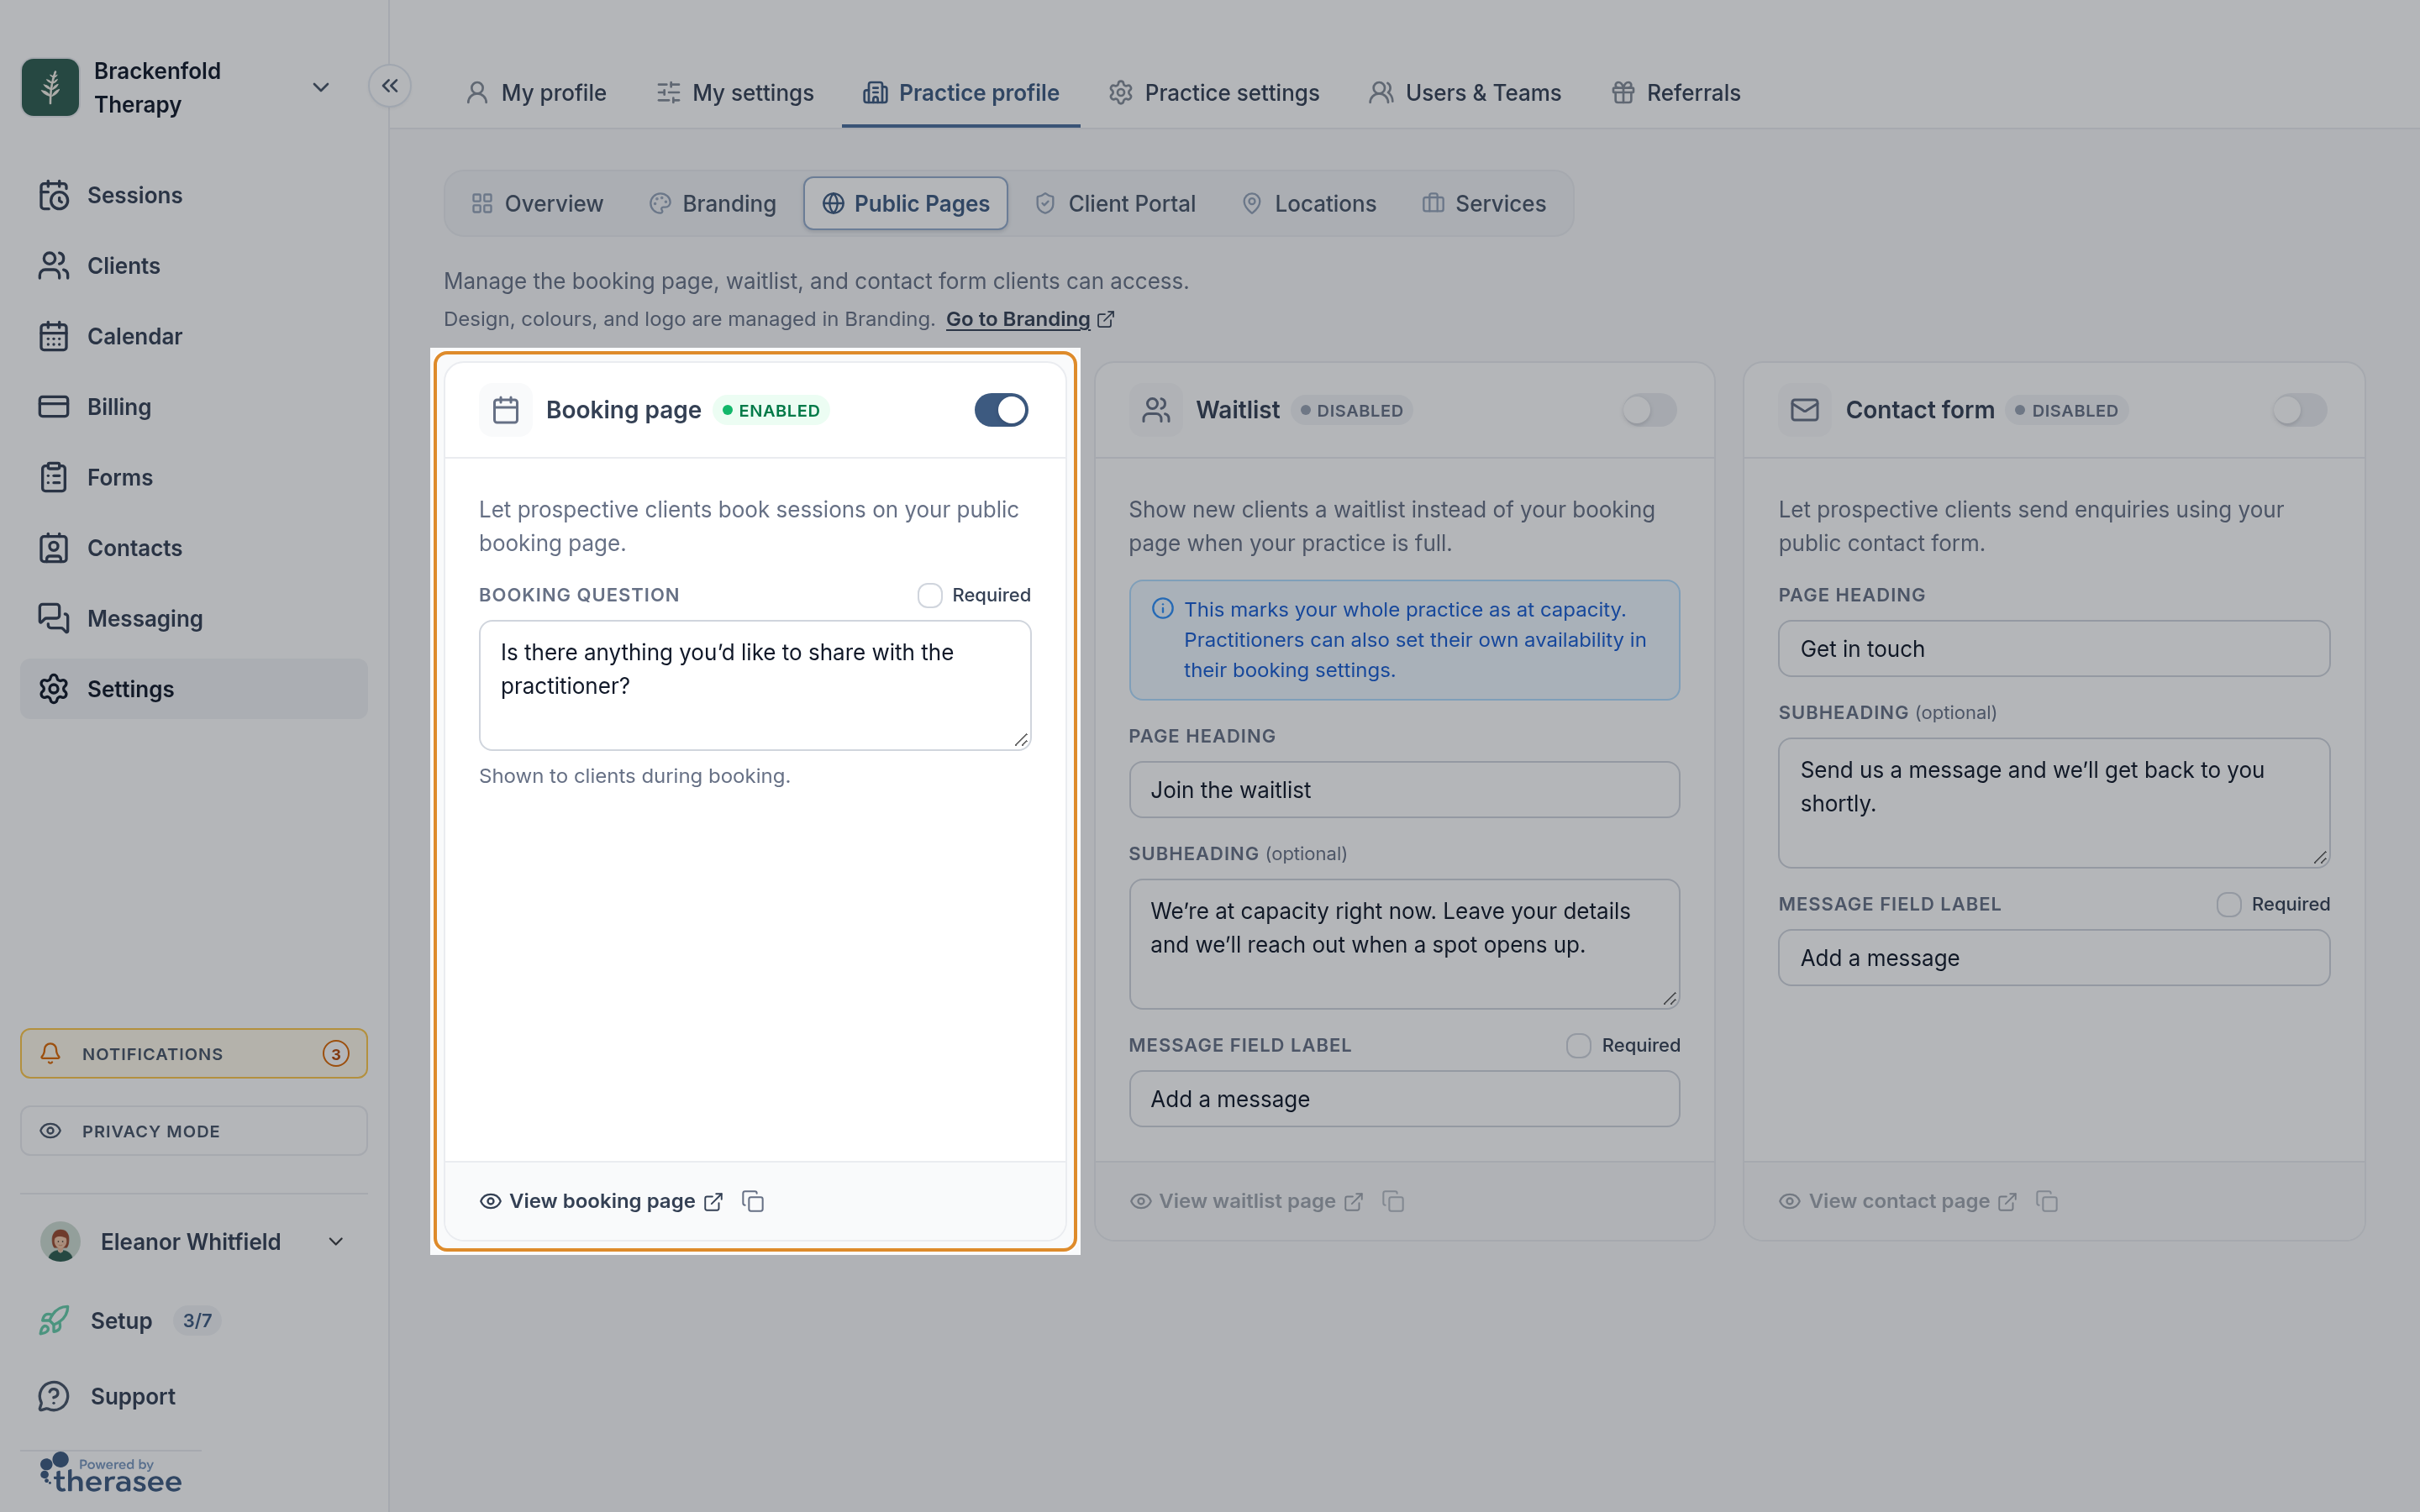
- The client portal is on, if existing clients will book from it. Under Settings, Practice profile, Client Portal, turn on Secure client portal and leave Booking ticked under Default client sections. You can turn Booking off for one client from their profile, under Portal access. See Turning on the client portal.
- Your services are offered online. A service appears to clients only when it is offered to them in the What clients can book table on your booking settings (see below). See Setting up your services.
- Your locations are offered. Under Settings, Practice profile, Locations, an in-person location is open to client bookings unless its status reads Clients can't book here. To open it, choose Let clients book here from its ⋯ menu. Video sessions are offered when the Online row (Built-in video link) is switched on.
- You have weekly availability. Under Settings, My settings, Availability, give each working day at least one time slot. Each slot can be limited to particular locations and services; clients are offered a service only inside slots that include it.
- You can be booked. In a practice with a team, a practitioner takes online bookings only when Show in calendar is on in their settings under Settings, Users & Teams. Admin users can't be booked.
Set your booking rules
- Go to Settings, My settings, Booking. Each practitioner sets their own rules.
- In the Client Booking Settings card, type a number into each field and pick a unit from the button beside it.
- When you change anything, Cancel and Save appear at the top of the card. Click Save. You will see Booking settings saved.
- In the What clients can book table, each service you are assigned to has two choices. Under New clients (people booking without signing in), pick Booking page, Link only or Not offered. Under Existing clients (people signed in to your portal), pick All clients, Selected clients or Not offered. Each change saves straight away and you see Saved.
- In Where clients can book you, untick any location where you don't want clients to book you themselves. You can still book clients in there yourself.
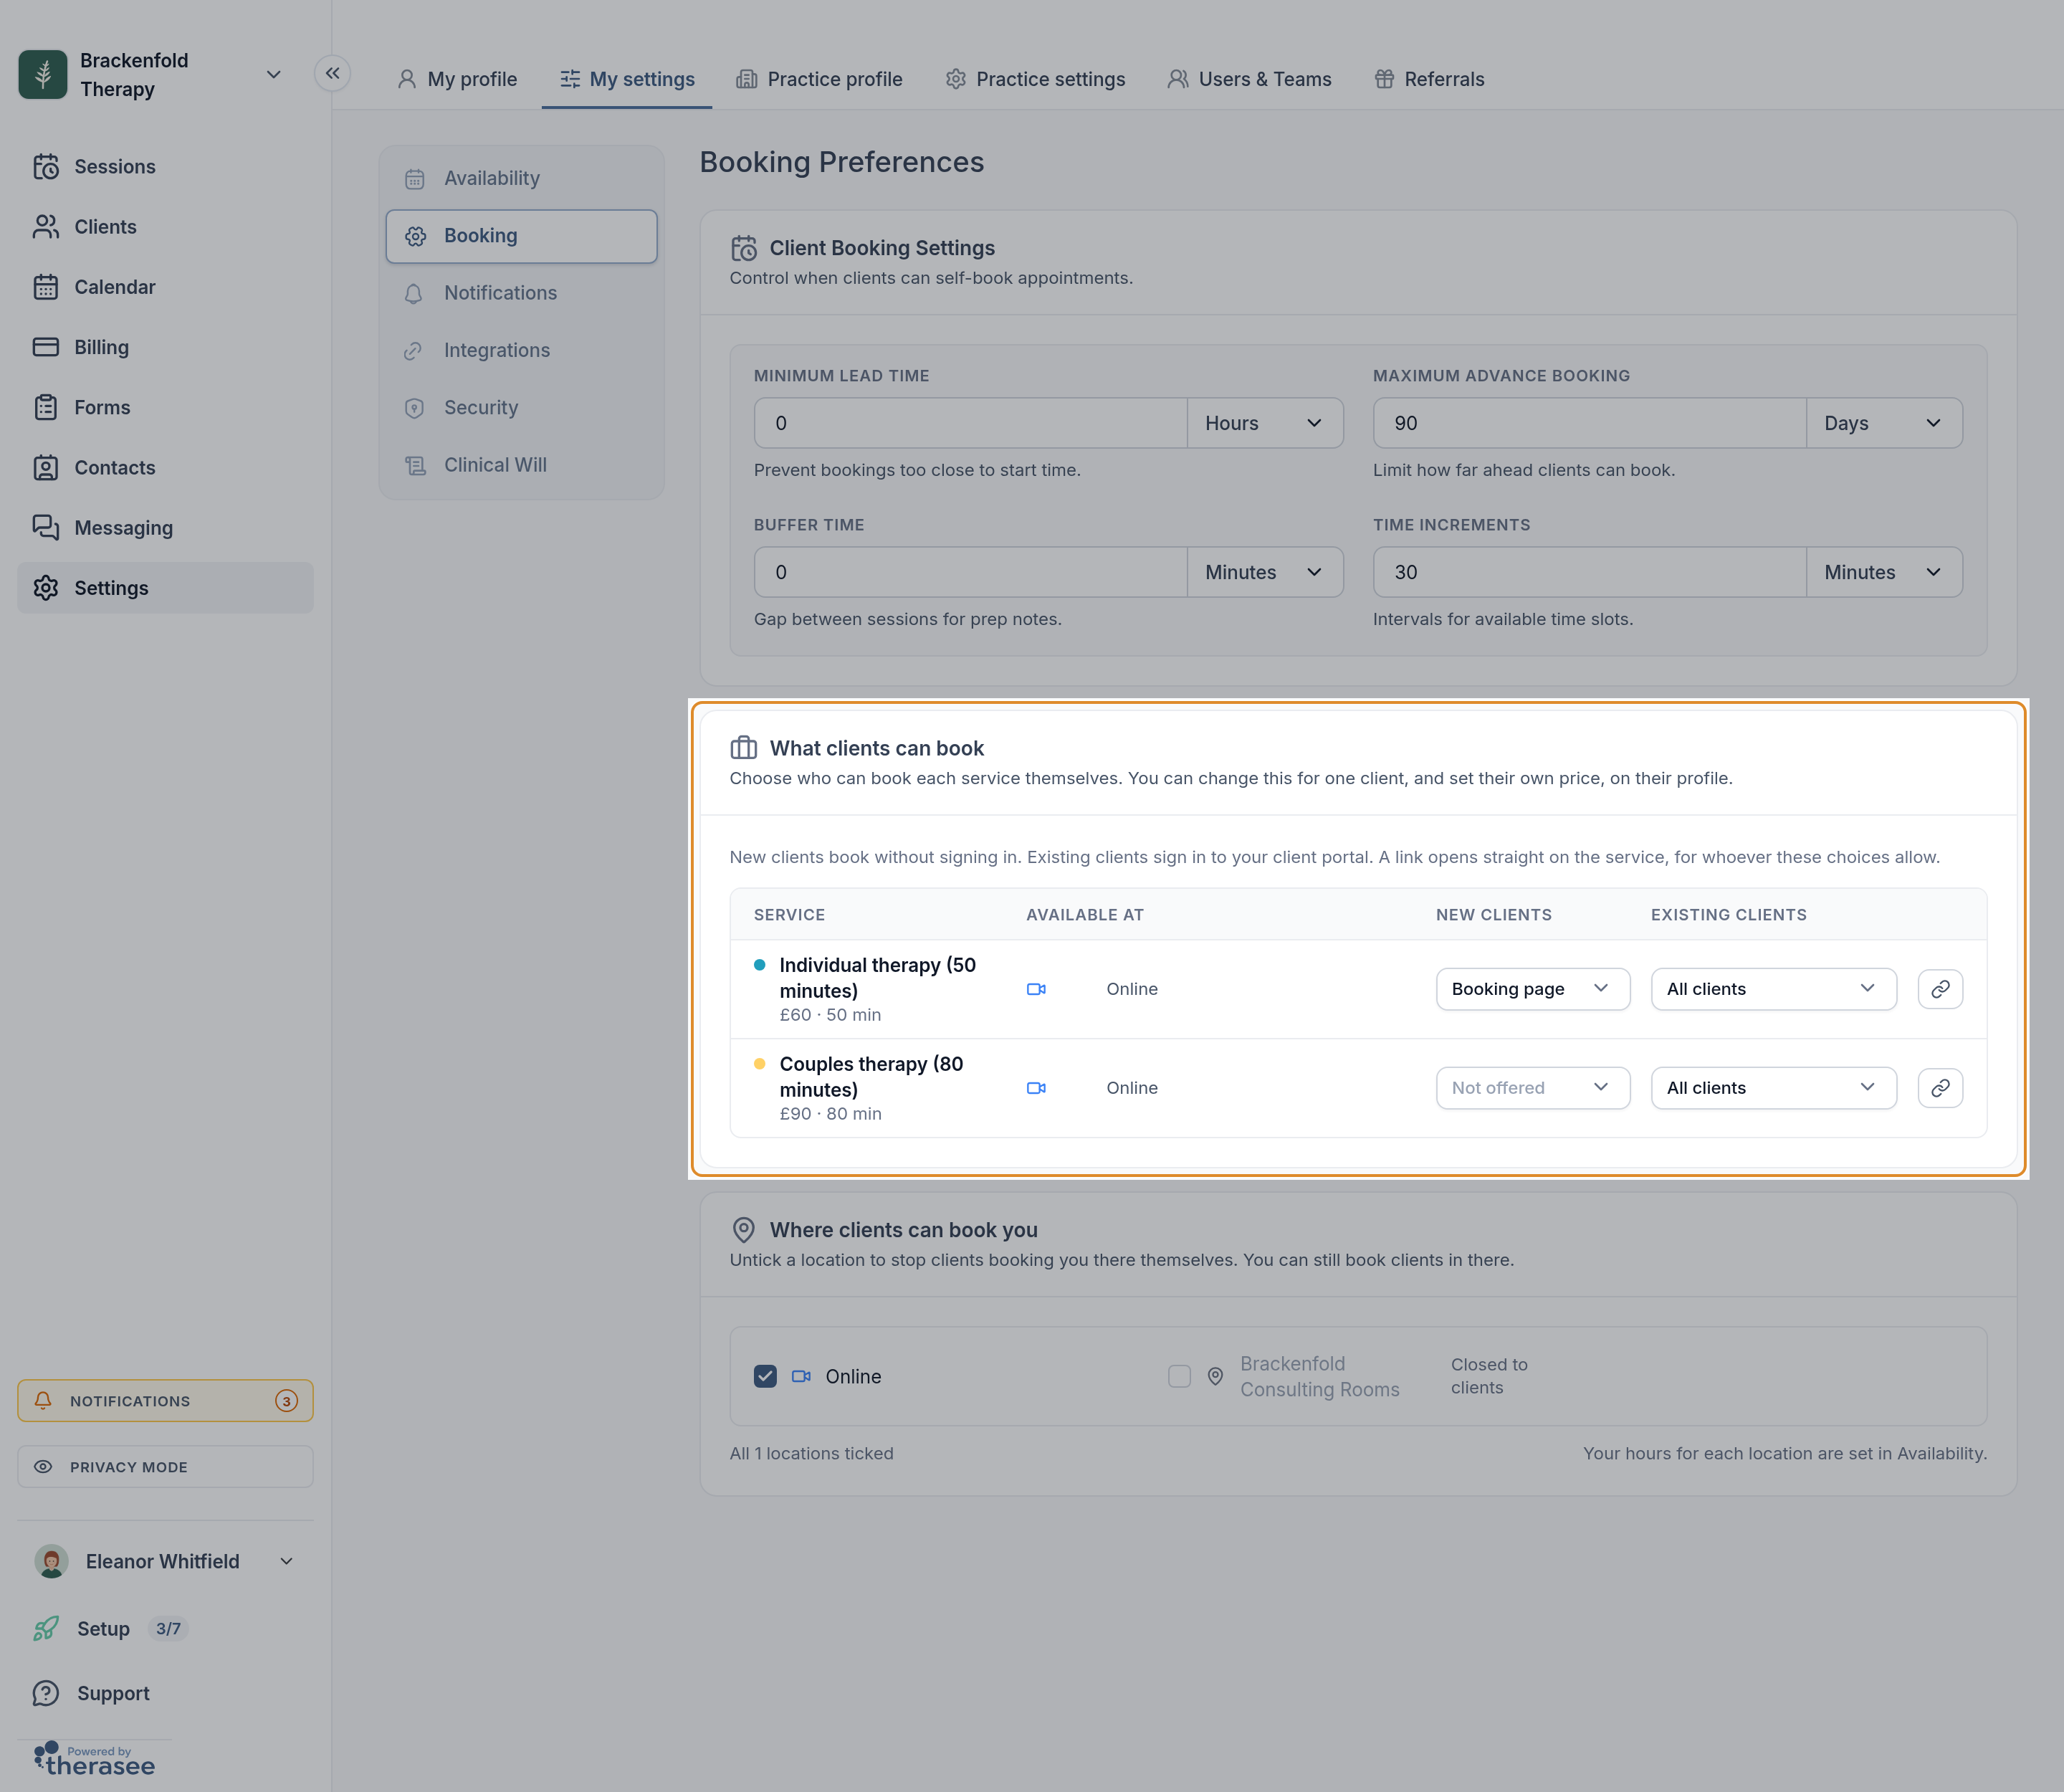
What each rule does:
- Minimum Lead Time (minutes, hours or days, up to 365 days): no time starting sooner than this from now is offered. With 24 hours, a client looking at 10:00 on Monday can book nothing before 10:00 on Tuesday. It starts at 0.
- Maximum Advance Booking (days or months): nothing further ahead than this is offered. It starts at 90 days.
- Buffer Time (up to 180 minutes or 3 hours): a time is offered only if it leaves at least this gap before and after anything already in your diary, including appointments at any of your locations, blocked time and events from a connected Google or Outlook calendar that you show in Therasee. It starts at 0.
- Time Increments (up to 180 minutes or 3 hours): how often start times are offered, counted from the start of each availability slot. A time is offered only if the whole session fits before the slot ends. With a 09:00 to 12:00 slot, a 50-minute service and 30-minute increments, clients see 09:00, 09:30, 10:00, 10:30 and 11:00. It starts at 30 minutes. If clients see start times you did not expect, such as 09:15 and 09:45, look at where each availability slot starts: start the slot on the hour, or change the increment.
For example, to offer a free first consultation to new clients only, set its New clients choice to Booking page and its Existing clients choice to Not offered. A Link only service is left off your booking page: the link icon at the end of its row copies a link that opens your booking page on that service. For a Selected clients service, open each client's profile and select Change on the Services card to choose it for them. The same card lets you set a client's own price.
In a practice with more than one bookable practitioner, this page also has a Waitlist card. Switch it on when you are full: new clients see your waitlist form instead of your times, and existing clients can still sign in and book follow-ups.
How clients book
New clients use your public booking page. Click View booking page on the Booking page card to open it and copy its address. To send a link that goes straight to you, use the link icon at the top of the Calendar; its tooltip reads Booking Link for your name, and clicking it copies your personal link.
Put the booking link on your website
To let visitors book from your own website, add a button or link such as Book a session that points to your booking page. Your booking page address is your practice address followed by /booking, for example portal.therasee.com/your-practice/booking. Copy it from Settings, Practice profile: on the Overview tab, the Practice URL card lists it under YOUR CLIENT LINKS with a copy icon. The booking page opens as its own page rather than inside your website, so set the link to open in a new tab. Before you publish your site, follow the link yourself and check that your times show. See Adding your booking page and client portal to your website for step-by-step instructions for WordPress, Wix and Squarespace.
Existing clients click Book appointment in their portal, or sign in part-way through the public page. In a practice of one, or when a client has seen you before, they skip choosing a practitioner. They see the services you offer existing clients, at their own price if you have set one.
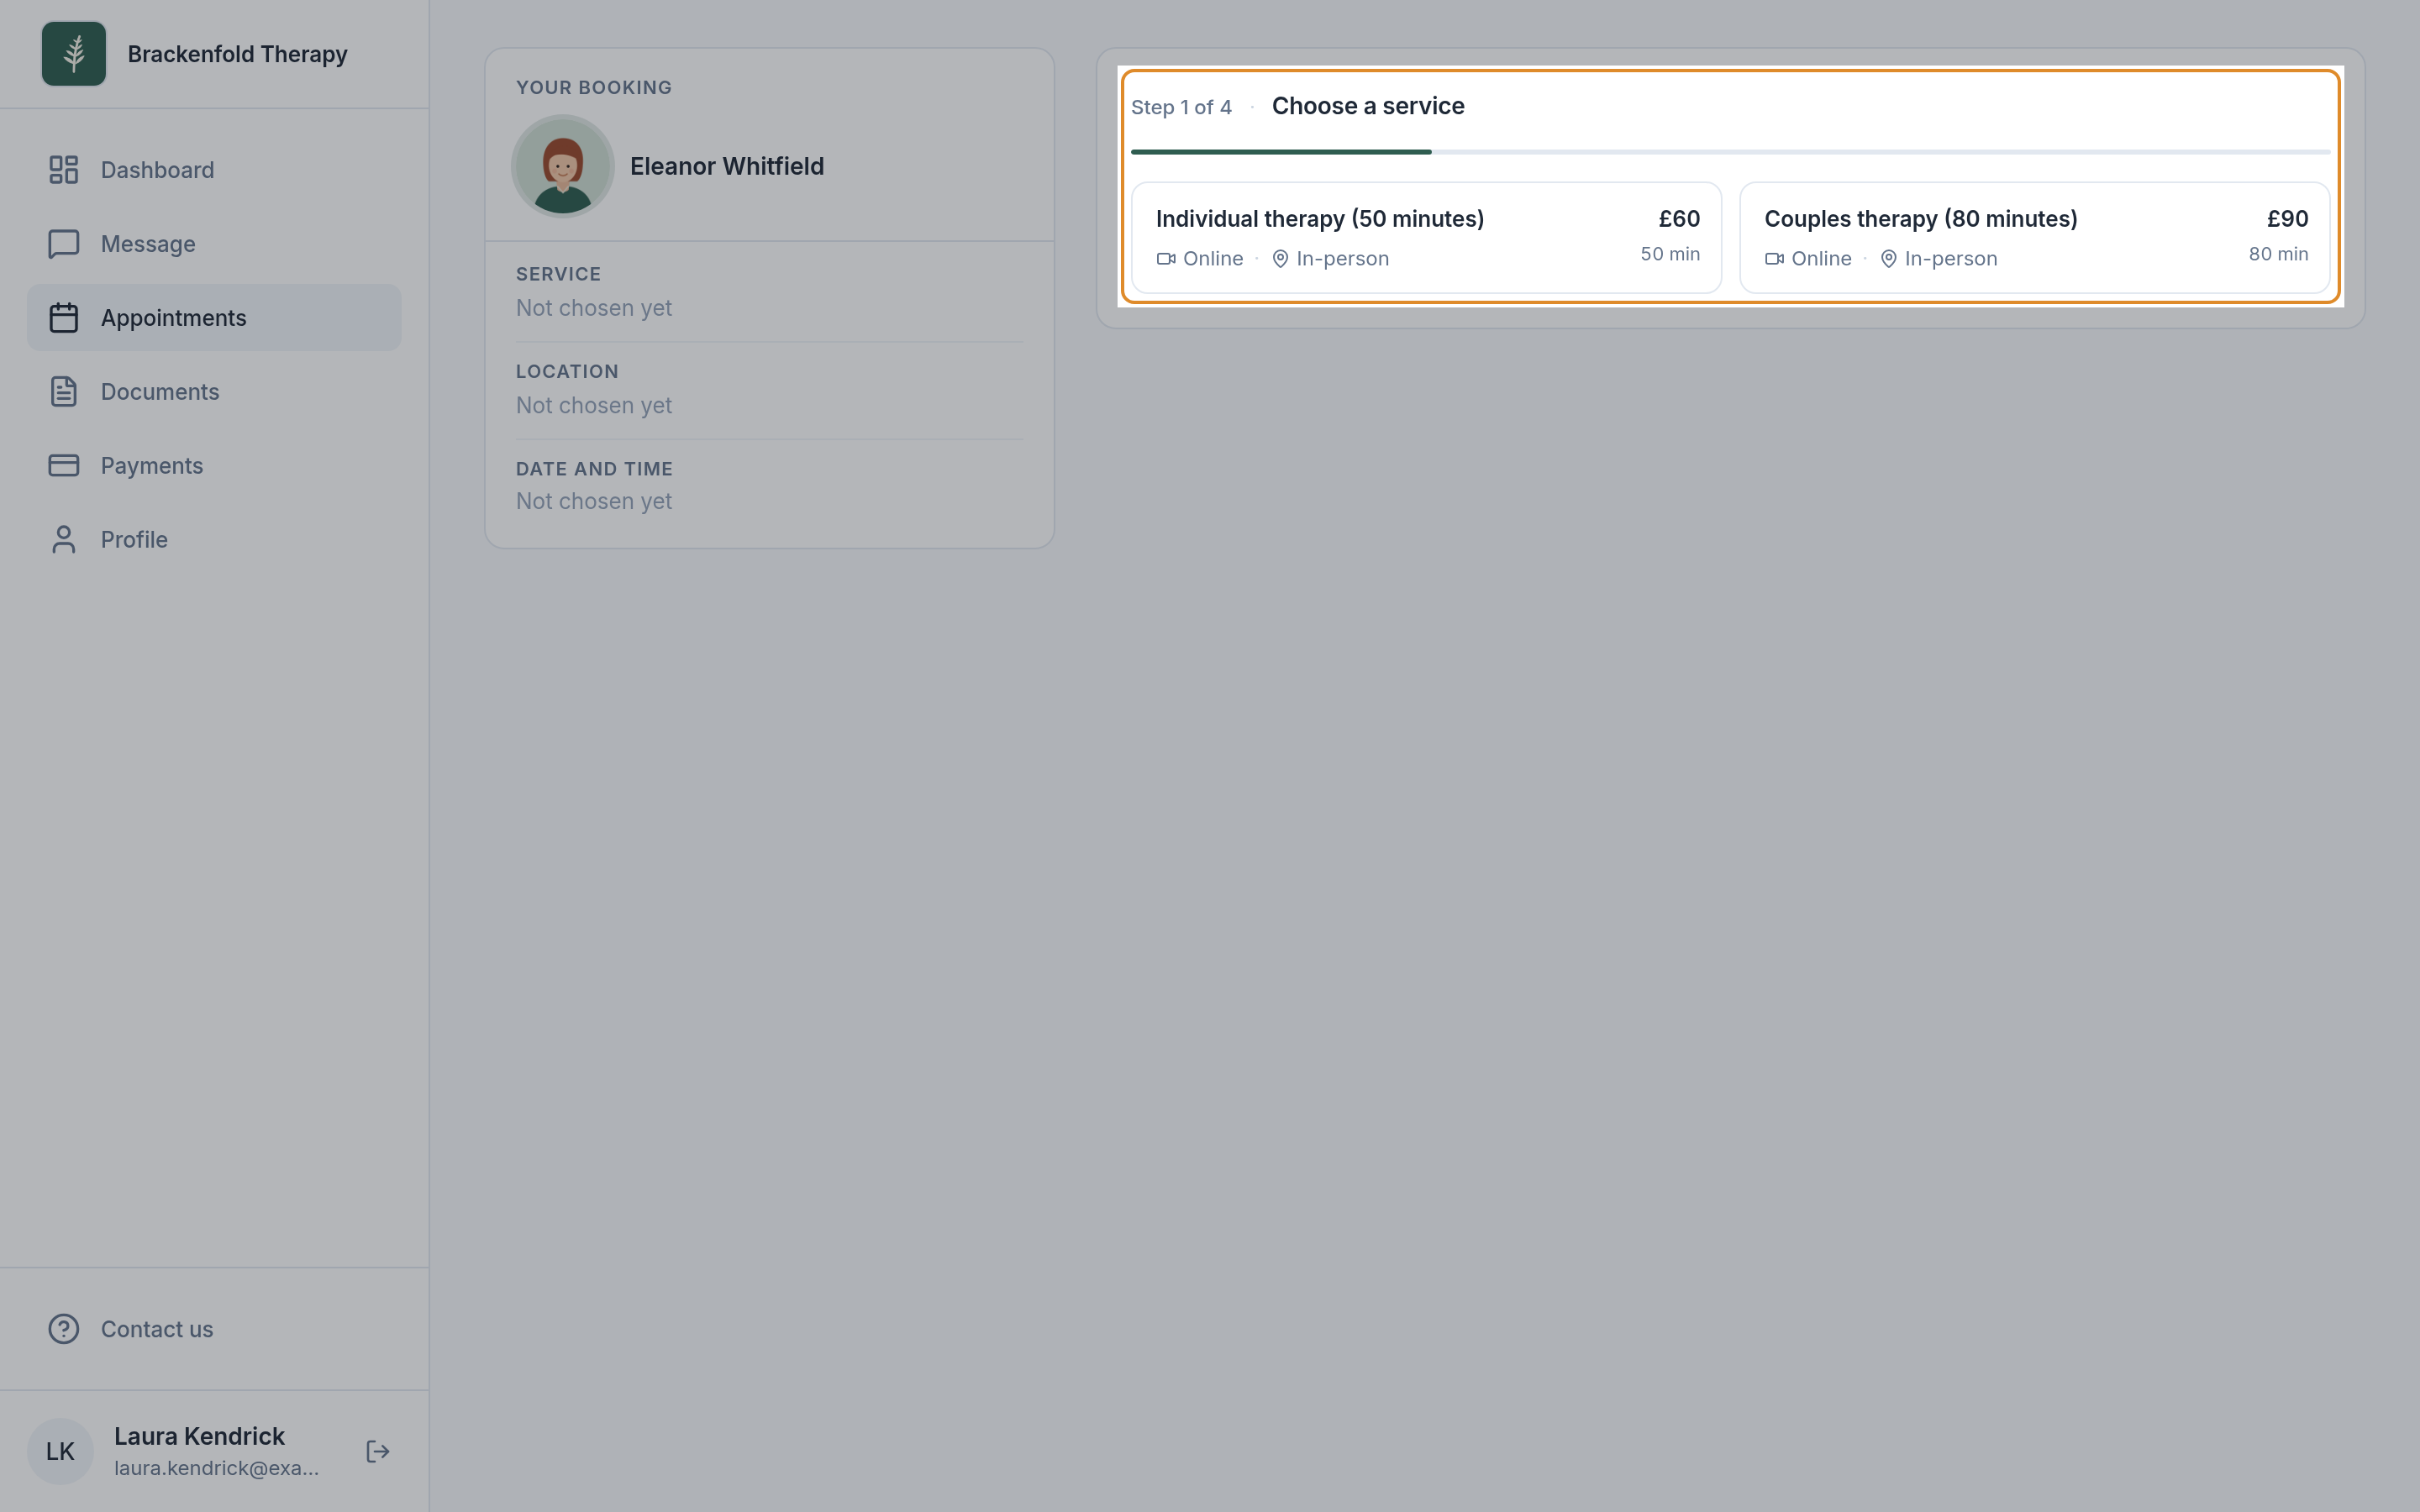
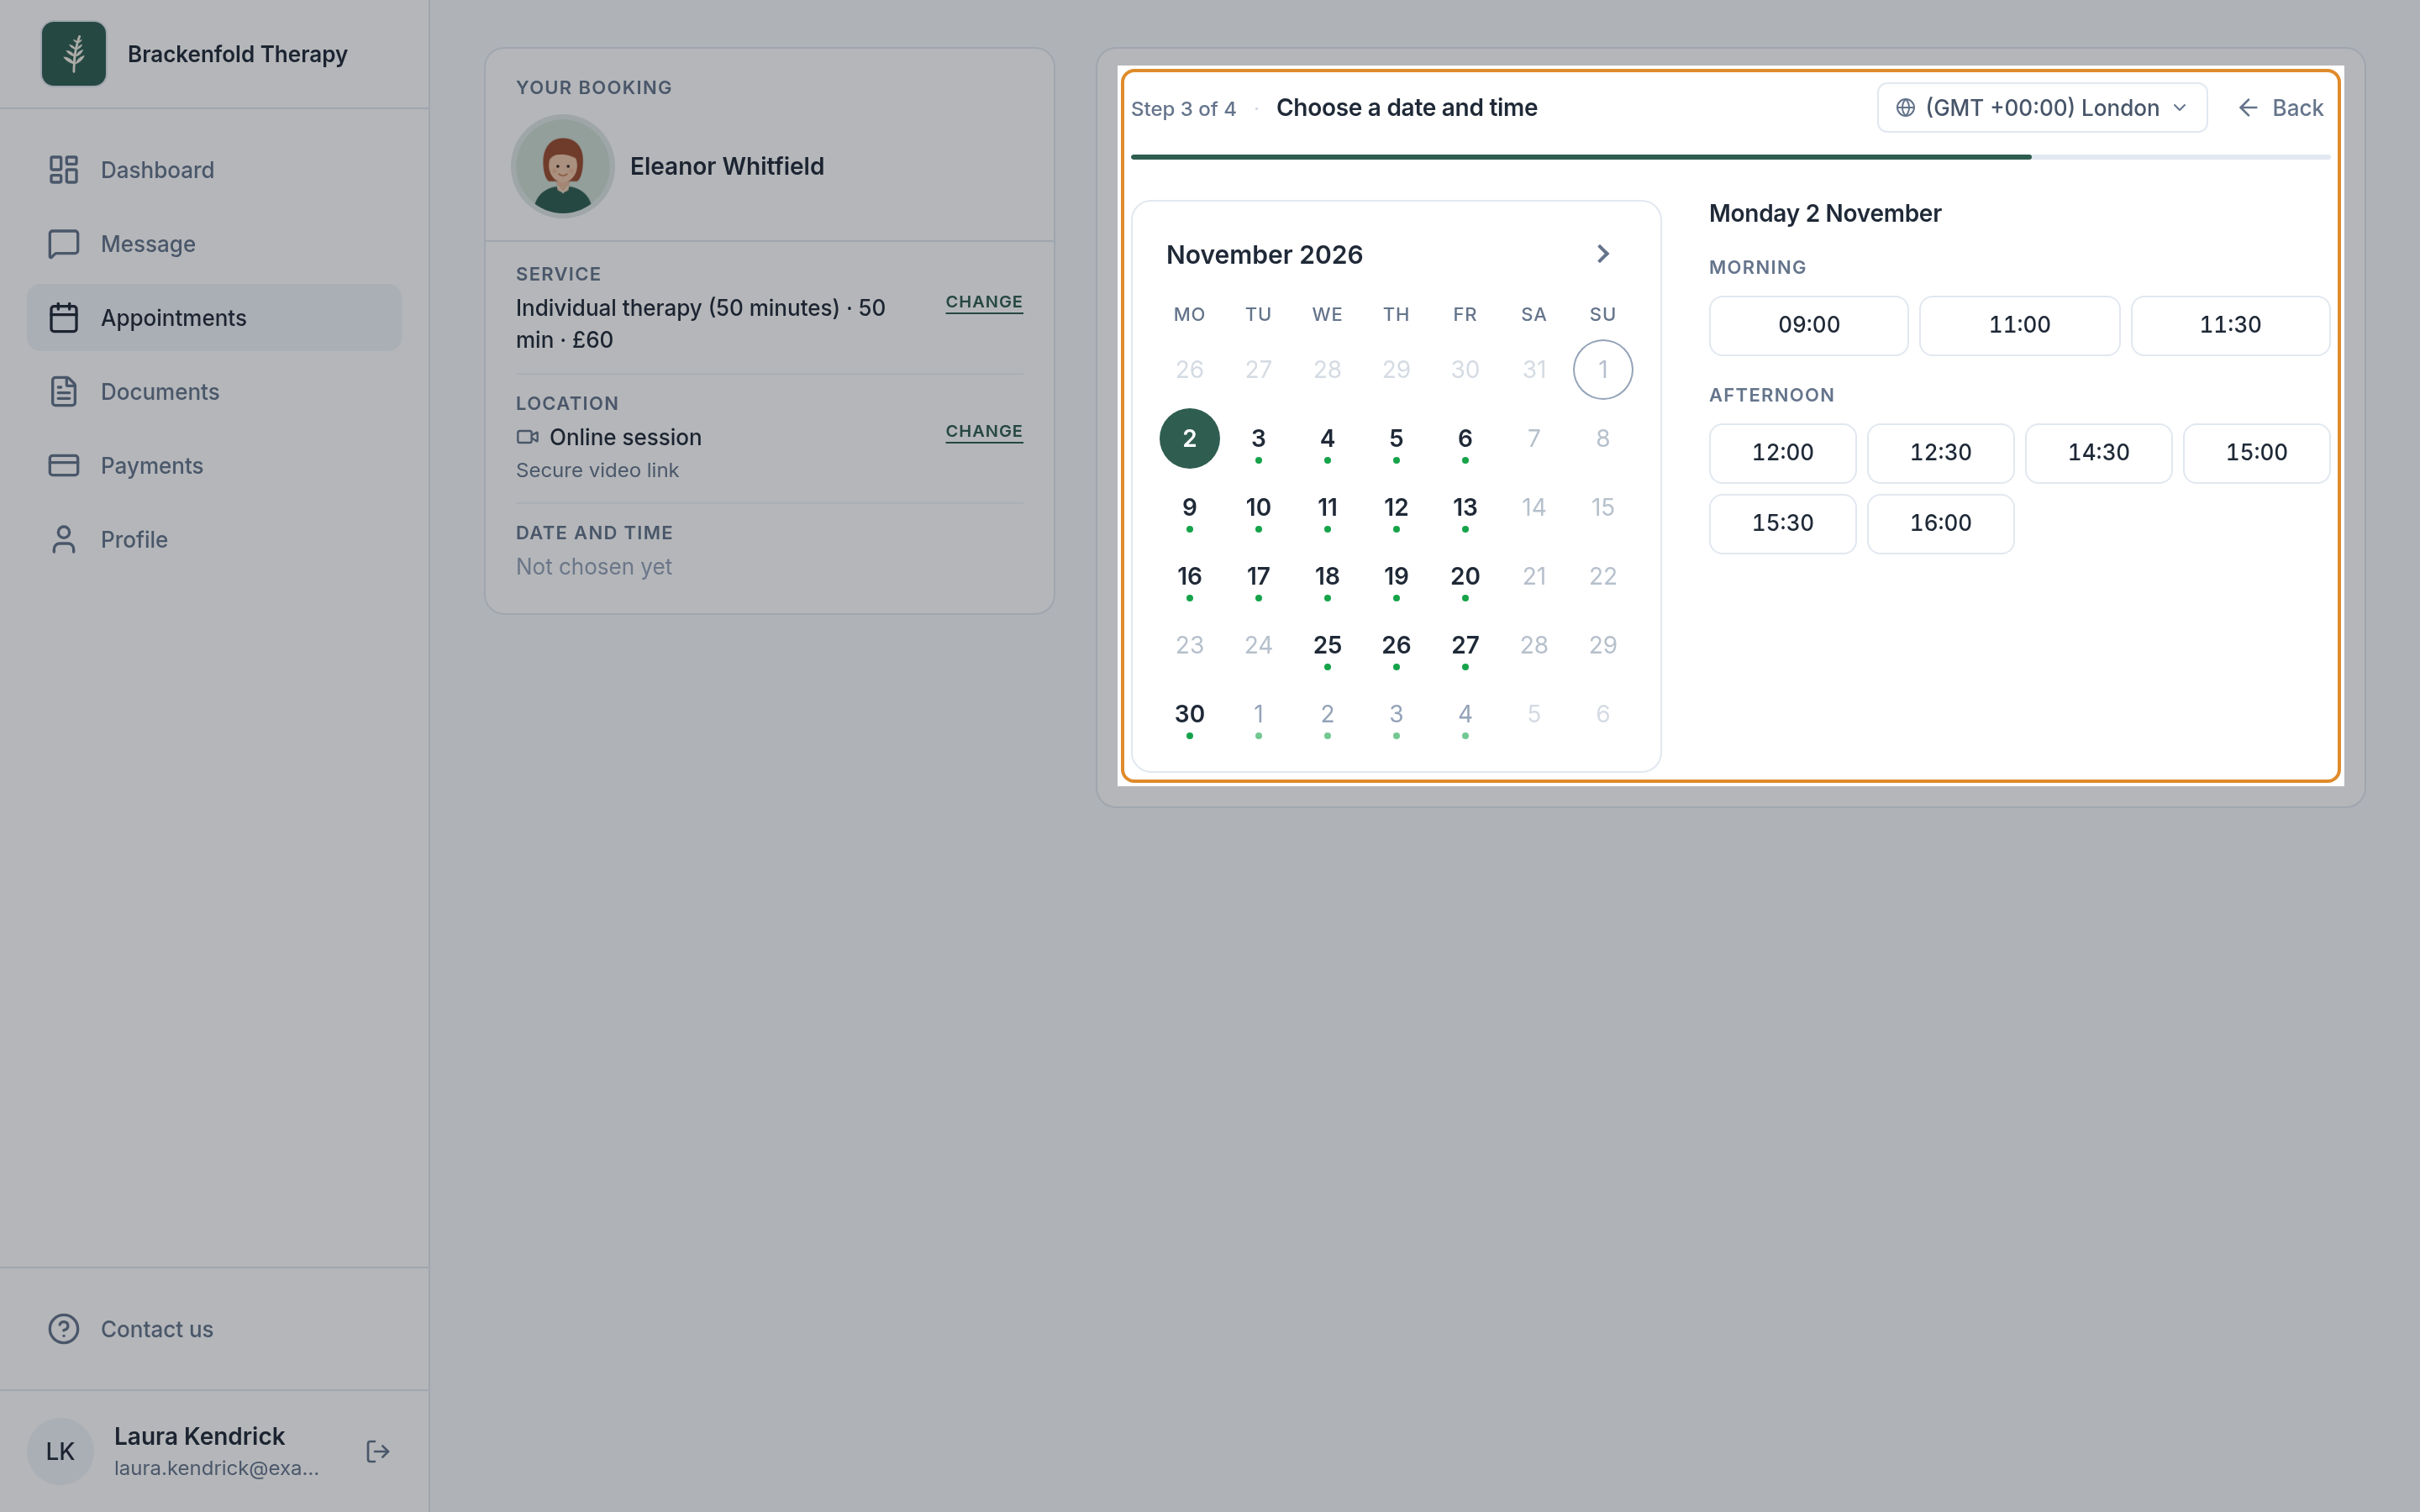
Either way, the client works through the same steps:
- Choose a practitioner (practices with more than one).
- Choose a service, showing each service's price and length.
- Choose a location.
- Choose a date and time. Times show in the client's own time zone, which they can change. If the month on screen has nothing left, a Next available card jumps them to the next date with times.
- Your details, for new clients only: first name, last name, email address, phone number and your booking question.
- Review and book, or Review and pay when the service takes payment at booking.
You set the booking question on the Booking page card under Booking question, and can make it required. When a new client books, Therasee adds them to your client list as a prospect, assigned to the practitioner they booked with, with their answer saved on their record. If their email address or phone number matches a client you already have, the appointment is added to that client instead.
If your whole practice is full, switch on the Waitlist card on Public Pages. New clients then see a waitlist form instead, and existing clients are offered Sign in to book as usual.
Taking payment when clients book
To have clients pay as they book, open the service under Settings, Practice profile, Services and tick Process payments at the time of booking. This needs Stripe connected and a price above zero. The client then sees Review and pay and a Pay button showing the total, including tax if the service is taxable, and pays through Stripe. The appointment is made once the payment goes through; if the client leaves the payment page, nothing is booked.
Keep your Stripe account able to take payments. If it cannot when a client books, the booking still goes through without payment and its invoice stays unpaid for you to collect.
When a service does not take payment at booking, an online booking of a paid service follows your automatic invoicing for Single appointments: if that is on, an invoice is raised when the client books. See Creating and sending an invoice.
Let clients cancel or reschedule
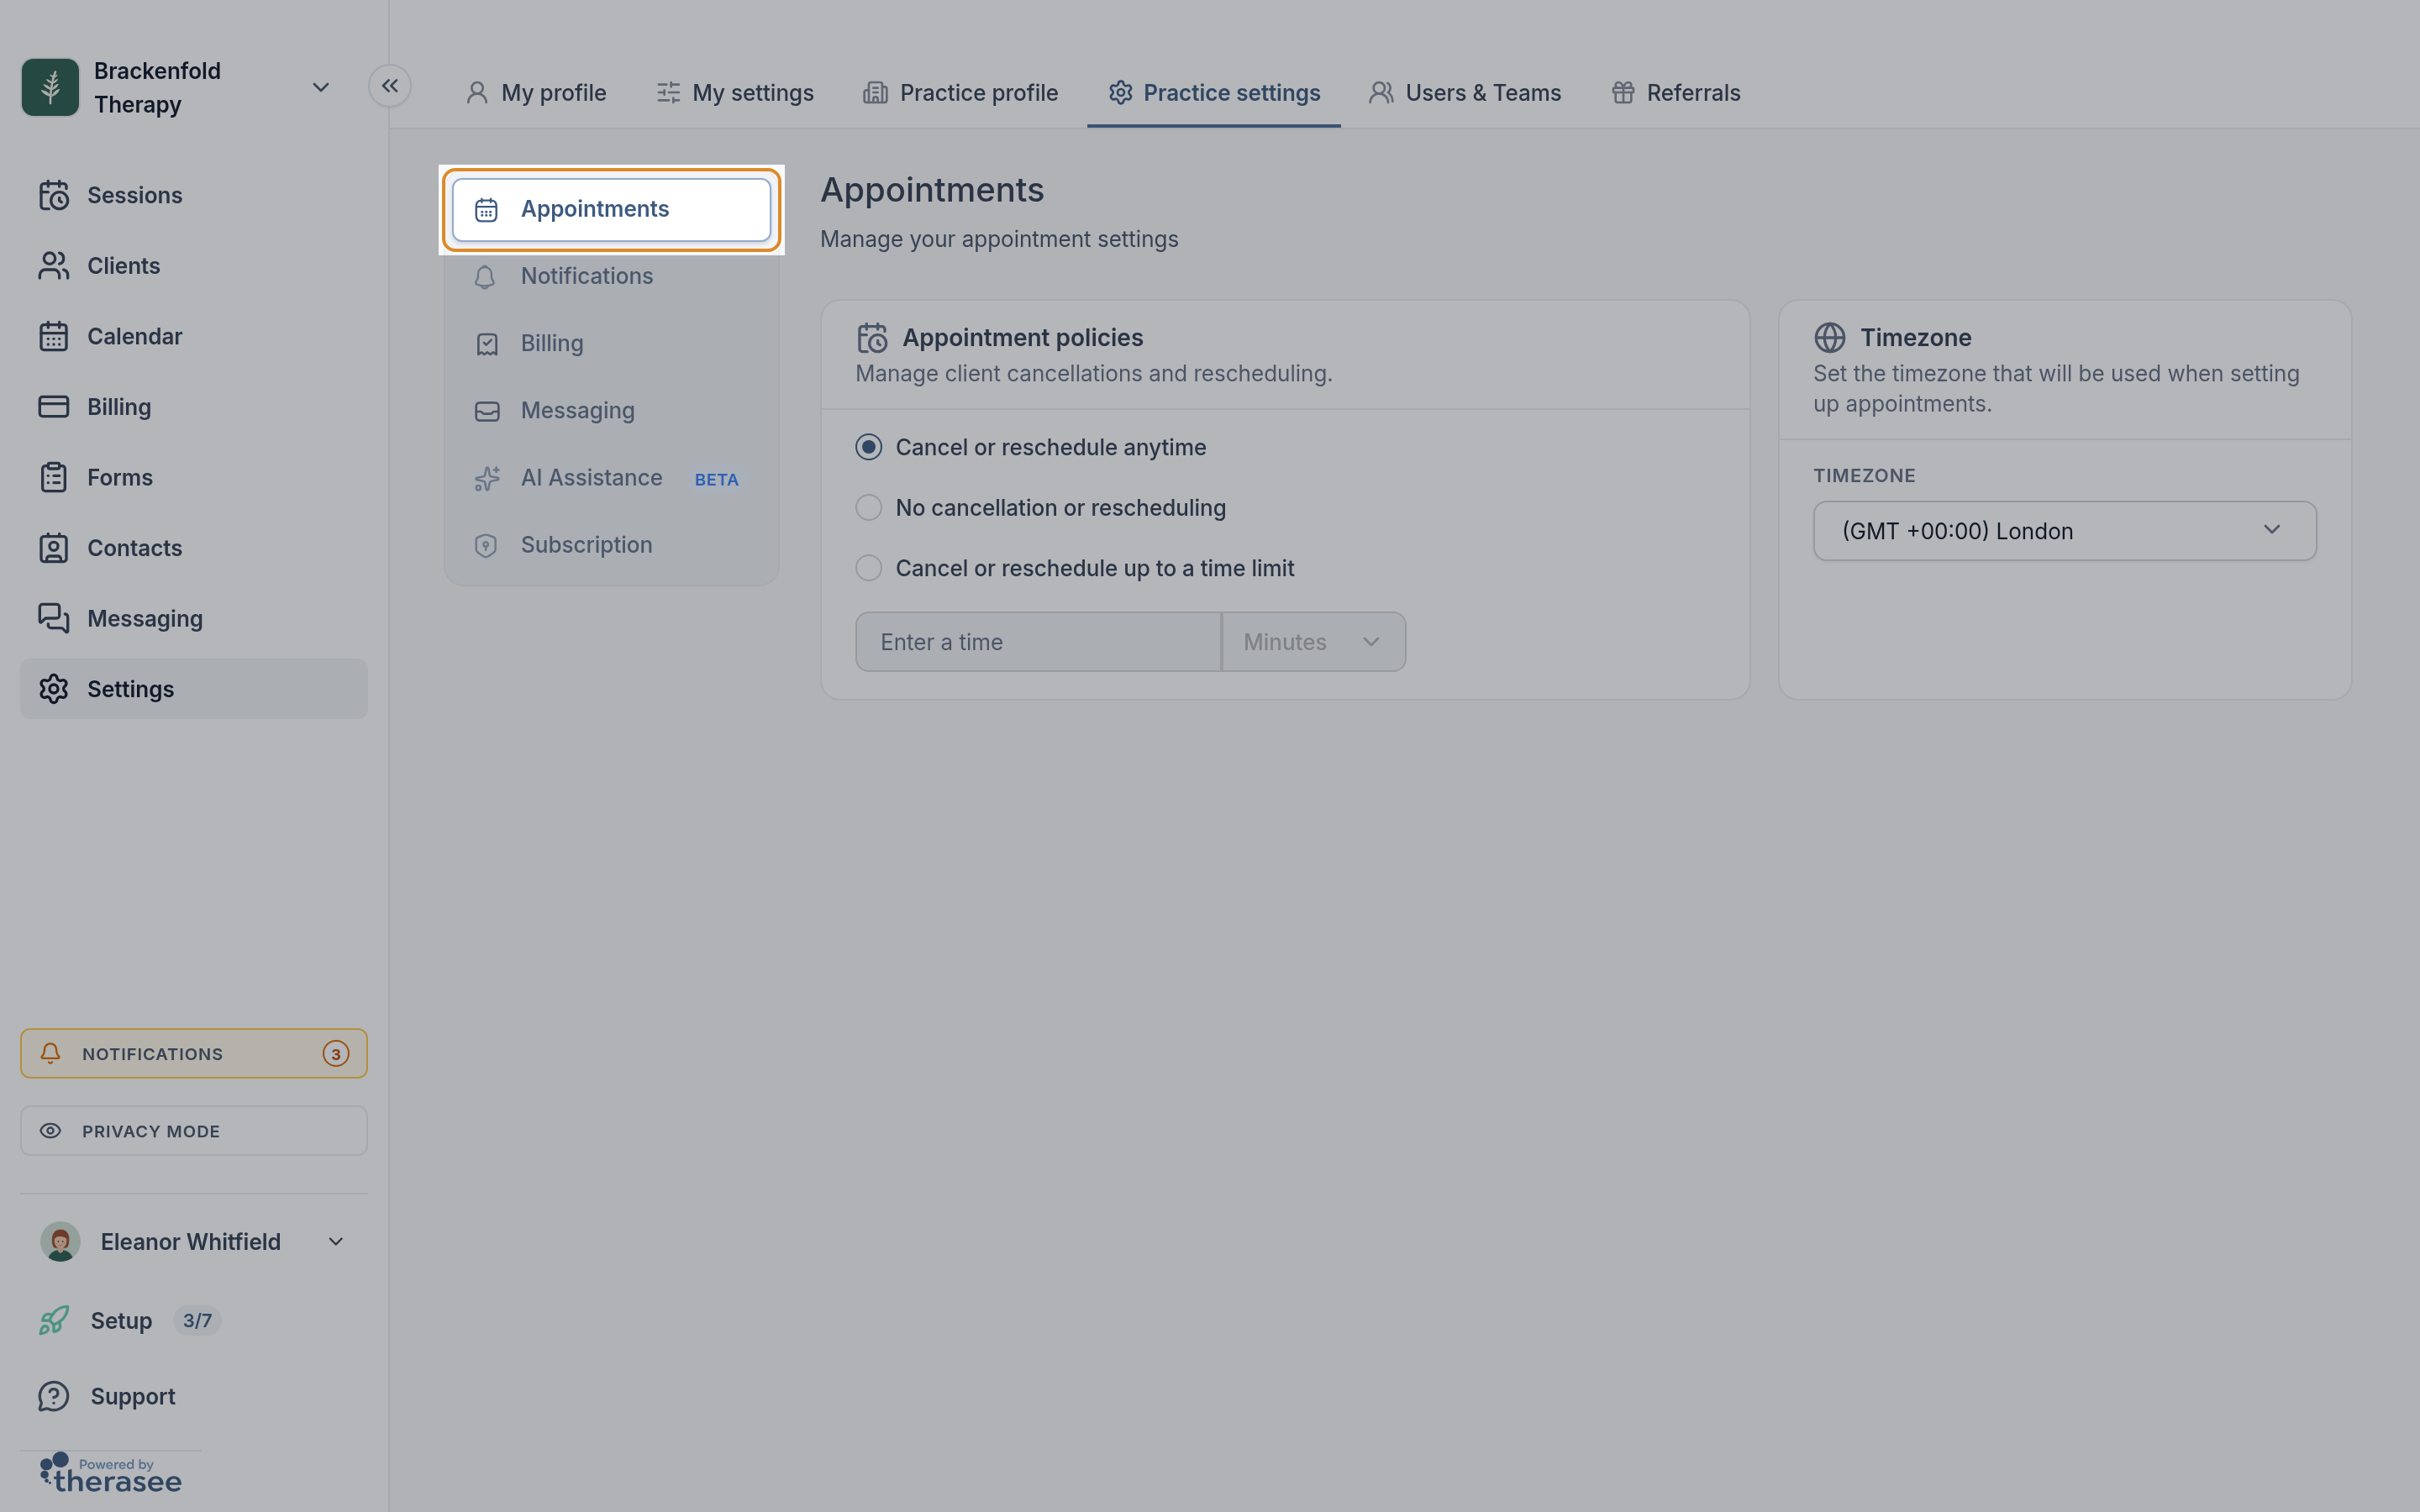
- Go to Settings, Practice settings, Appointments.
- In Appointment policies, choose Cancel or reschedule anytime, No cancellation or rescheduling, or Cancel or reschedule up to a time limit. For a time limit, enter a number and pick minutes, hours or days.
- Click Save. You will see Appointment policies saved.
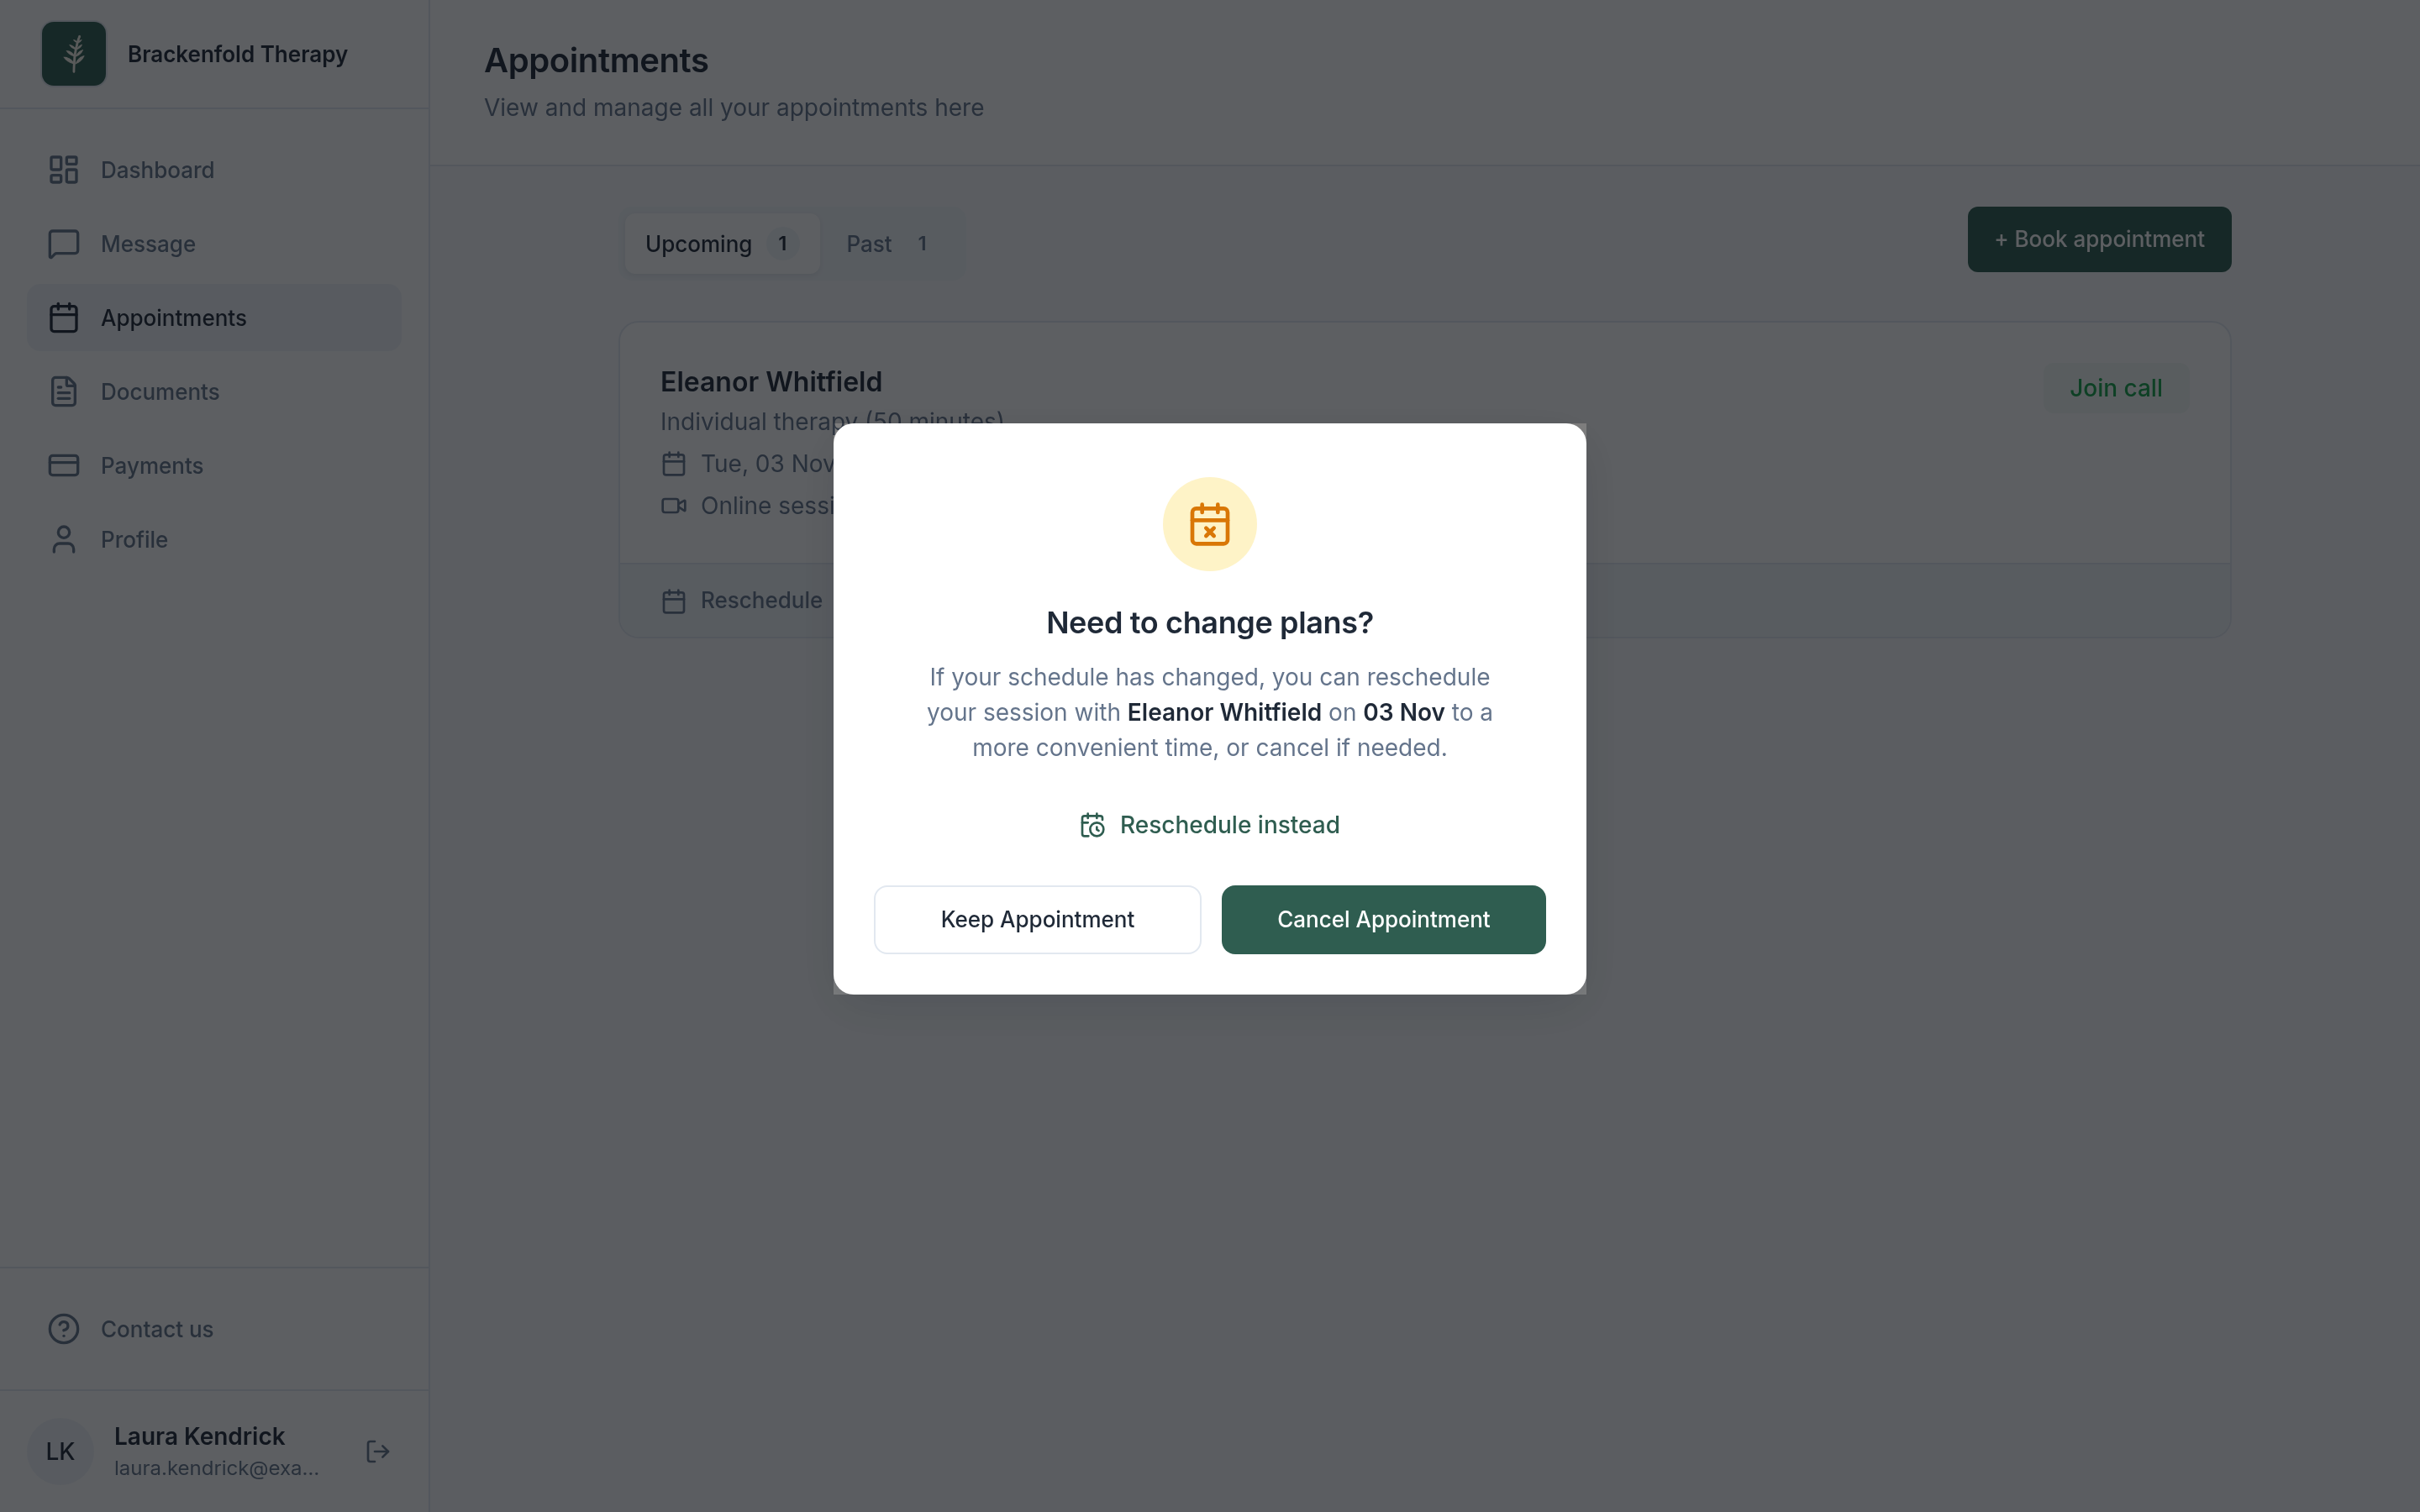
Where a change is allowed, the client sees Reschedule and Cancel on the appointment in their portal; inside your time limit, a note asks them to contact the practice instead. For a paid appointment, the client is asked to contact you about a refund; cancelling does not refund automatically. See Cancellations and no-shows for handling cancellations yourself.
What you are notified of
- Every online booking appears in your in-app notifications, as New client booked for someone new or New appointment from for an existing client, and on the client's record.
- For email as well, go to Settings, My settings, Notifications and tick the Email column for Appointment booked, Appointment cancelled and Appointment rescheduled.
- Waitlist sign-ups arrive as Waitlist signup from the client's name, sent to the practitioner they chose or to the practice owner.
- The client is sent a confirmation by email, text or both, as ticked for Appointment confirmations under Settings, Practice settings, Notifications.
How blocked time and custom hours change what clients see
- A whole day blocked: clients see no times that day.
- Part of a day blocked: any time that would overlap the block disappears.
- Custom hours on a date: they replace your weekly availability for that date, for the locations and services you chose. On that date, clients booking any other location or service see no times at all.
See Blocking out time and Changing your availability for one week.
If clients see no time slots
When a client has chosen a service and a location and nothing can be booked, the date and time step shows No times to book and says the practitioner currently has no times available to book online. If only the month on screen is empty, they see No times in that month and a Next available card that takes them to the next date with times.
Times are worked out for one practitioner, one service and one location at a time, so a client can see times for video sessions and none for your room, or the other way round. The quickest way to find the cause is to look for yourself: click View booking page on the Booking page card under Public Pages, choose the same service and location the client chose, and look at the dates. You only need to reach the date step; there is no need to book.
Then check these, in this order. The first three are the most common.
- The location is attached to your working hours. Every time range in your weekly schedule has a locations drop-down, with a map pin icon. Clients booking at a location are offered times only in ranges where that location is ticked. Each range keeps the locations that were ticked when you set it up, so a location added afterwards is not included until you tick it. Go to Settings, My settings, Availability, open the map pin drop-down on each range, tick the location wherever you see clients there, and click Save. You will see Availability saved. Keep at least one location ticked in every range.
- The service is offered on that day. The drop-down with a briefcase icon beside each range lists the services you offer during it. A service is offered only in ranges where it is ticked, so a service added after you set your hours, or one you left out of a particular day, has no times. If the drop-down shows a number rather than All, open it and tick the service in each range where clients should be able to book it, then click Save. See Setting your working hours.
- The booking window leaves room. On Settings, My settings, Booking, check the unit beside each number as well as the number. A Minimum Lead Time of 14 days where you meant 14 hours hides the next two weeks. A short Maximum Advance Booking hides everything beyond it, so if your next free time is further away, clients see nothing. A long Buffer Time can use up every gap in a busy week.
- The session fits inside a range. A time is offered only if the whole session ends before the range does, so a 60-minute service is never offered in a 45-minute range. Make the range longer, or offer a shorter service in it.
- Nothing on those dates takes the time away. A whole-day block removes every time that day, and custom hours on a date replace your weekly hours for the locations and services you chose (see the section above). Appointments at any location, and events from a connected Google or Outlook calendar that you show in Therasee, also take their time away.
If the client cannot see the service or the location in the list at all, rather than seeing no times, go back to What needs to be in place at the top of this article: the service must be offered to that kind of client in What clients can book, and the location must be open to clients on Locations and ticked under Where clients can book you.
Once you have saved a change, the client can go back a step and choose the service or location again to see the new times.
Was this helpful?