Adding your booking page and client portal to your website
Find the links to your booking page, contact form and client portal, switch the pages on, and add a Book now button to WordPress, Wix, Squarespace or any other website.
Updated 4 November 2026
Your practice has its own public pages: a front page, a booking page, a contact form and the client portal sign-in. Linking to them from your website or email signature lets new clients book or get in touch without emailing you first.
The links you can share
Every link starts with your practice URL, which looks like portal.therasee.com/your-practice.
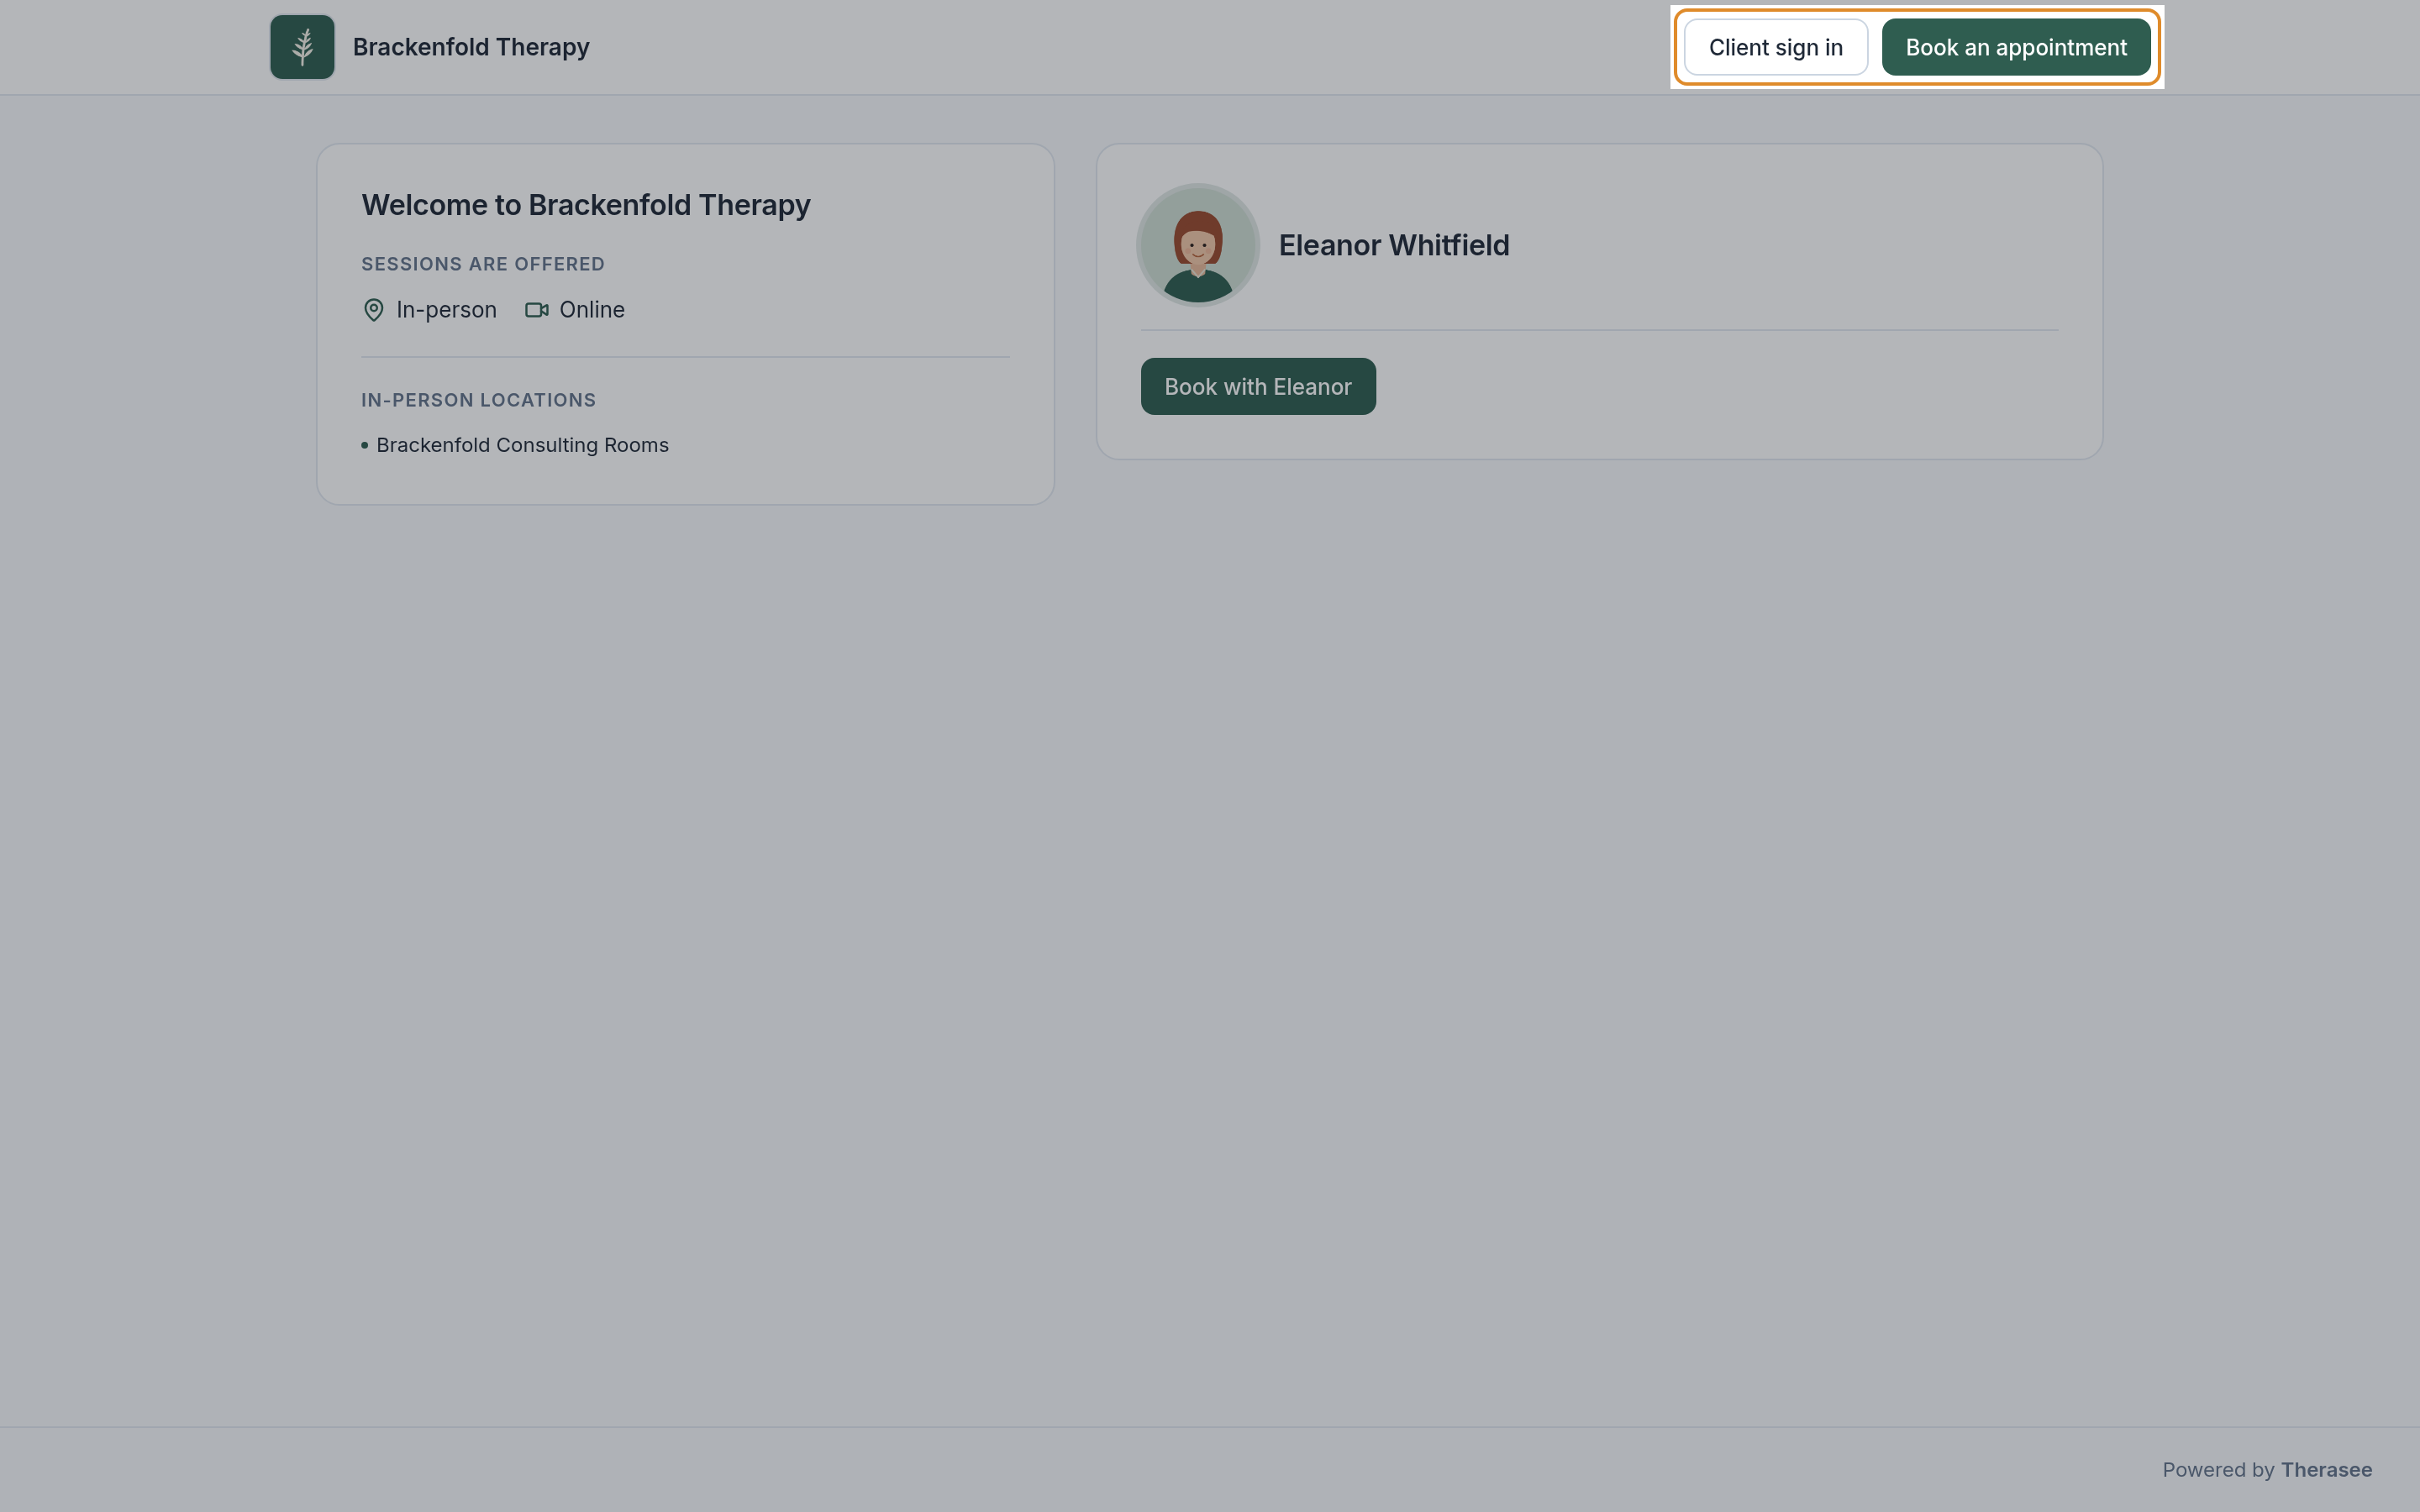
- Front page: portal.therasee.com/your-practice. A welcome page showing your practice, your practitioners and how sessions are offered, with buttons for Book an appointment, Client sign in and Contact (each one appears only when that page is switched on). This is the best single link for a website.
- Booking page: portal.therasee.com/your-practice/booking. Takes visitors straight into booking. Use it for a Book now button.
- Contact form: portal.therasee.com/your-practice/contact. For people who want to ask a question before booking.
- Client portal: the front page address. Existing clients use its Client sign in button.
The waitlist does not have a link of its own. When your practice is marked as at capacity, the booking page shows new clients the waitlist instead, so your booking link keeps working either way.
Copy your links
- Go to Settings > Practice profile. The Overview tab opens.
- Scroll to the Practice URL card. On the right, under YOUR CLIENT LINKS, you see a row each for Booking page, Contact form and Client portal, with the path beside it.
- Click the copy icon at the end of a row. You see a message such as Booking page link copied, and the full address is ready to paste. The open icon beside it shows the page in a new tab, so you can check it first.
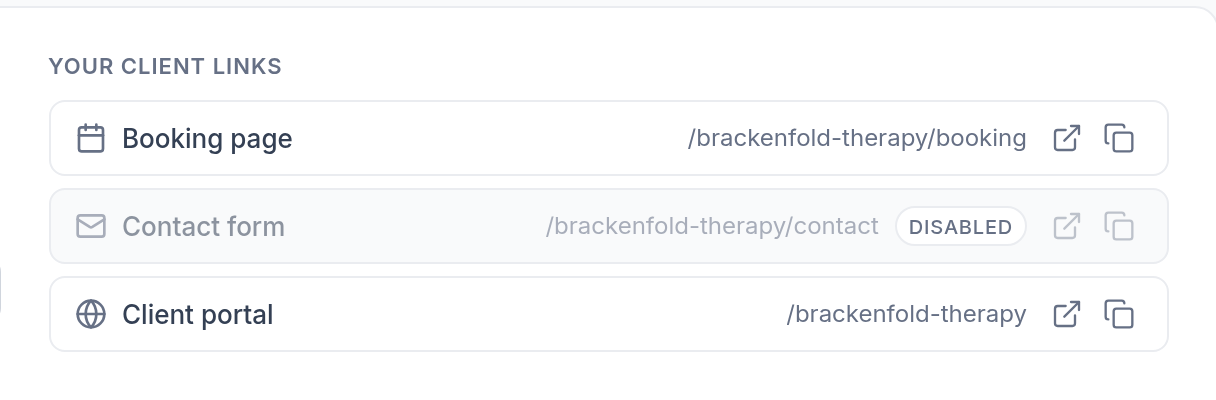
A row marked Disabled is a page that is switched off; see the next section.
You can change the name in your practice URL in the same card, under URL NAME. Links use the saved name, so if you change it later, update the links on your website, email signature and anywhere else you have shared them.
A link for one practitioner
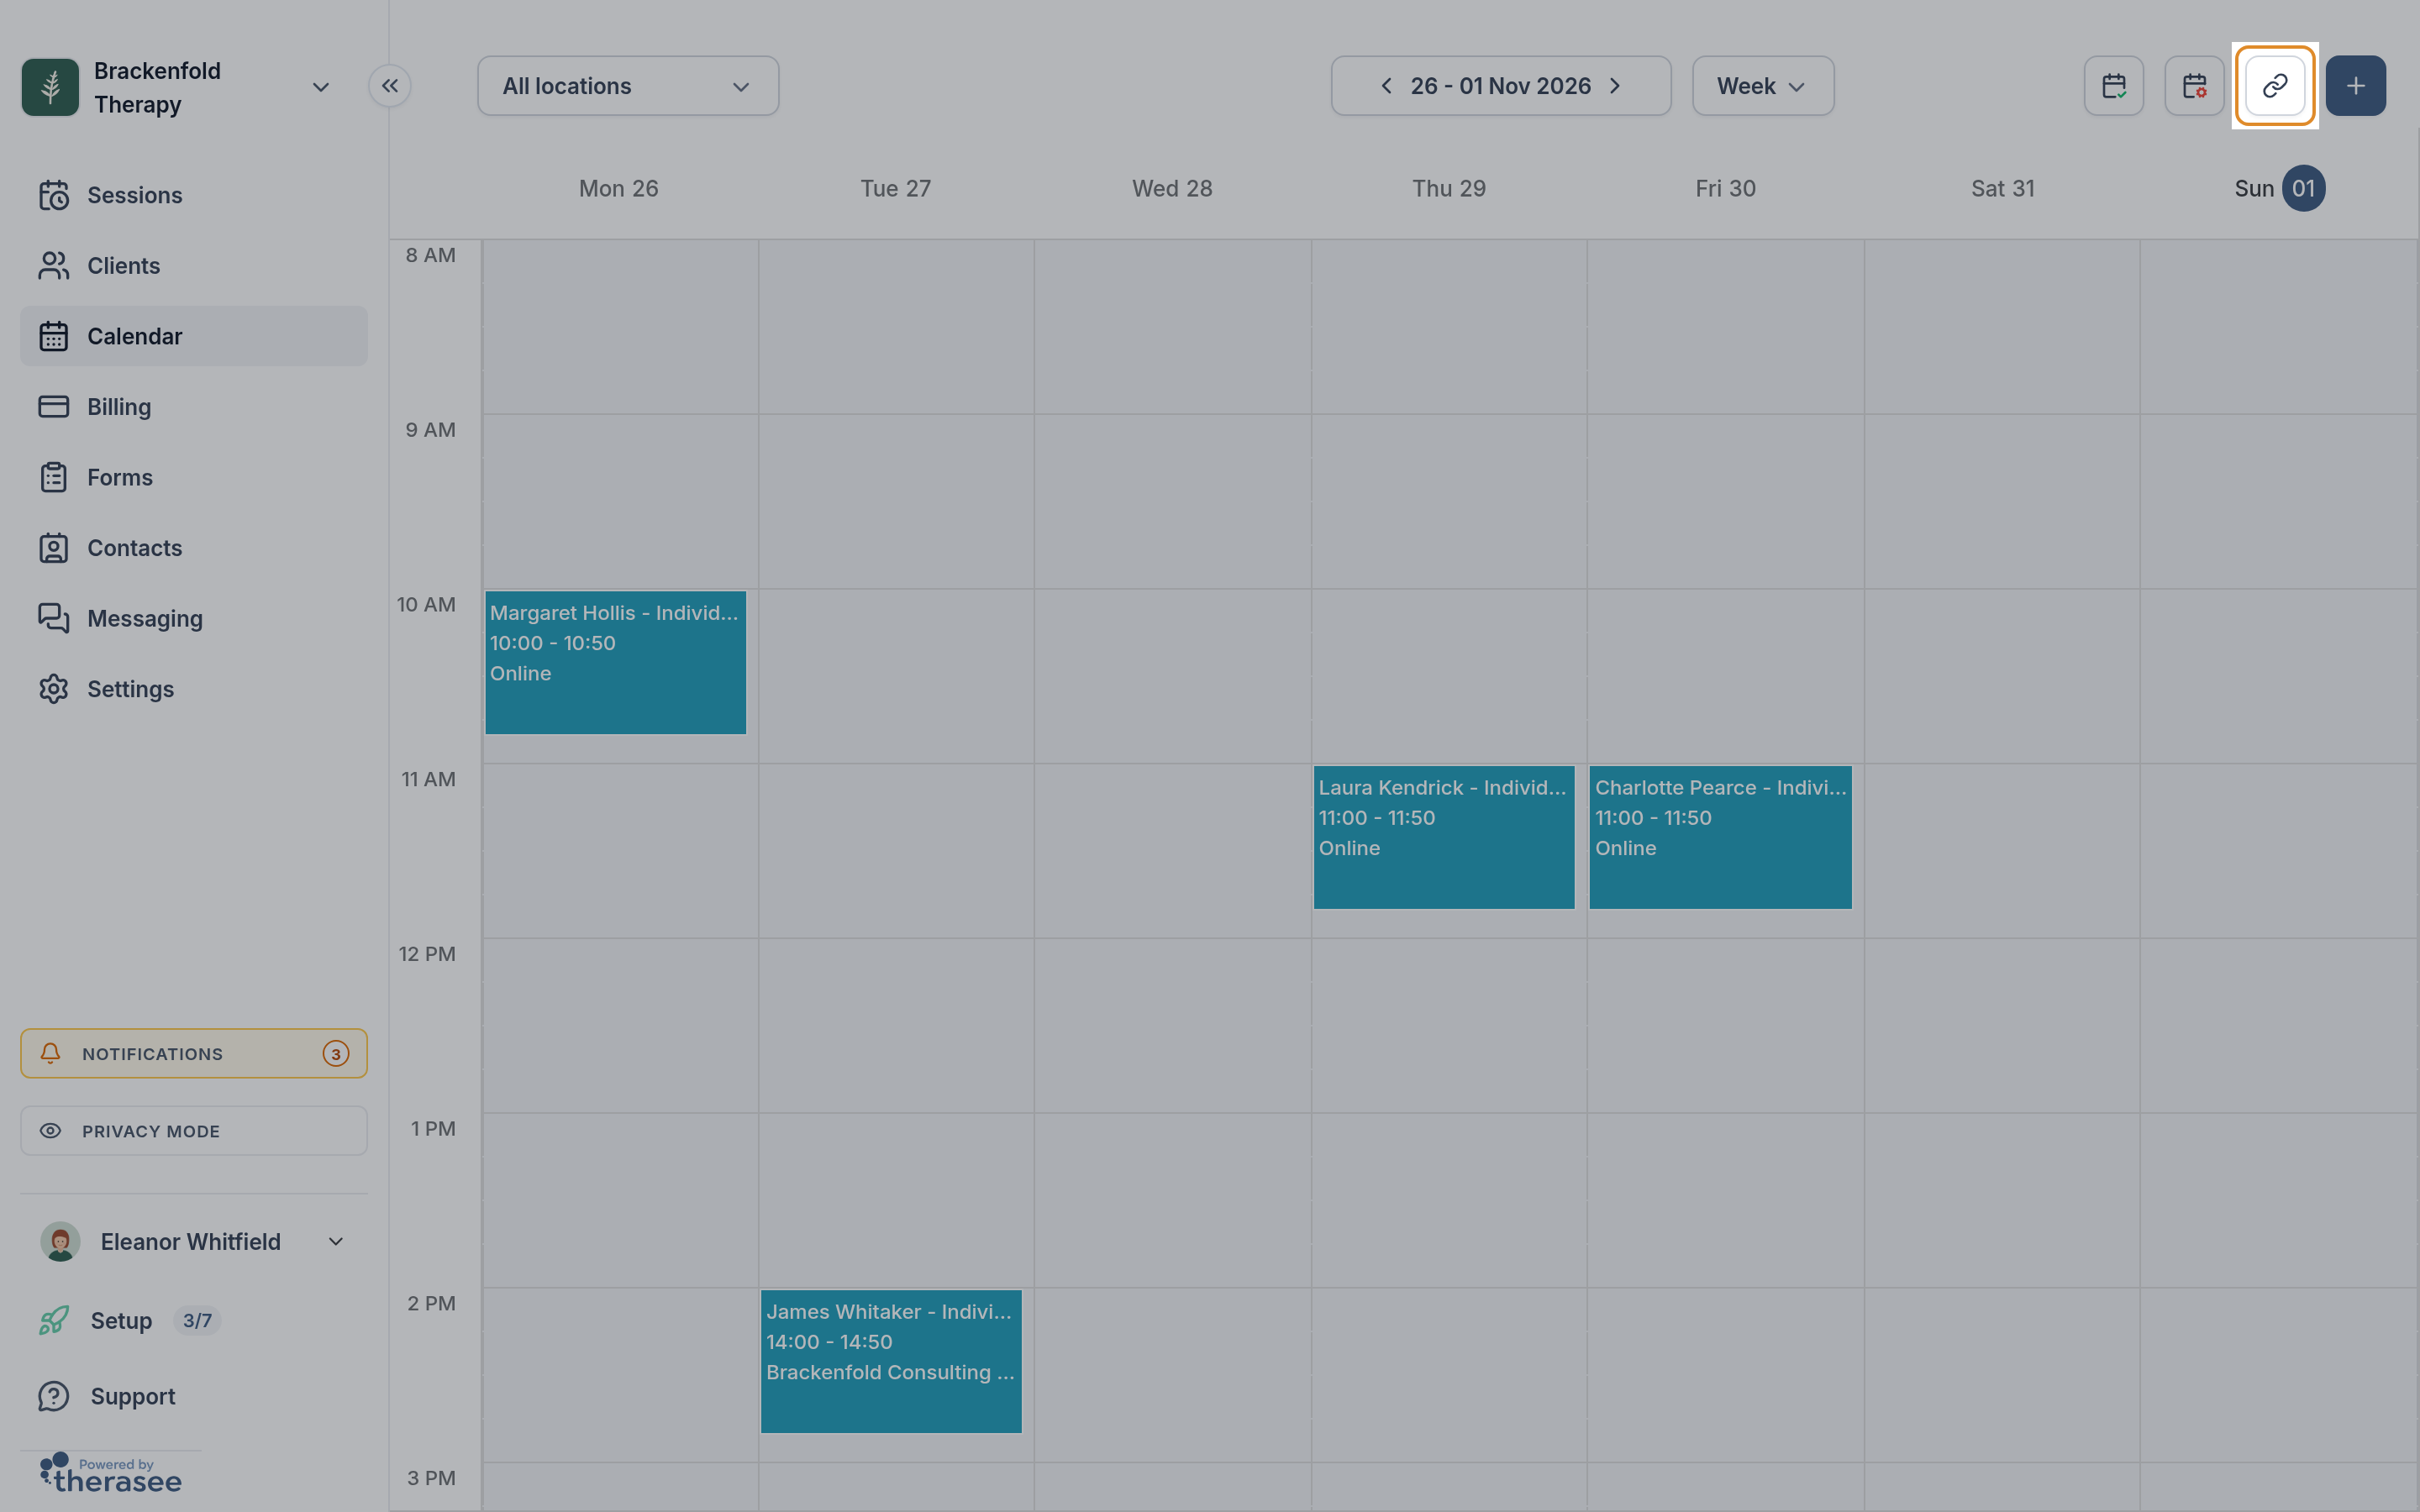
In a practice with several practitioners, you can link to one person's booking page so visitors skip choosing a practitioner. Each practitioner can copy their own with the link icon at the top of the Calendar (tooltip Booking Link for and their name). Practice managers can also copy it from Settings > Users & Teams, where the Booking URL column has a Copy link button for each practitioner who takes bookings.
A link for one service
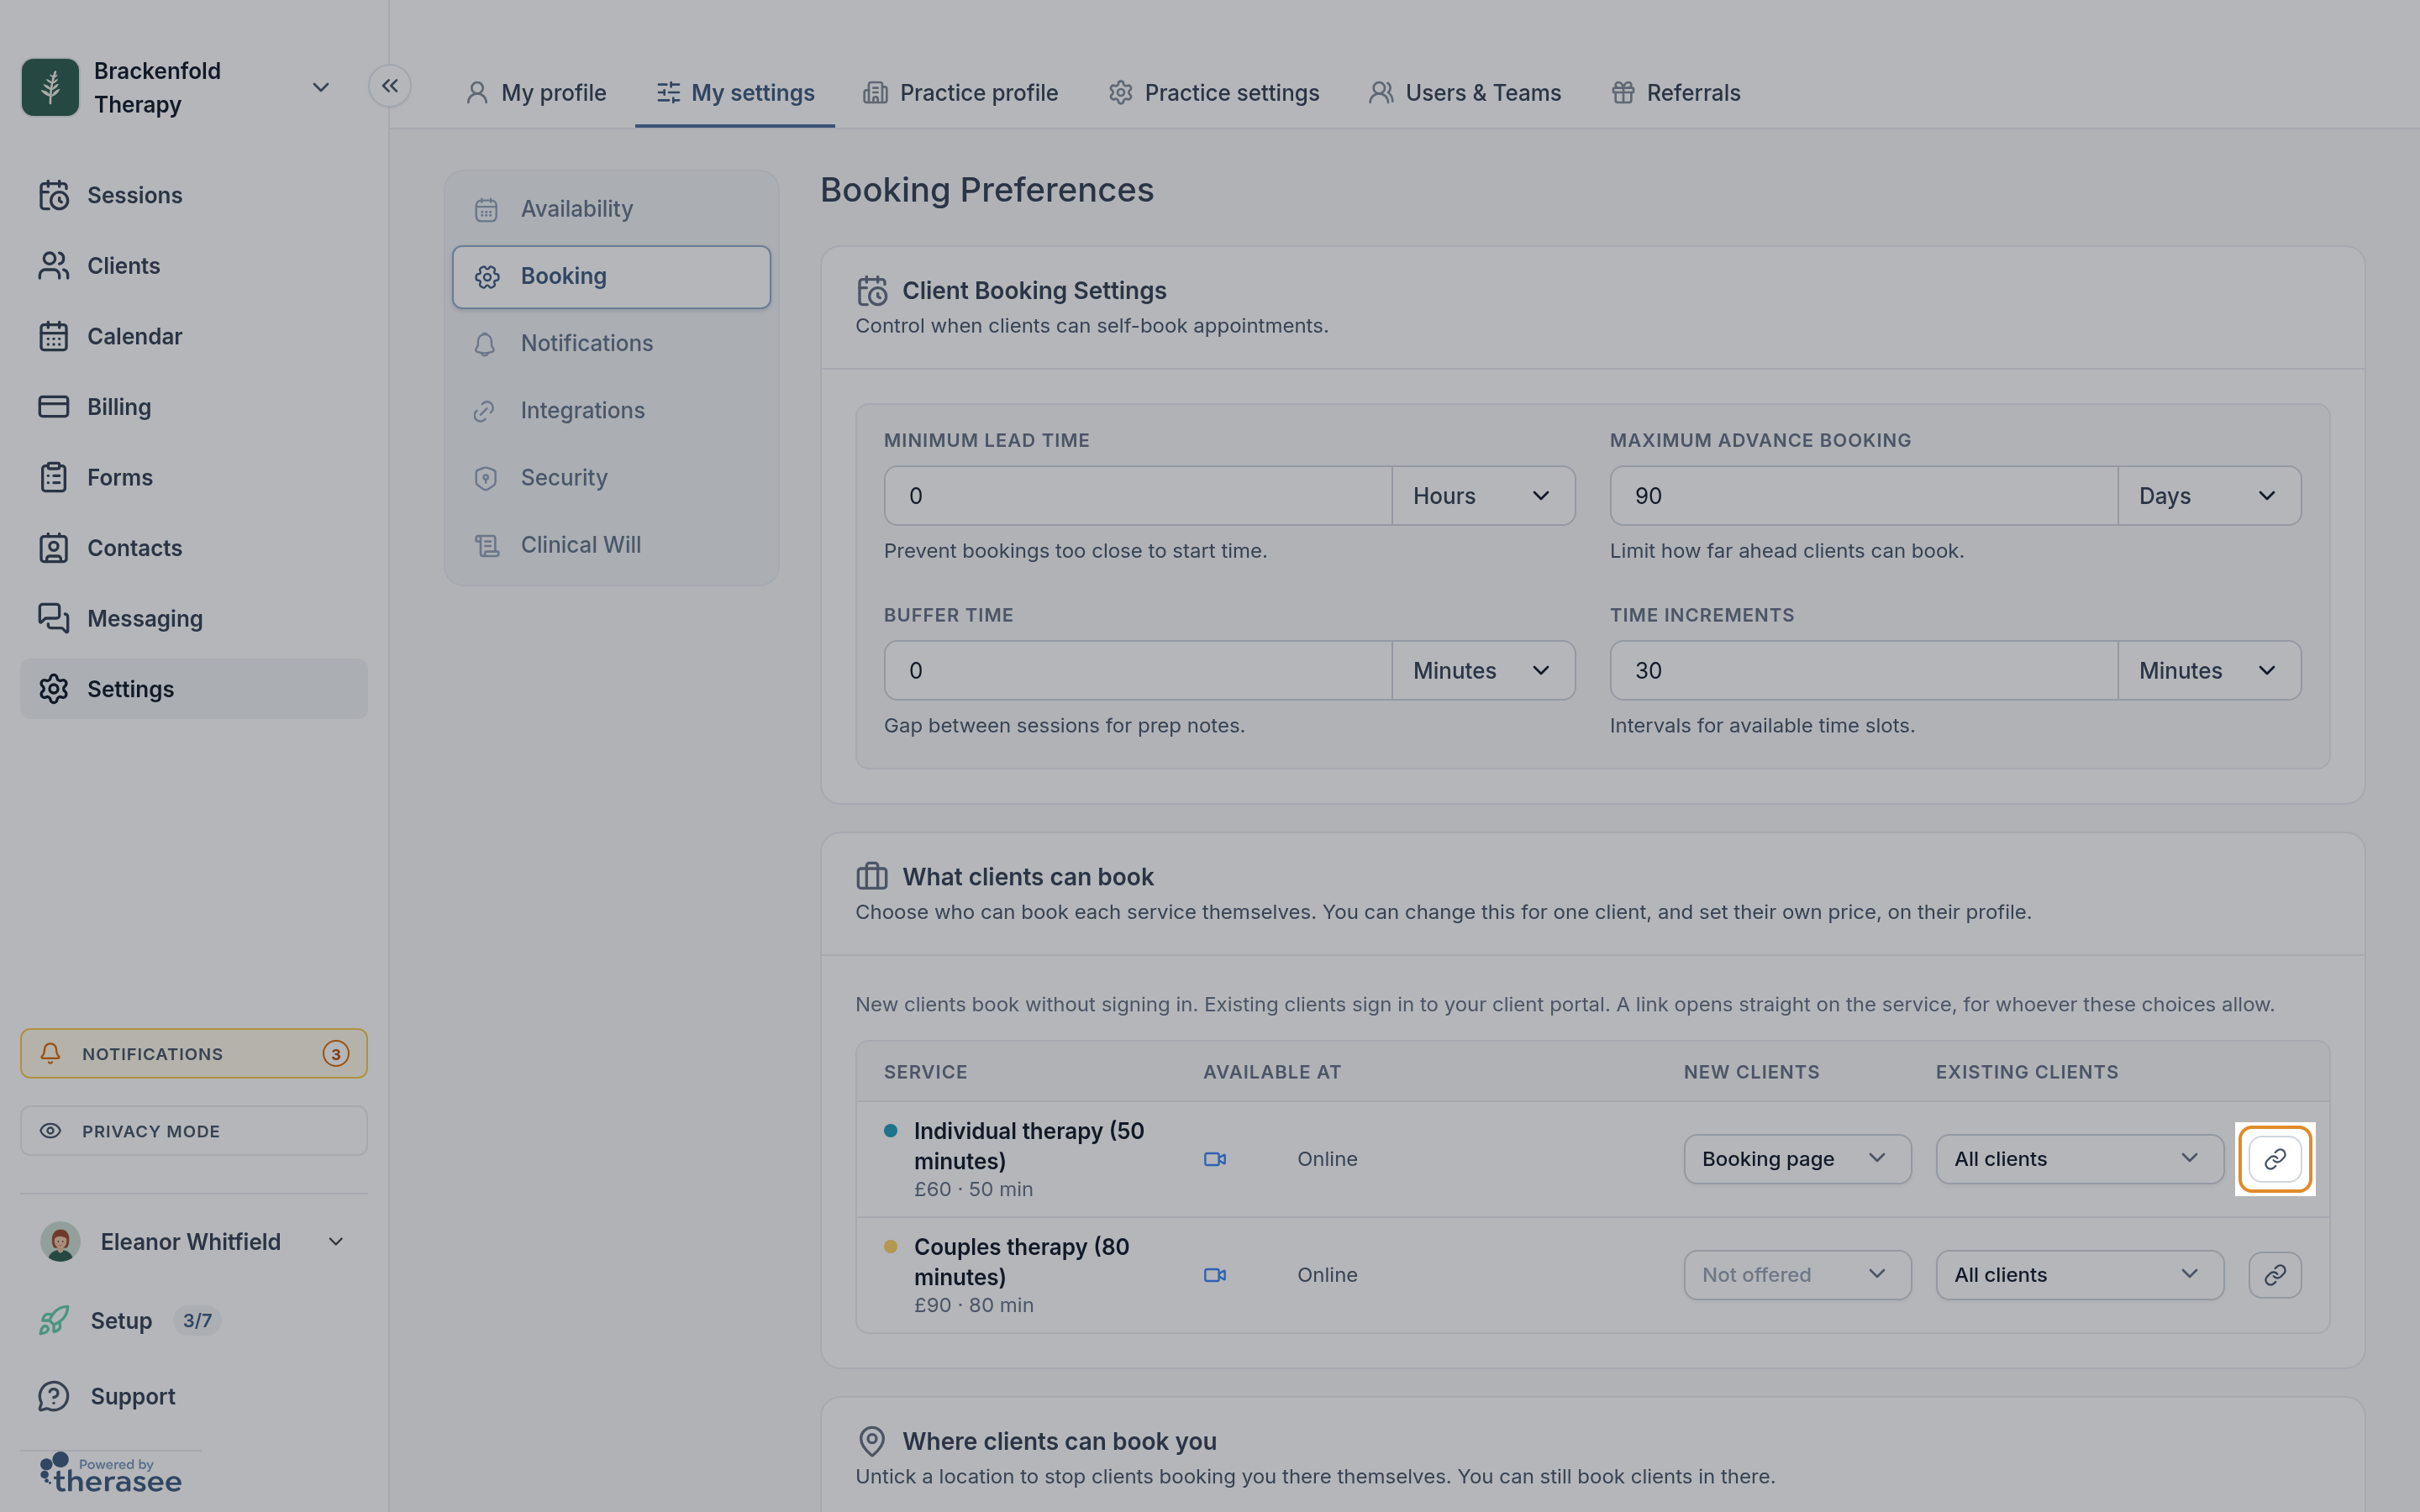
You can also link straight to one service, such as a free first consultation, so visitors skip choosing it. Go to Settings, My settings, Booking and find the What clients can book card. Click the copy icon at the end of the service's row (tooltip Copy booking link). The link opens your booking page on that service, with you as the practitioner. To keep a service off the booking page but bookable from its link, set New clients to Link only for that service.
Switch the pages on
- Go to Settings > Practice profile > Public Pages.
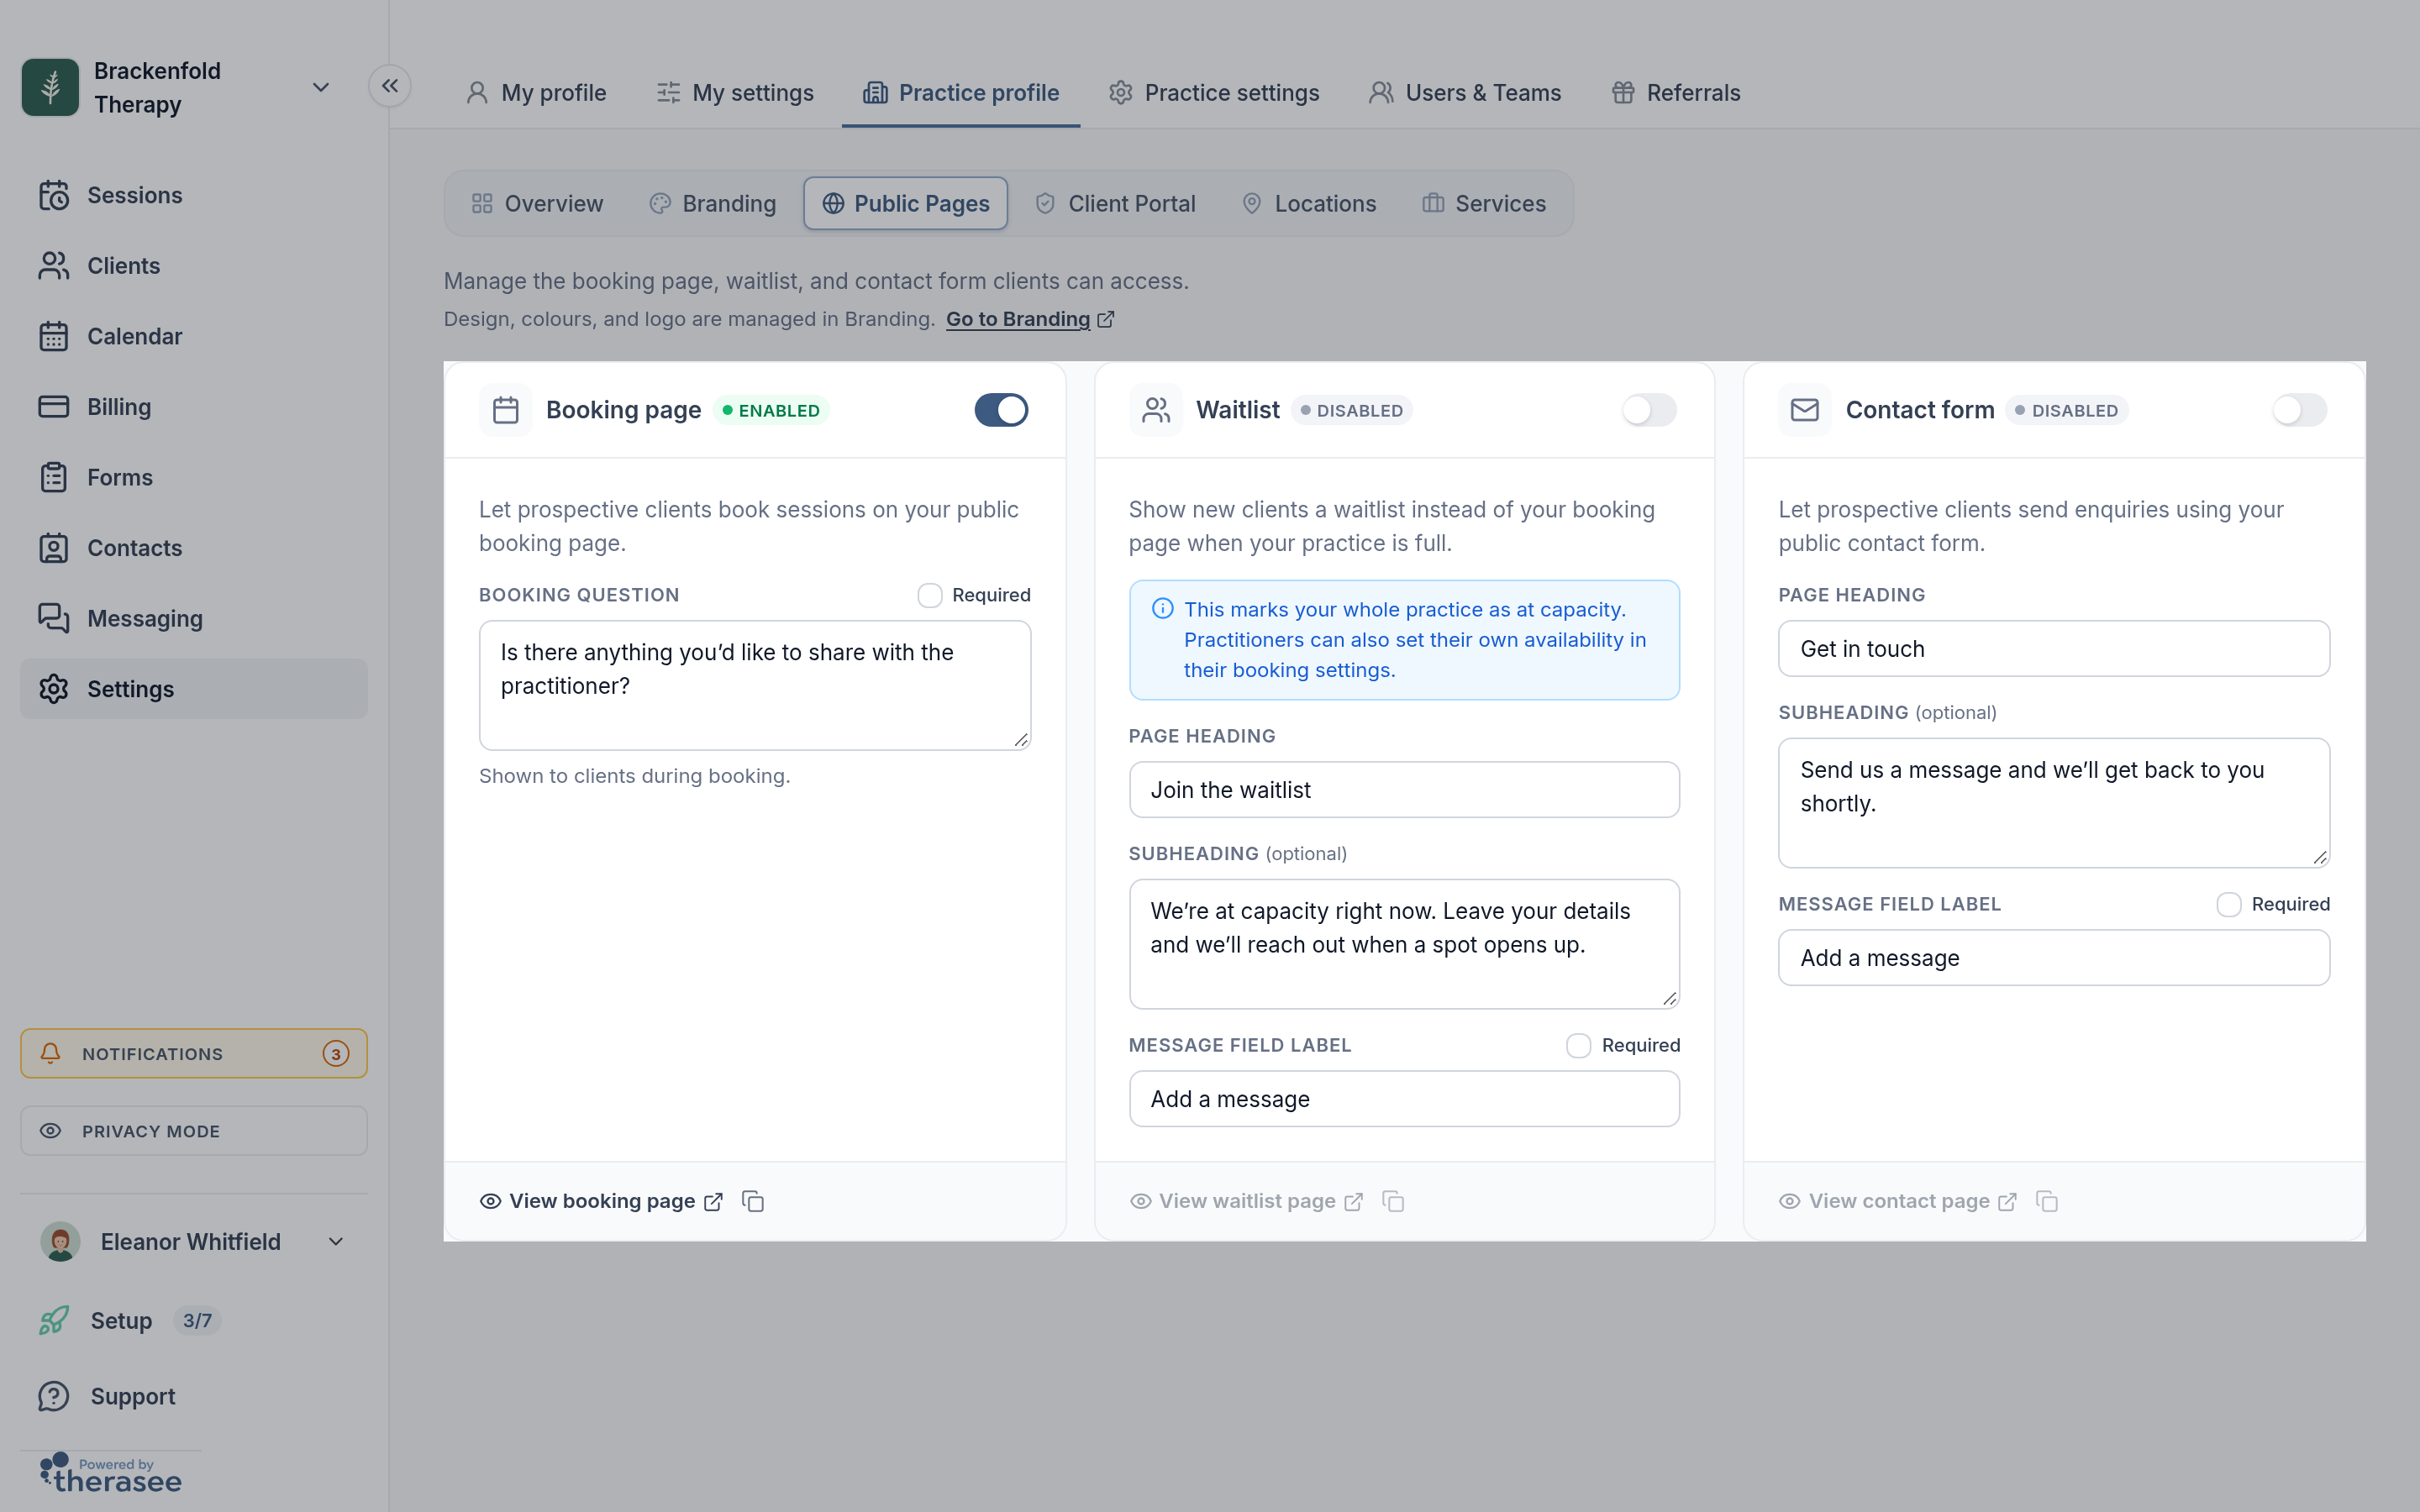
- You see three cards: Booking page, Waitlist and Contact form. Each has a switch at the top right and a badge showing Enabled or Disabled.
- Turn on the switch for each page you want to use. The change saves straight away, and you see a message such as Booking page enabled or Contact form enabled.
- Use View booking page (or View contact page) at the foot of a card to see the page as a visitor does; the copy icon beside it copies its link.
A few things to know:
- The booking page switch controls online booking as a whole. For clients to see times, your services, locations and availability also need to be set up; see Letting clients book appointments.
- The waitlist needs the booking page on. Turning on Waitlist marks your whole practice as at capacity: the booking card's badge changes to At capacity, and new clients who follow your booking link are asked to leave their details instead of booking. Existing clients can still sign in and book as usual.
- The client portal has its own switch, on the Client Portal tab. The Client sign in button appears on your front page only while the portal is on. See Turning on the client portal.
- If a page is off, anyone following its link sees a simple page saying the practice could not be found, with none of your details on it.
Each card also lets you change the wording visitors see, such as the Booking question asked during booking. Edit the text, then click Save in that card.
When someone sends the contact form or joins the waitlist, they are added to your client list with the status Prospect or Waitlist, and you get a notification in Therasee.
Add a Book now button to your website
Every website builder has a button or link block. The steps are the same everywhere:
- Copy your booking page link (or your front page link) as described above.
- In your website editor, open the page where the button should go.
- Add a button. Give it a clear label such as Book a session or Book now.
- Set the button's link to the address you copied. Paste the whole address, including https://.
- If the builder offers it, choose to open the link in a new tab, so visitors keep your website open behind the booking page.
- Publish or save your website, then click the button on the live site to check it goes to the right page.
Where to find the button in the most common builders:
- WordPress (block editor): add a Buttons block, type the label, then use the link icon in the block's toolbar to paste your address. The link options include opening in a new tab.
- Wix: add a Button from the Add panel, then choose the link option on the button, pick Web address, paste your address and choose to open it in a new window.
- Squarespace: add a Button block to a section, type the label, and paste your address into its link field. Tick the option to open the link in a new tab.
Other builders work the same way: add a button or link, paste the address, publish.
Can I embed the booking page inside my website?
No. Your booking page, contact form and client portal always open as their own pages, on their own secure address; they cannot be placed inside another website in a frame or widget. Use a button or link instead, opening in a new tab so your own site stays one click away.
What your visitors see
Your front page shows your practice name and logo, your practitioners and how sessions are offered, with the booking, sign-in and contact buttons at the top.
The booking link opens the booking steps straight away. Nobody is asked to sign in or create an account before they have chosen a time: a new client picks a practitioner (if you have more than one), a service, a location and a time, then enters their details. An existing client can sign in on the details step instead.
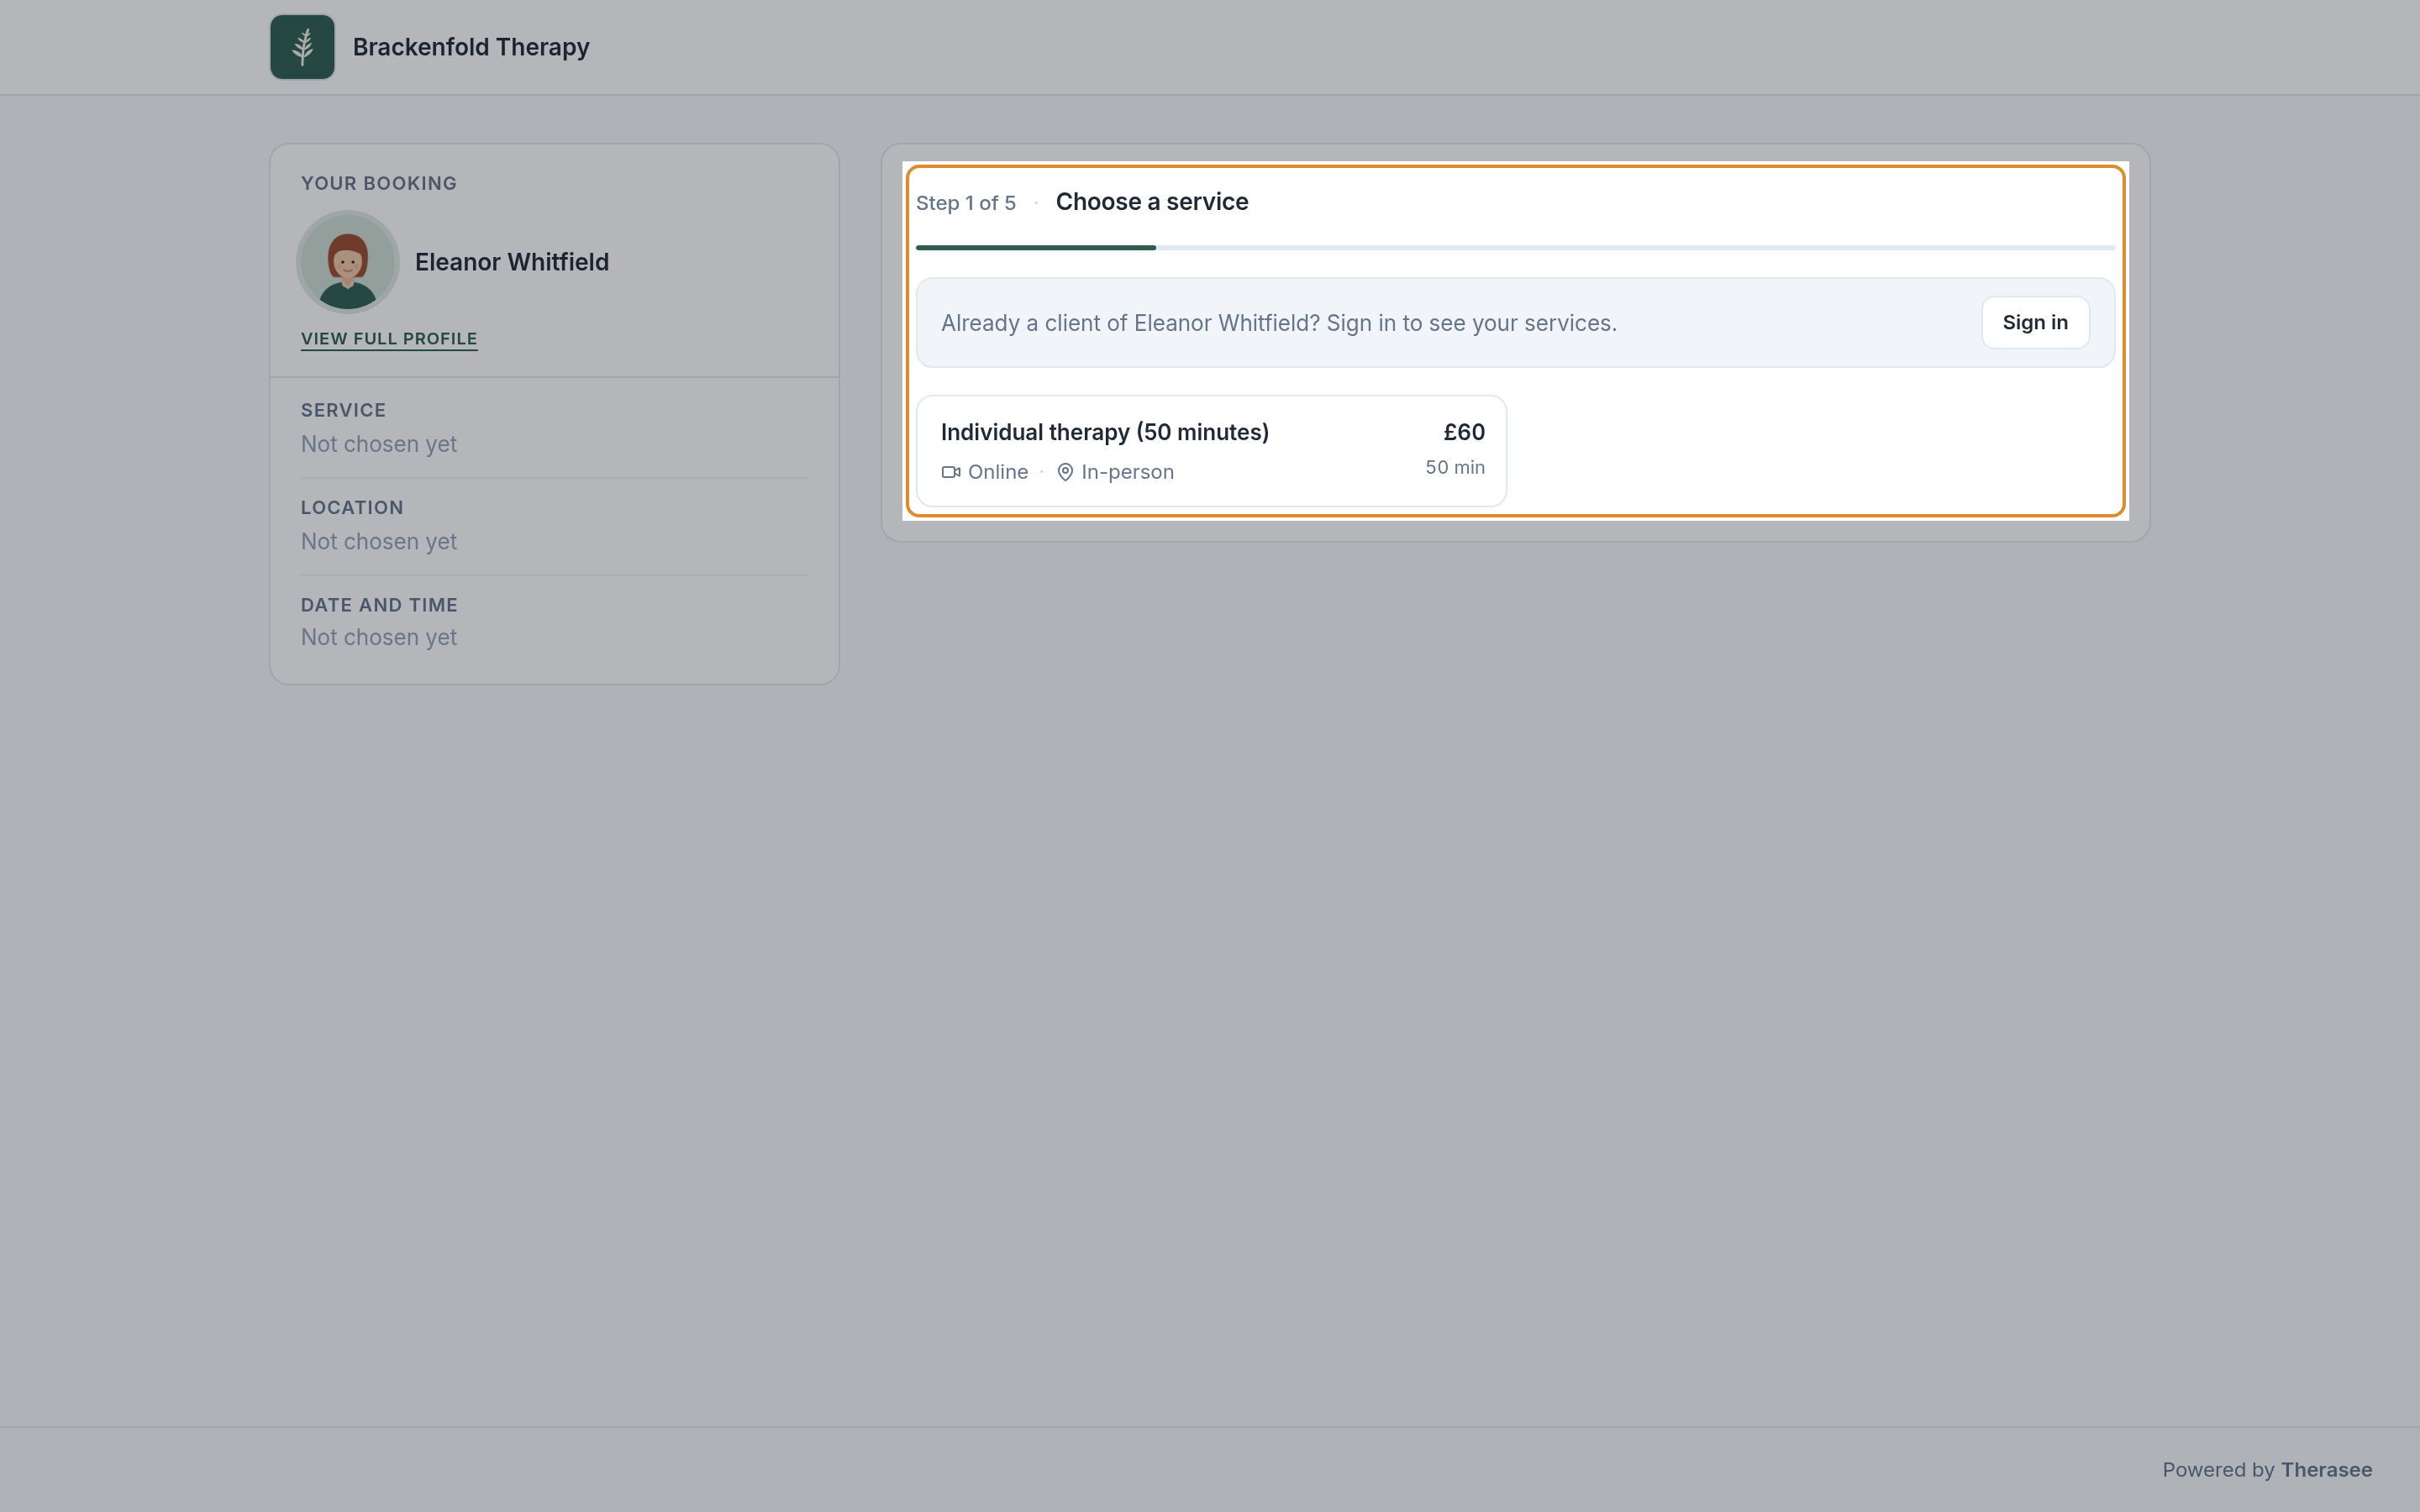
Every service you offer to new clients on the booking page is listed, and a free service is shown as Free. If you offer a free first consultation, set it up as a service with a price of 0, and under What clients can book set its New clients choice to Booking page; it then appears on your booking page for new enquiries. To send visitors straight to it, use its own link (see A link for one service above). See Setting up your services.
Your branding carries over
Your public pages and client portal use your practice's name, logo and brand colour, so visitors arriving from your website still feel they are with your practice.
- Set your Logo and Square icon on the Overview tab of Practice profile.
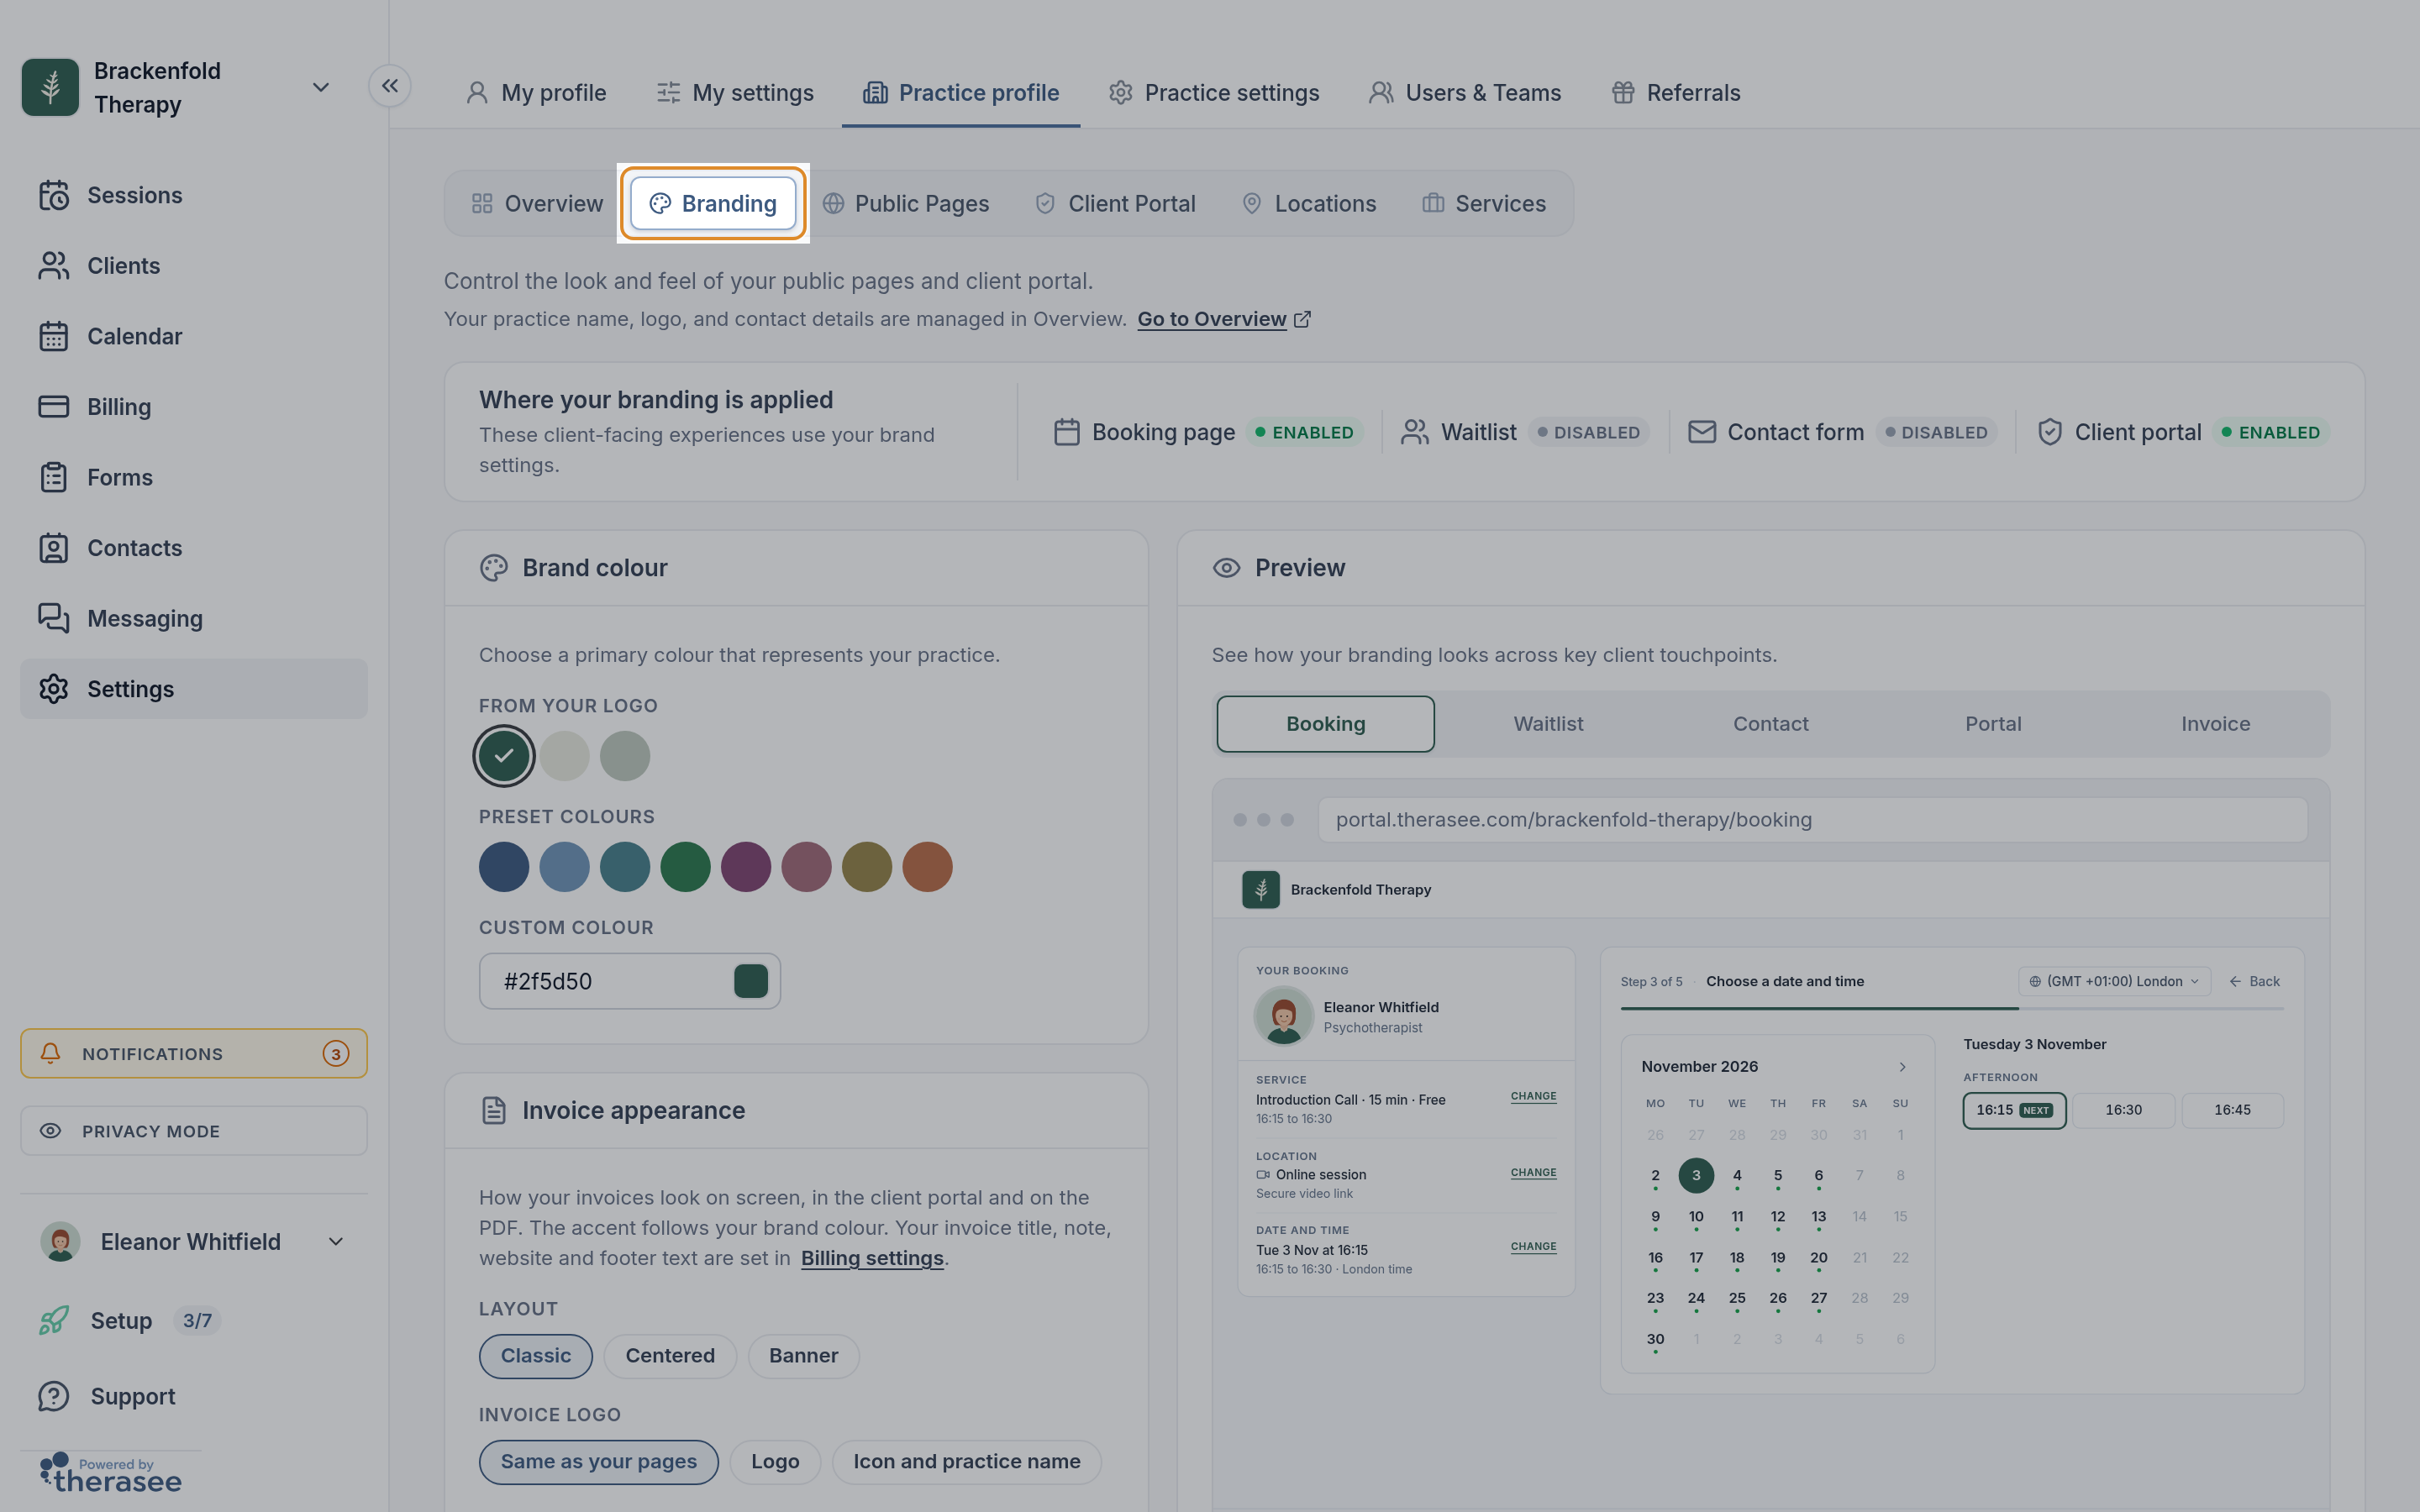
- Set your Brand colour on the Branding tab. You can pick a colour taken from your logo, a preset or your own colour; a colour matching your website makes the change of page feel seamless. The Preview shows how your booking page, contact form and client portal will look.
Other places to share your link
The same links work anywhere: add "Book a session:" and your booking link to your email signature, paste it into the website field of your social media profiles and therapy directory listings, or print your front page address on a card. Any free QR code generator can turn the address into a QR code for leaflets.
Was this helpful?