Working with couples
Keep one shared record for two people seen together: add the couple, book their sessions, give each partner portal access, and choose who receives messages, forms and invoices.
Updated 4 November 2026
When you see two people together, such as partners in relationship counselling, you can keep one shared couple record. The couple is booked, invoiced, messaged and written up once, while each partner keeps their own contact details and portal sign-in.
A couple record or two individual records?
- Use the Couple type when the two people come to sessions together and the work is about them as a pair.
- Use two Individual records when each person has their own therapy with you. A person can have both an individual record and a place in a couple.
- For a child or someone supported by a parent, guardian or carer, use the Dependant type instead: see Working with dependants.
The couple record holds no email address or phone number of its own: everything that goes out is sent to the partners, using their details.
Add a couple
- Go to Clients and select the + button at the top right.
- In the Add client panel, under Client type, select Couple ("two people seen together, with one shared record"). Choose a Status, such as Active.
- Fill in Partner one and Partner two. For each, type their First name, Last name, email and phone number, or select Link an existing client or contact instead and search for them. Each partner needs at least a name.
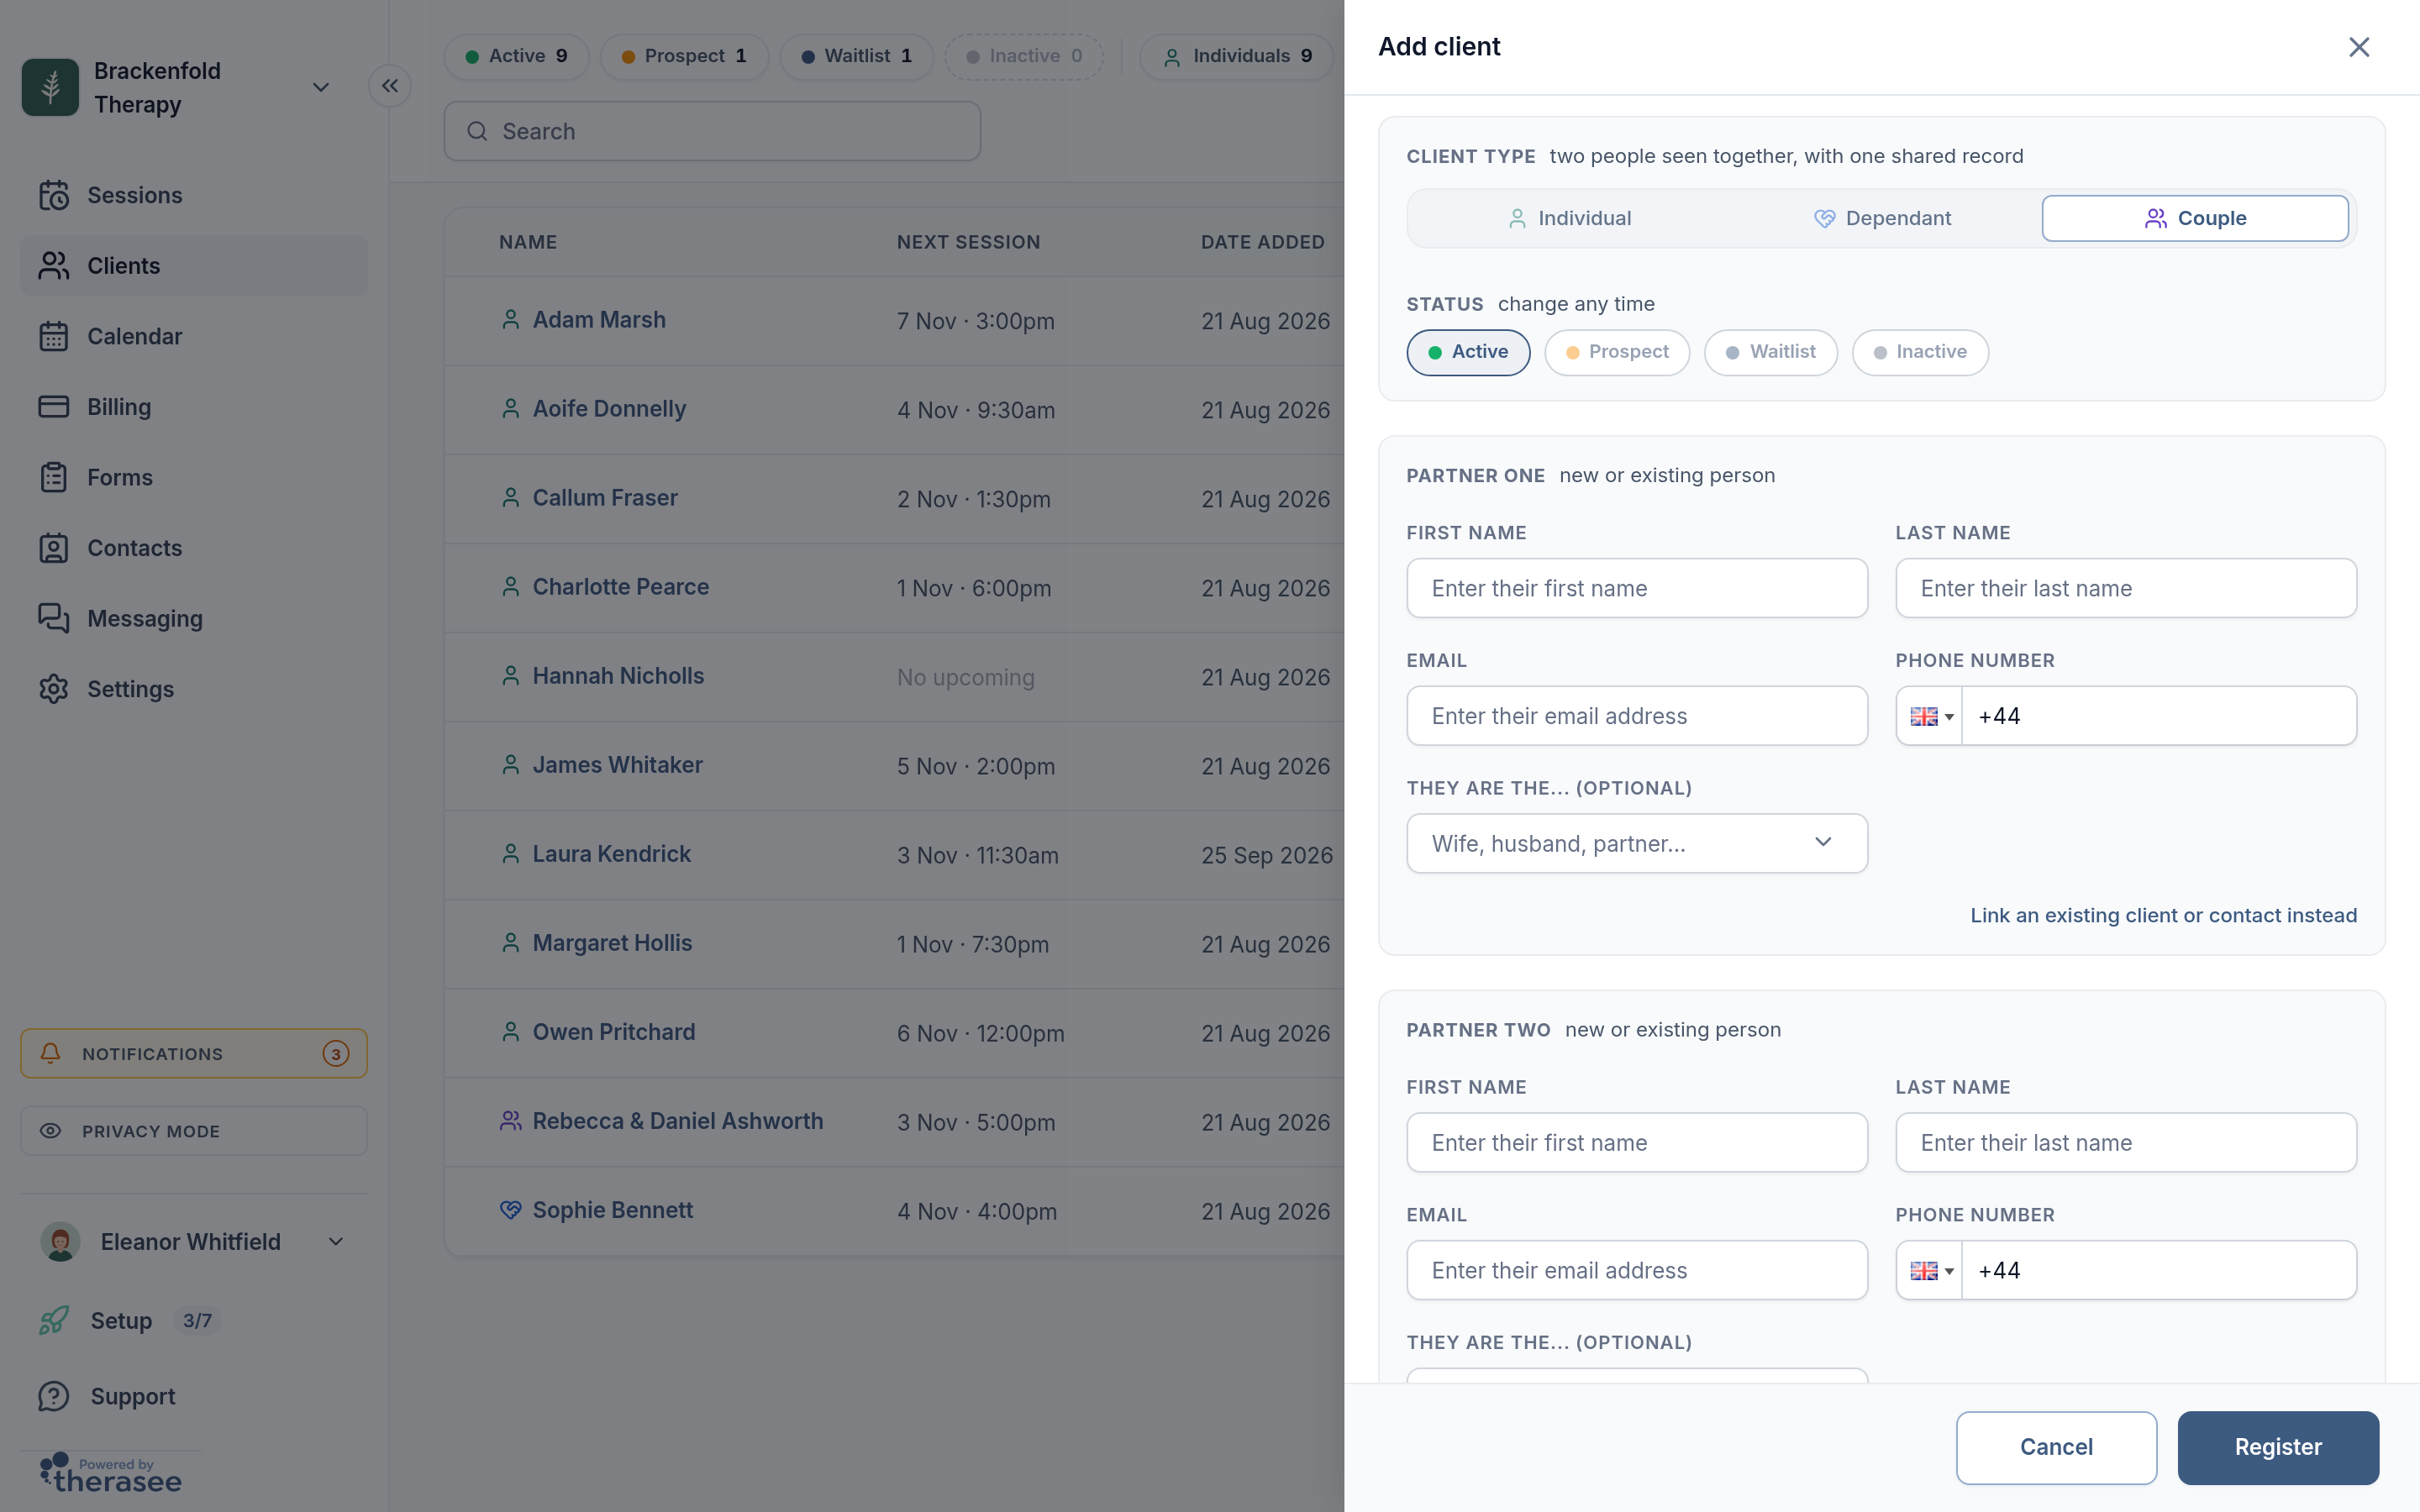
- Check the Record name. It fills itself in from the partners' names (for example "Rebecca & Daniel Ashworth" when they share a surname). It's how the couple appears in search, the calendar and invoices; type over it if you prefer.
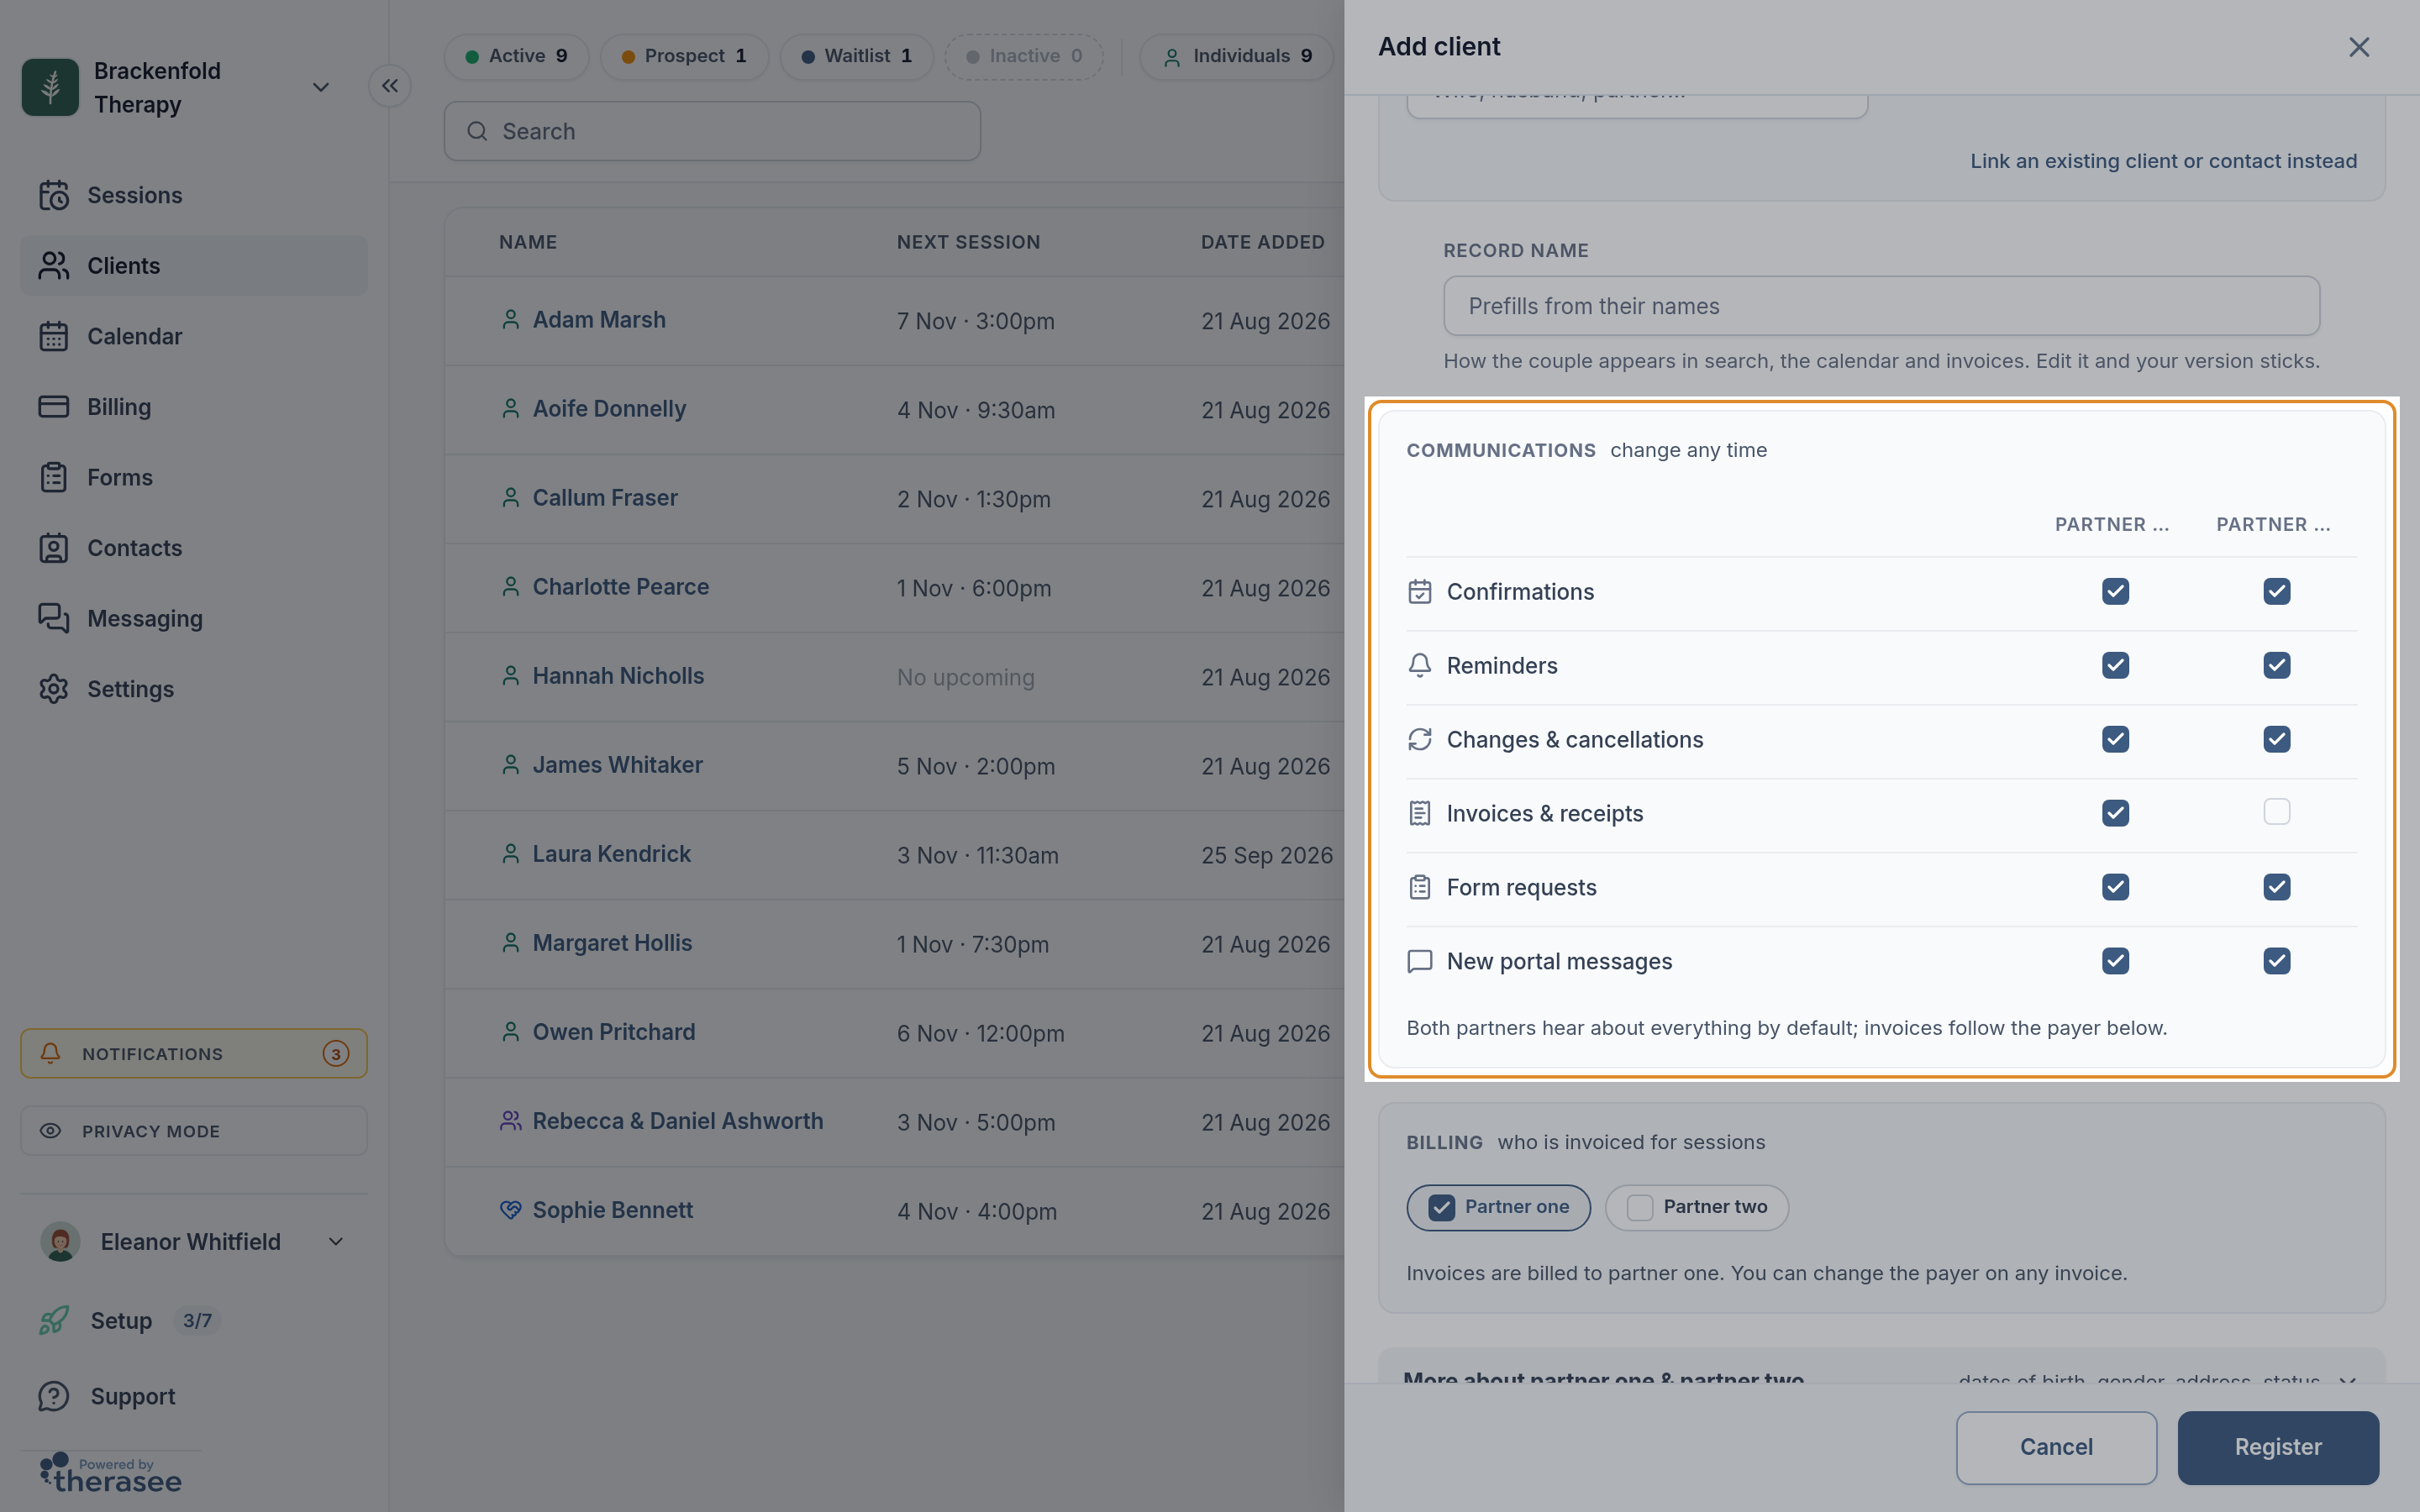
- Under Communications, tick which partner receives each kind of message: Confirmations, Reminders, Changes & cancellations, Invoices & receipts, Form requests and New portal messages. Both partners receive everything to begin with, apart from invoices, which go to the paying partner.
- Under Billing, choose the partner who is invoiced for sessions. The Invoices & receipts row follows your choice.
- Optionally open More about the couple for dates of birth, gender and address (one shared address, or one each if they don't live together).
- Select Register. You'll see Client added.
Adding the couple sends nothing to either partner. The couple appears on Clients with a Couple badge. A partner you typed in is saved as a contact, under Contacts, not as a separate client. If a partner's email or phone is already on your books, you'll be offered Select them instead.
To turn an existing individual client into a couple, open their record, select the pencil on Client details, and under Client type choose A couple. Pick the other partner (add them on the Relationships tab first) and who receives the invoices. Existing appointments, notes, documents and invoices stay where they are.
The couple's record
Open the couple from Clients. The Client details card shows each partner with their contact details, marked Receives invoices or Emergency contact where that applies. Select the pencil to edit either partner, or to change the payer in the Billing card.
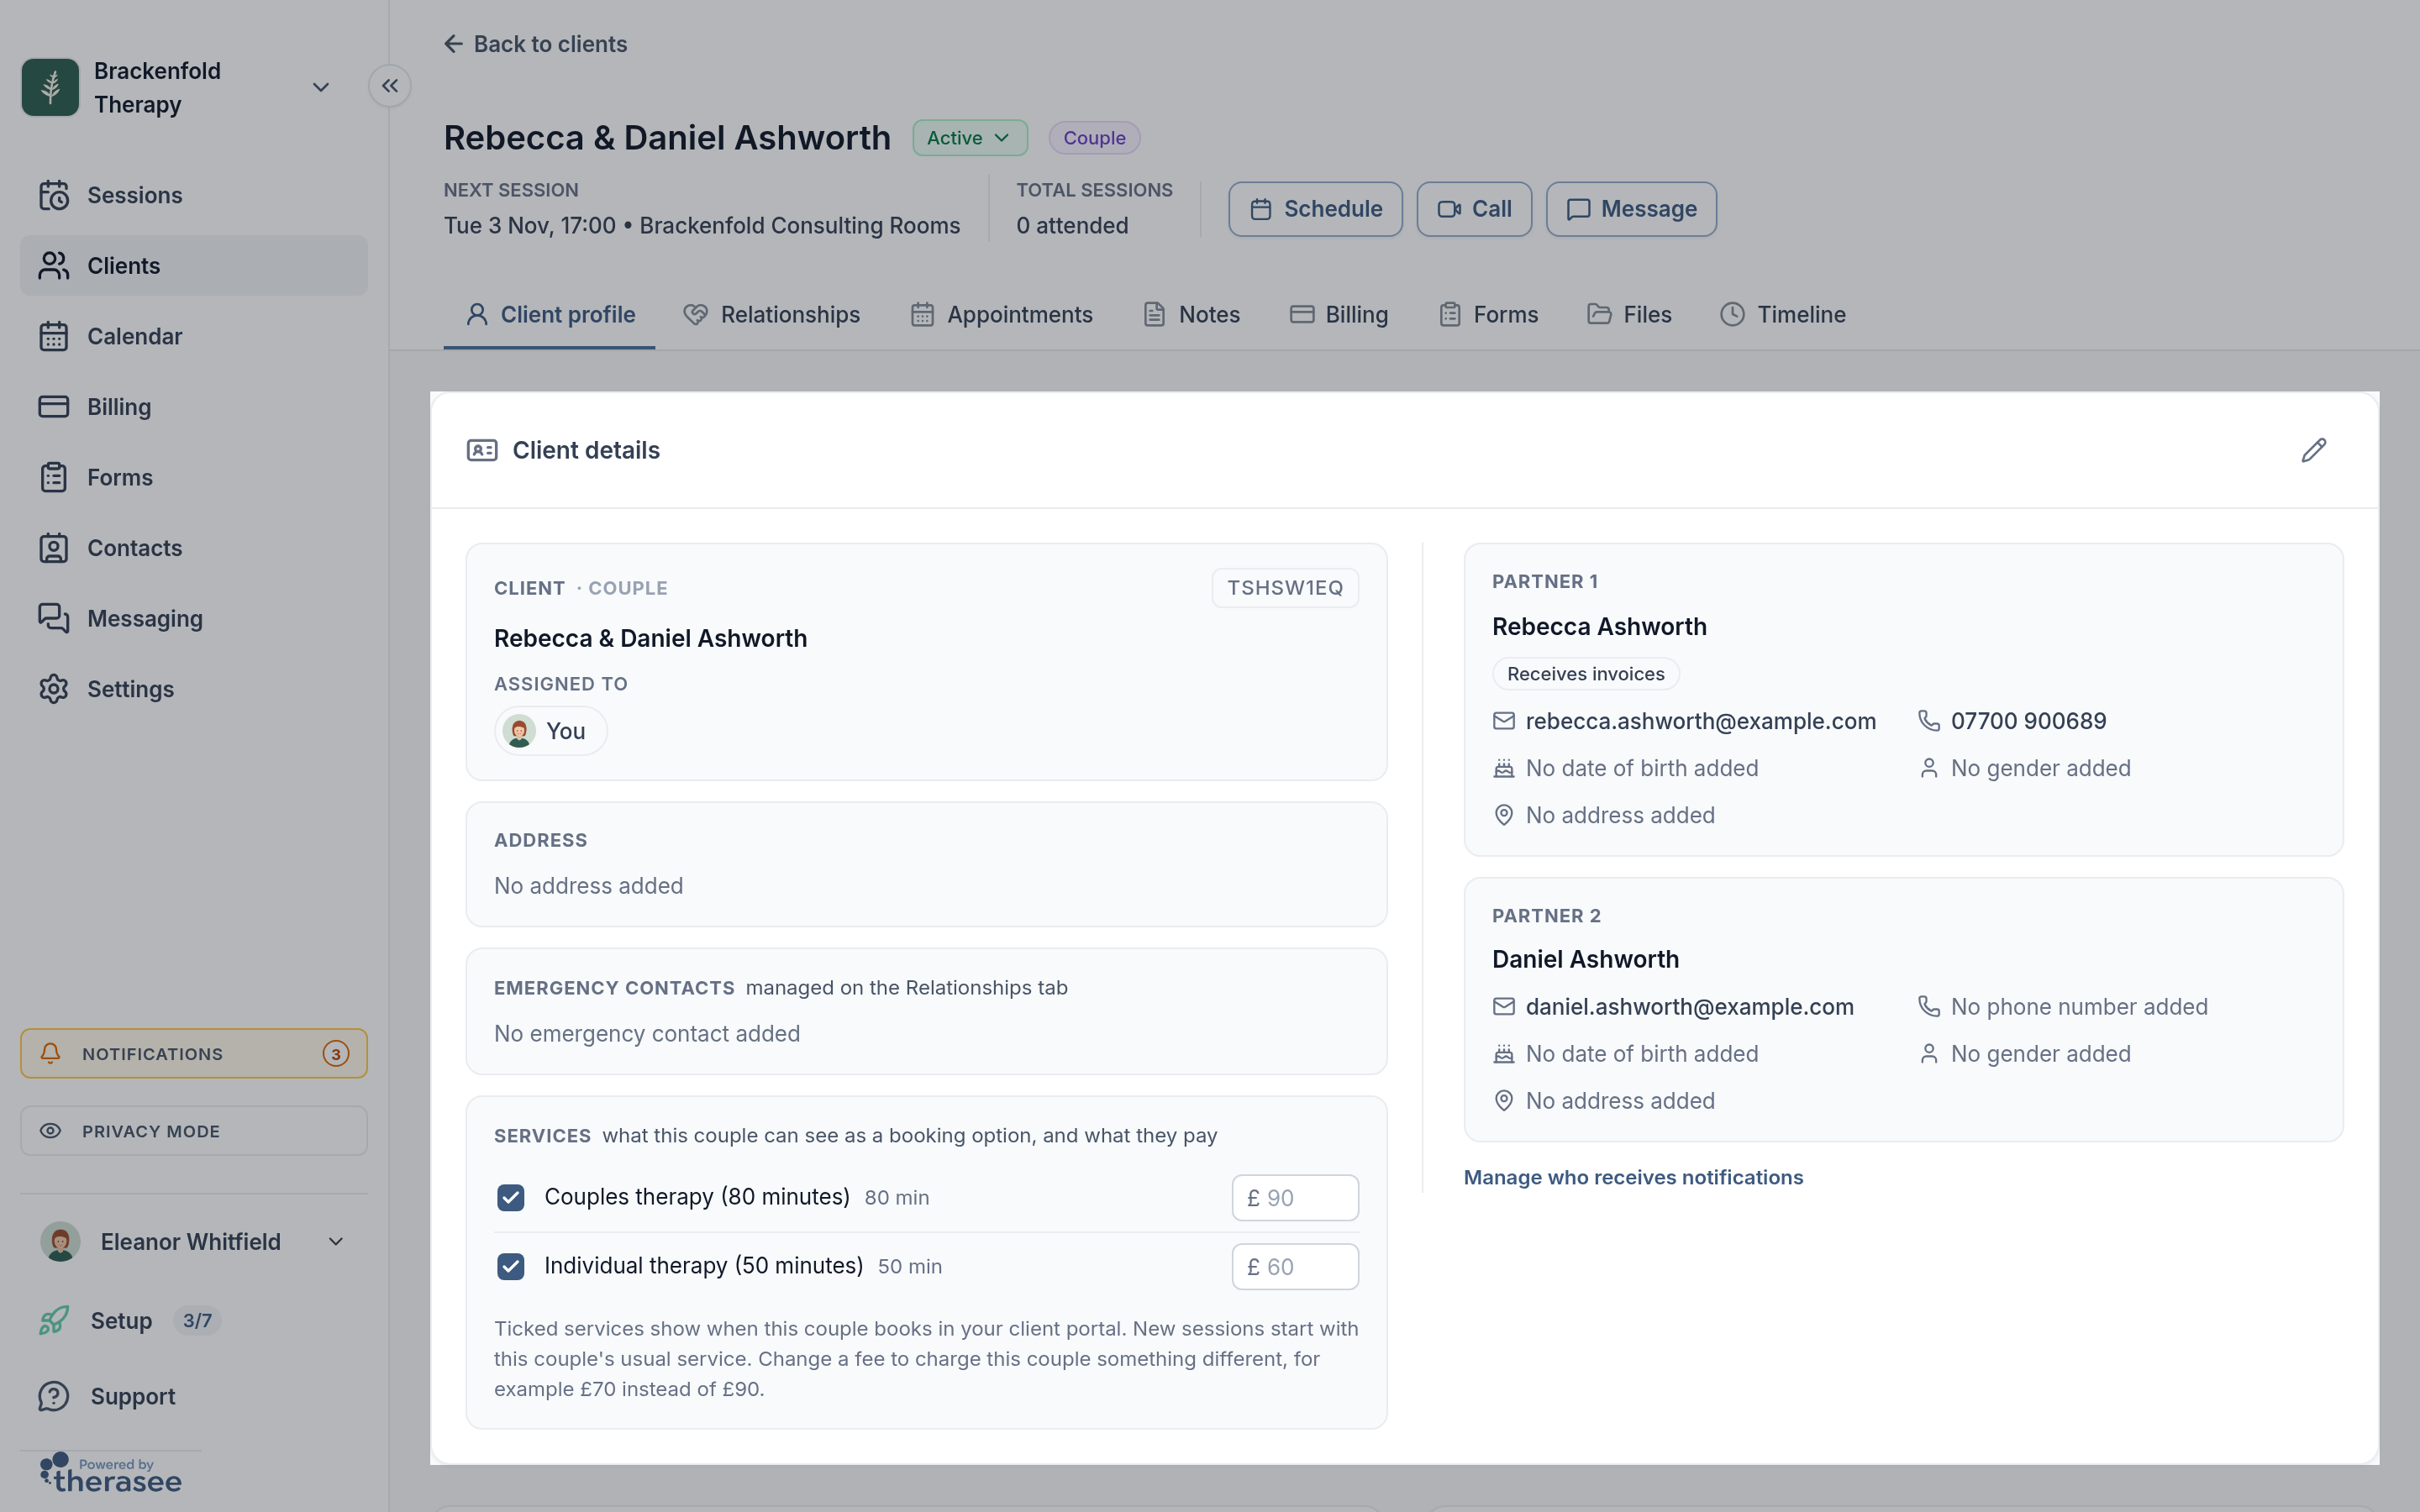
The Notifications card holds the Who receives what table from step 5; each tick saves straight away.
The Relationships tab
The Relationships tab lists both partners, each marked Couple, plus anyone linked to either of them. To add someone, such as a GP, select + (Add relationship). Under Who is this about? pick one partner (the link is saved on their own record) or Both for someone genuinely shared. Then choose an Existing contact or a New contact, set the Relationship and select Add.
The partners themselves are managed from Client details, not from this tab.
Book a couples session
- Start a booking as usual (see Booking an appointment) and pick the couple as the Client.
- Choose the service you use for couples work, so the duration and rate are right (see Setting up your services).
- Check Attending. Both partners are listed to begin with. To see one partner on their own, remove the other with the remove button beside their name. Use Search contacts to add anyone else joining.
- Select Schedule. In Send confirmation?, the Who gets notified table lists each partner with Email and SMS ticks, labelled attending or not attending. The ticks start from the couple's Confirmations setting. Change them for this booking if needed, then select Schedule and send or Schedule without sending.
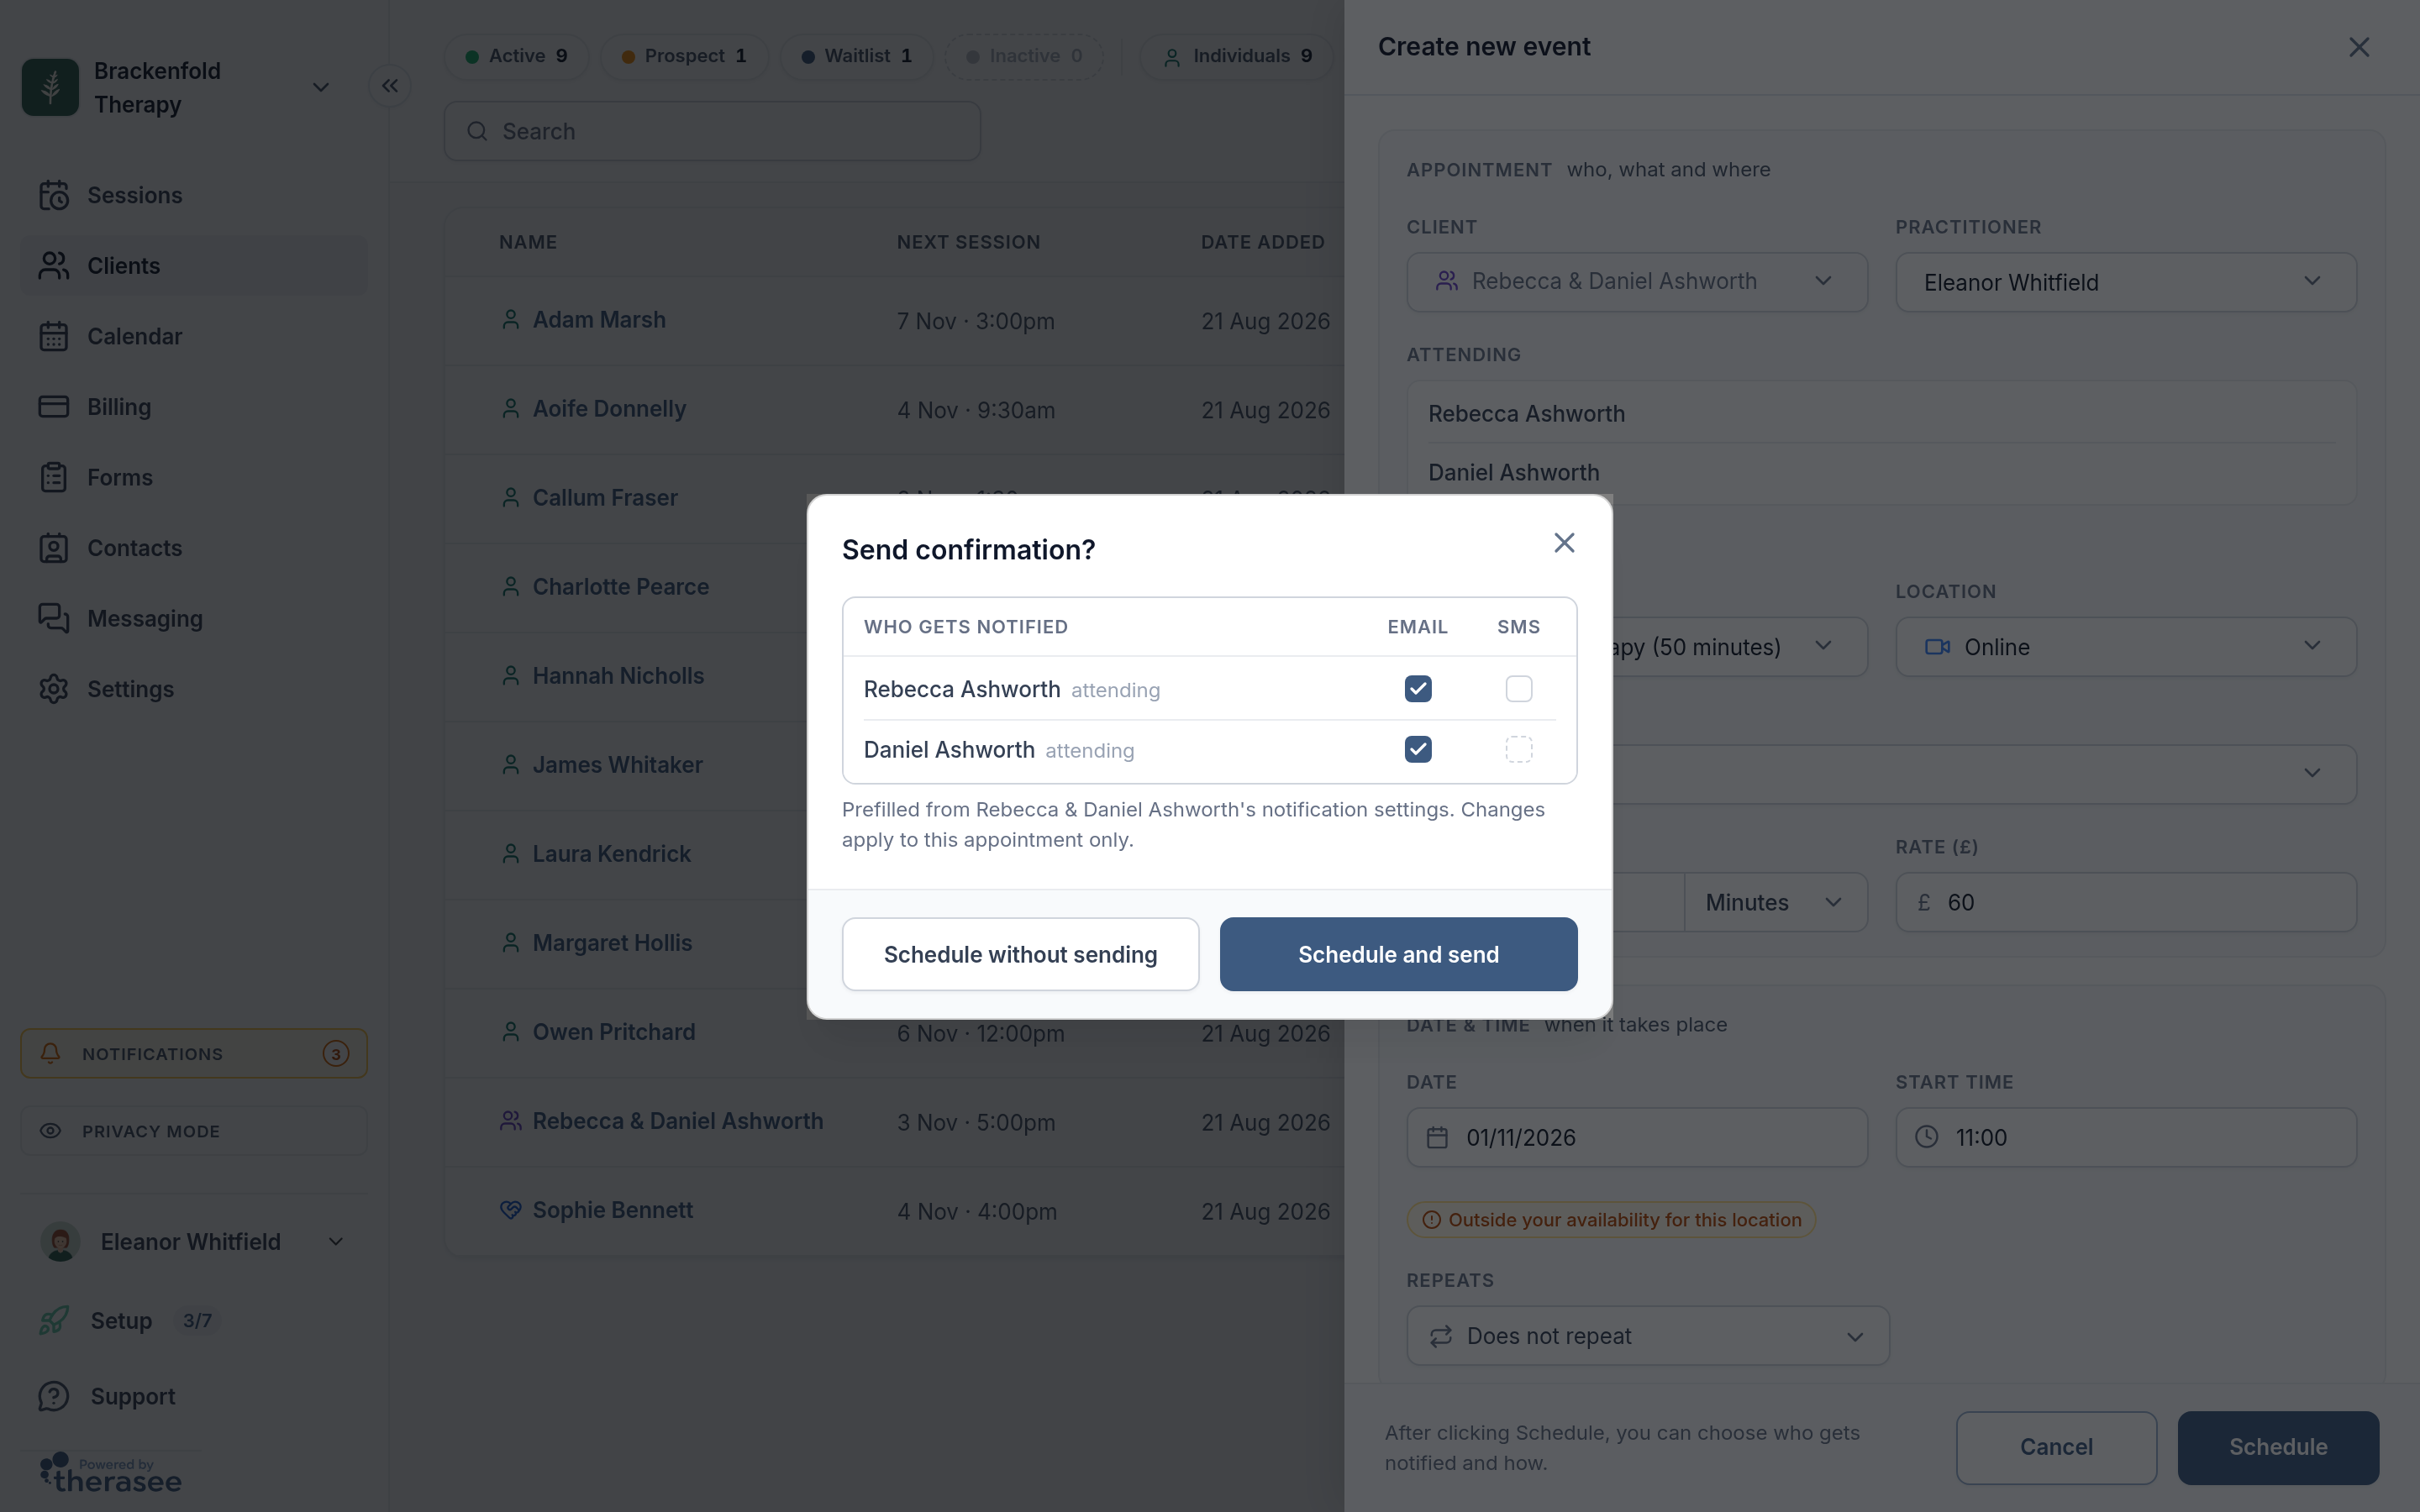
Who attends and who is told are separate choices: a partner who isn't in the room can still be told. For a video session, each partner who is sent the confirmation gets their own join link, so they can join from separate devices.
Portal access for each partner
Each partner signs in to your portal with their own email or phone number, and both see the same shared record. They never share a login.
- On the couple's record, find the Portal access card and turn the switch on (or select Disabled in the couple's Portal column on the Clients list).
- In the window that opens, tick Can sign in for each partner who should have access, and choose Email, SMS or both to send their link.
- Select Send, or Don't send to switch access on and tell them yourself.
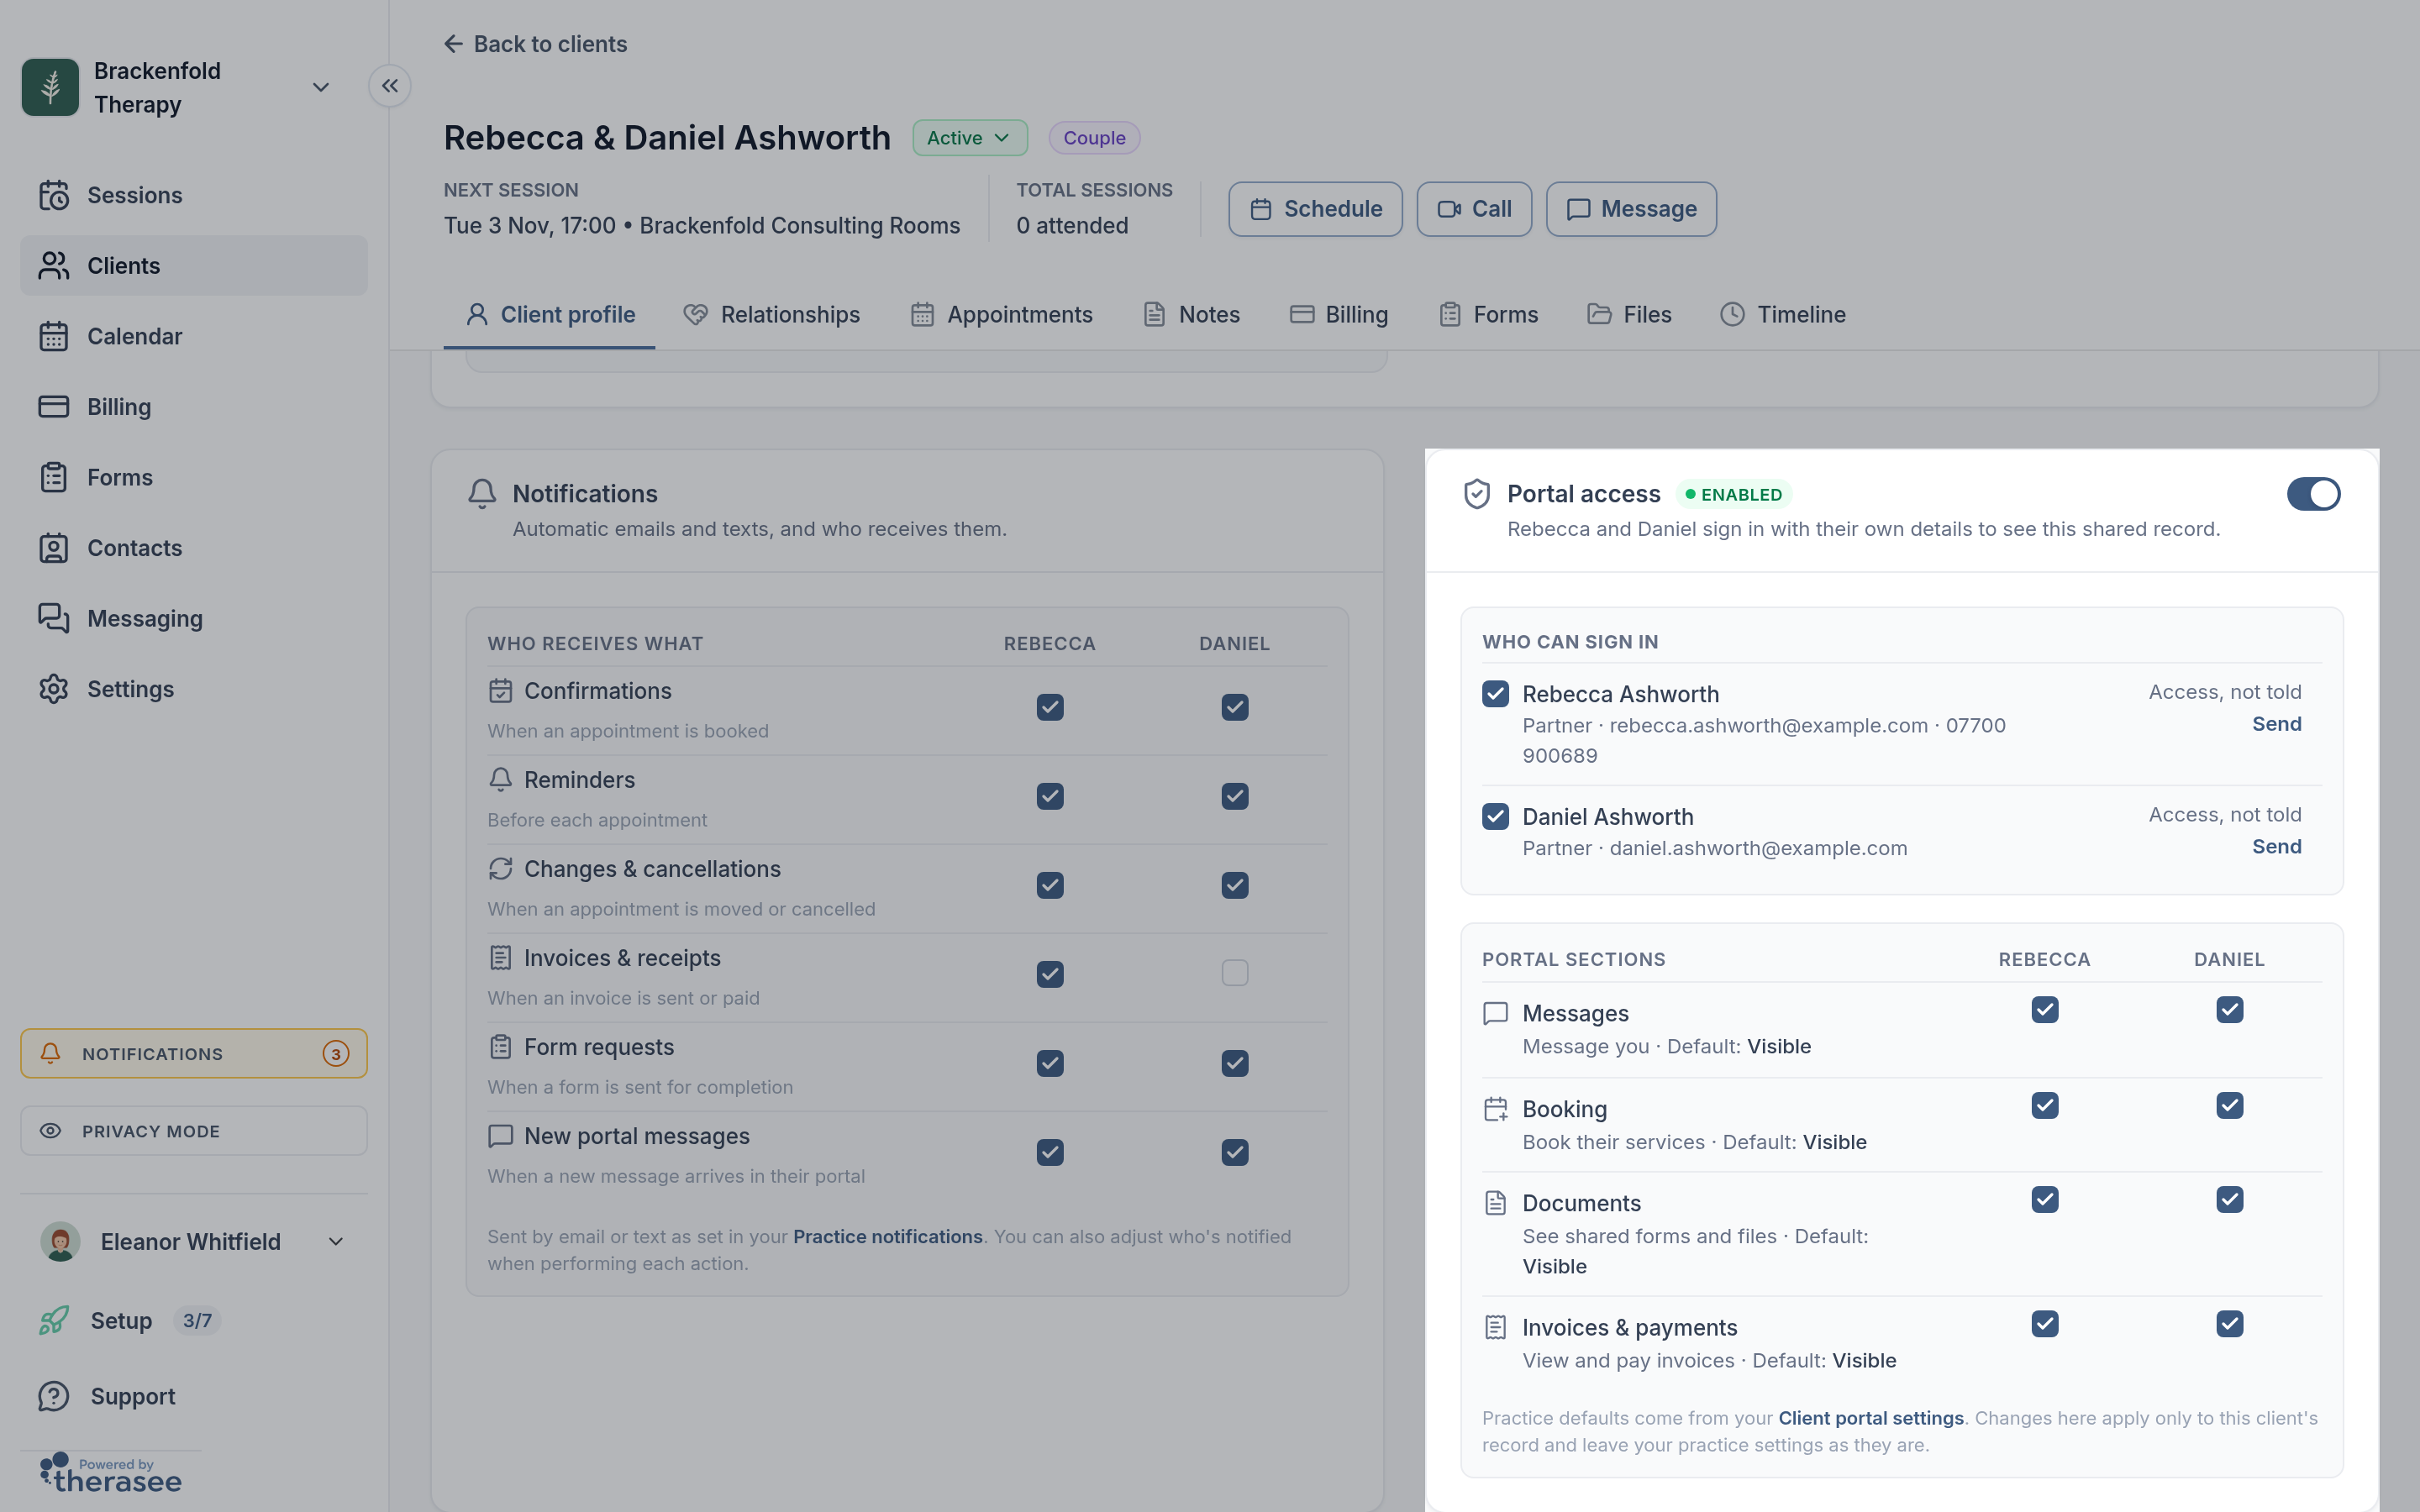
The card then shows where each partner stands (for example Last signed in) with a Send or Resend link. Untick one partner to end their access without affecting the other, and choose per partner which sections they see: Messages, Booking, Documents and Invoices & payments.
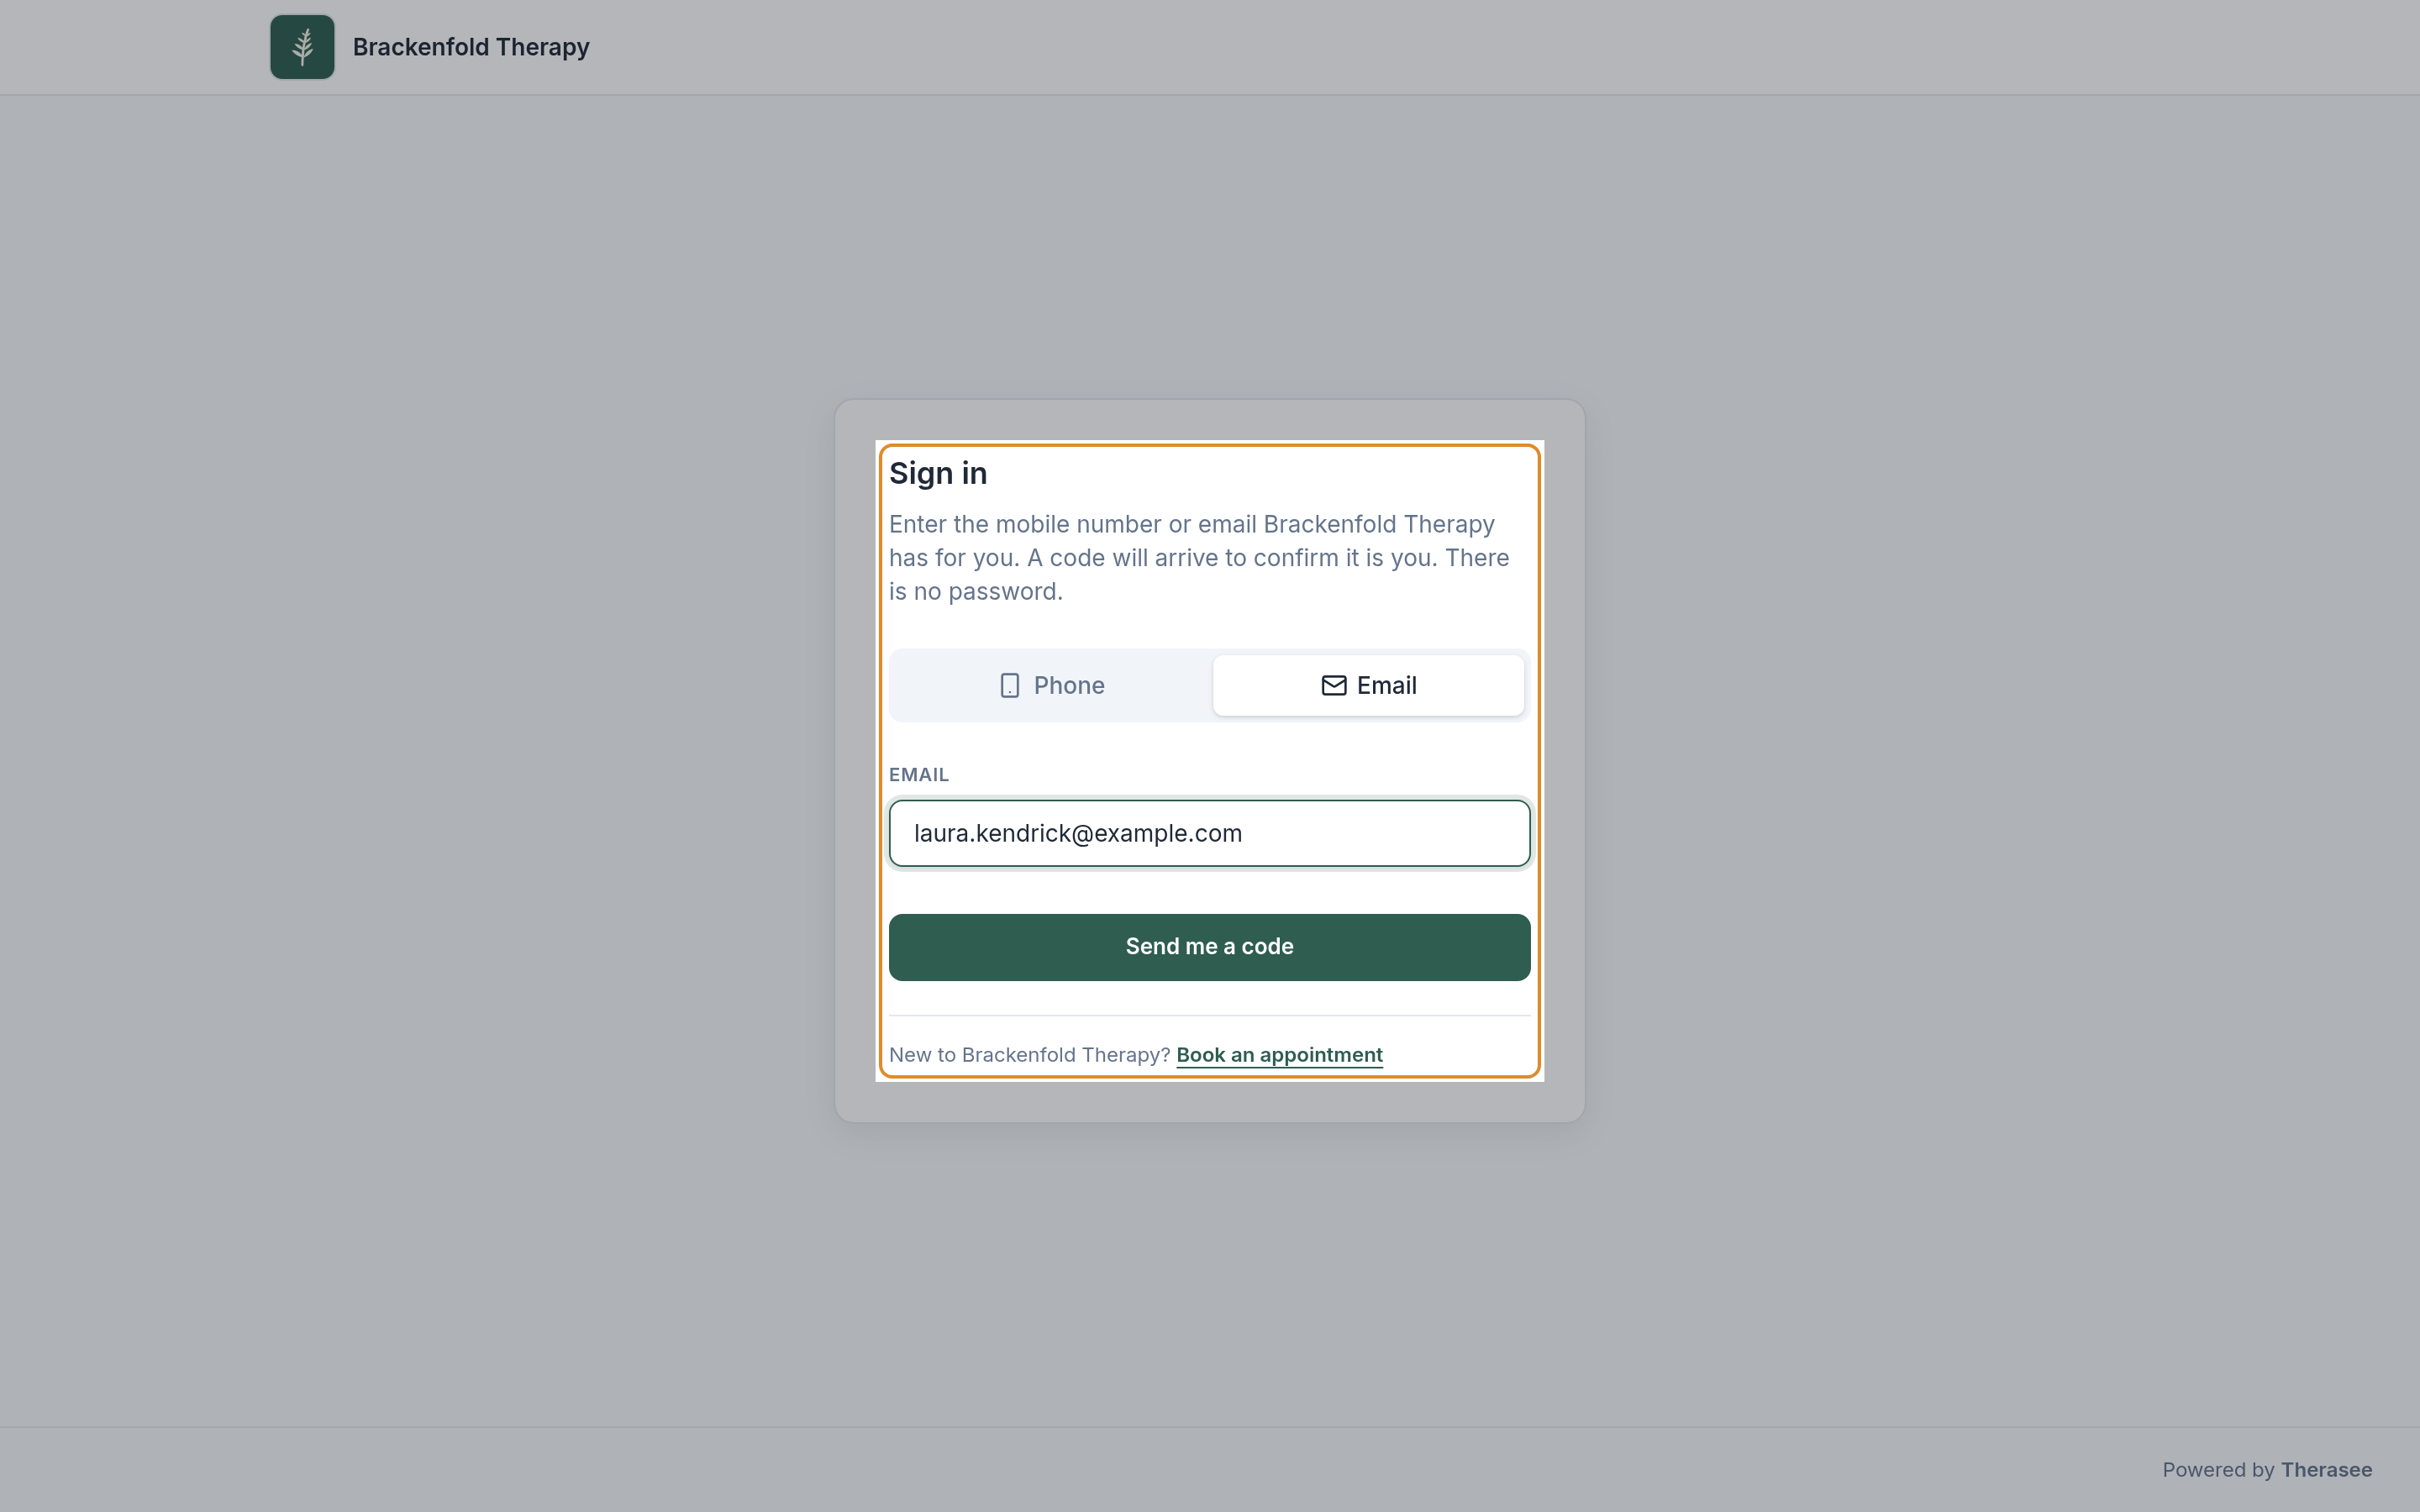
Each partner enters their own email or phone number on your portal's sign-in page and receives a code. Someone who also has an individual record sees Who are you here for? and chooses Your record or the one Shared with your partner. Share Signing in to your client portal with them.
Messages and forms
Messages. A couple has one shared conversation. In Messaging, the conversation header shows Who can view and reply: the partners who can sign in and see Messages. Everyone listed there reads what you send, and each message from the couple shows which partner wrote it. See Messaging a client.
Forms. When you give a couple a form, you're asked Who is this form for? Tick one or both partners. With both ticked, choose One form together (they share it and see each other's answers) or A copy each (a separate form for each of them). You also choose whether answers stay private to whoever filled them in (the starting choice) or everyone on the record can read them, and, on a signed form, who signs. See Creating and sending forms.
Invoices and notes
Invoices for couple sessions are made out to the couple and Billed to the paying partner. On a single invoice you can select Change payer to bill the other partner instead; the couple's default stays as it is. When you send an invoice, the paying partner is filled in as the recipient, and you can add the other partner. Invoice reminders go to whoever is ticked for Invoices & receipts. See Creating and sending an invoice.
Notes for couple sessions are written on the couple's record (see Writing session notes). Keep one-to-one work with a partner on their individual record.
When the work changes
- One partner stops coming. Book sessions with just the partner who attends (remove the other from Attending), and untick the other in Who receives what and Portal access if they should no longer hear from you. For individual work with one person, give them their own individual record.
- The couple's work ends. Set the couple's status to Inactive on the Clients list. Everything on the record stays in place.
- The wrong person was linked. Edit Client details and select Wrong person linked? Replace a partner. The window shows what moves to the new partner and what stays with the old one before you select Replace partner.
- The couple record was a mistake. Under Client type, choose An individual and pick which partner the record is about. This is only possible while the record has no appointments; after that, the notes and sessions are about two people and the record stays a couple.
Was this helpful?