Creating and sending forms
Build form templates with questions, statements and signatures, add standard outcome measures such as PHQ-9, GAD-7 and CORE-10, turn an existing paper or Word form into a digital one, send forms by email or SMS from a computer or phone, and track, sign and download what comes back.
Updated 4 November 2026
Forms let you collect information and consent from clients: intake forms, therapy agreements, questionnaires and outcome measures. You build a form once as a template, then send a copy to each client who needs it. Their answers come back to their record, where you can read, sign and download them.
Where your forms live
Open Forms from the main menu. There are two tabs:
- My templates: your own forms.
- Practice templates: forms shared with everyone in your practice. People who manage your practice's settings create these and switch each between Drafts and Published with the pill in the Form status column. Publish a practice form before sending it. Anyone can copy a published one into their own list with the Add to my templates icon.
Each row has Share (send to a client), Duplicate form, and a More actions menu with Edit, Download (a blank PDF) and Delete. Select a form's name to preview it.
Creating a form
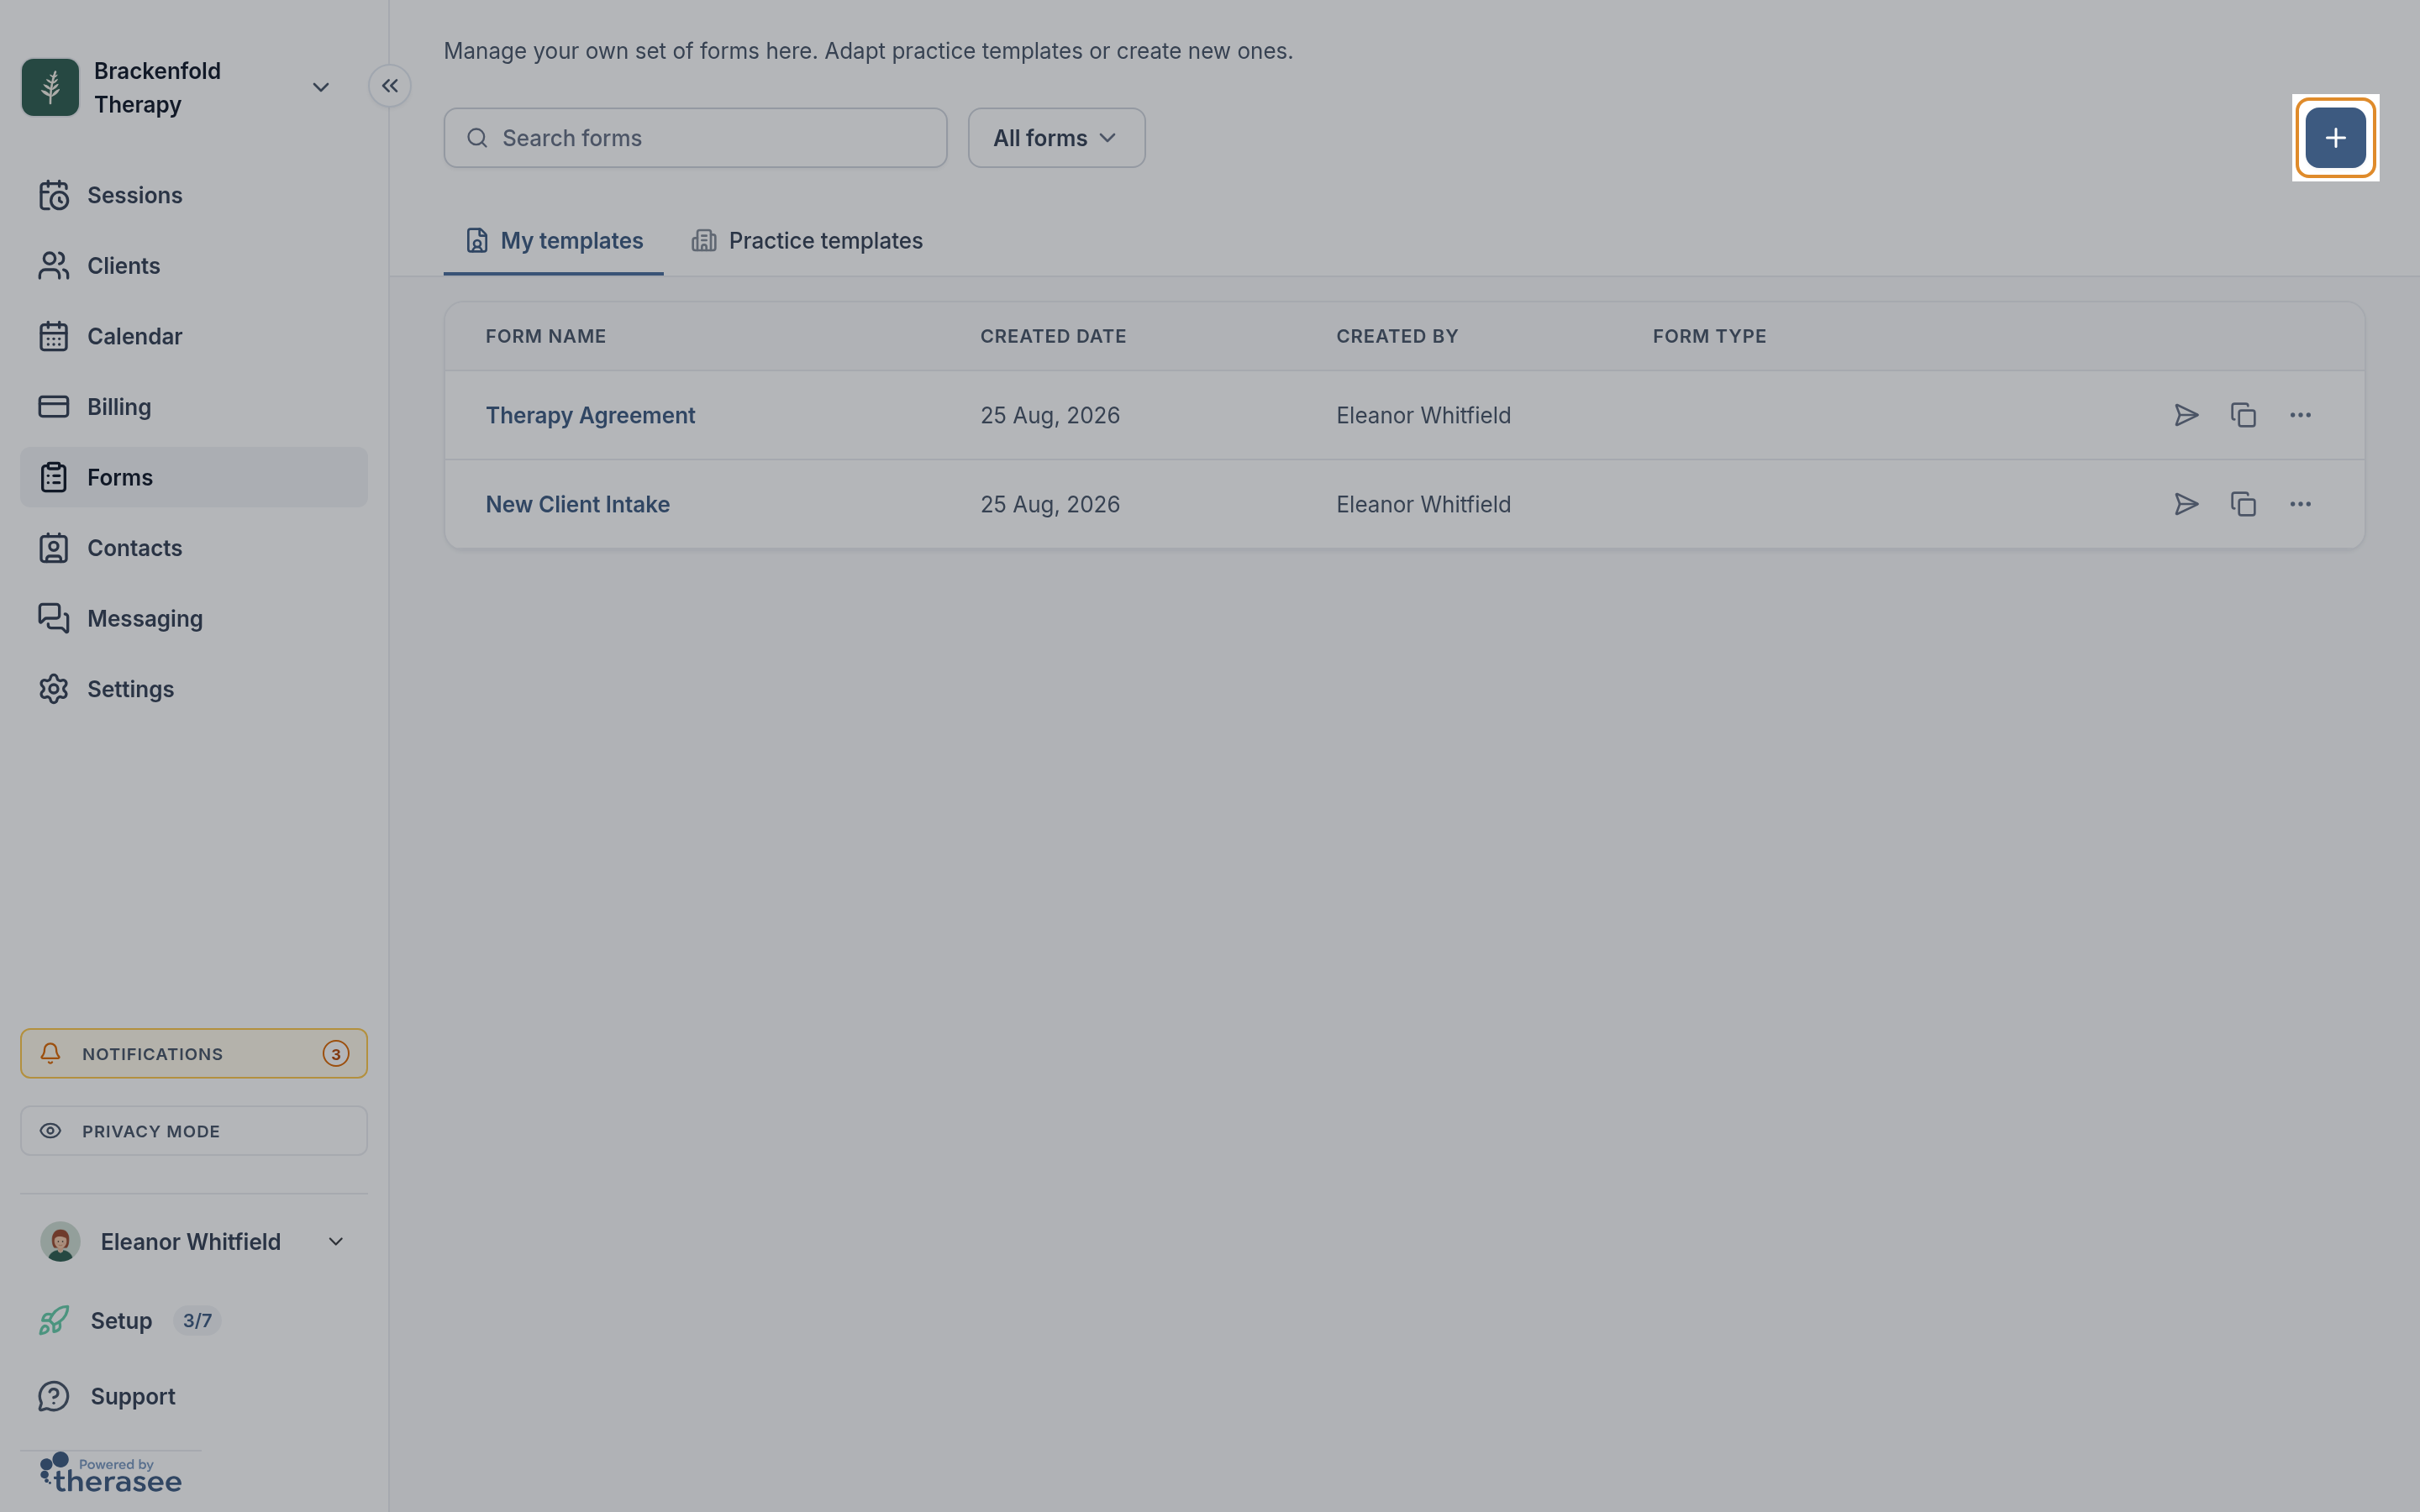
- On the tab the form should belong to, select + (New template). The form builder opens.
- Select the name at the top to rename the form. This is the title your clients see.
- Select the type badge (Select type) and choose Intake form, Assessment or Progress report, or type a New type name and select Create.
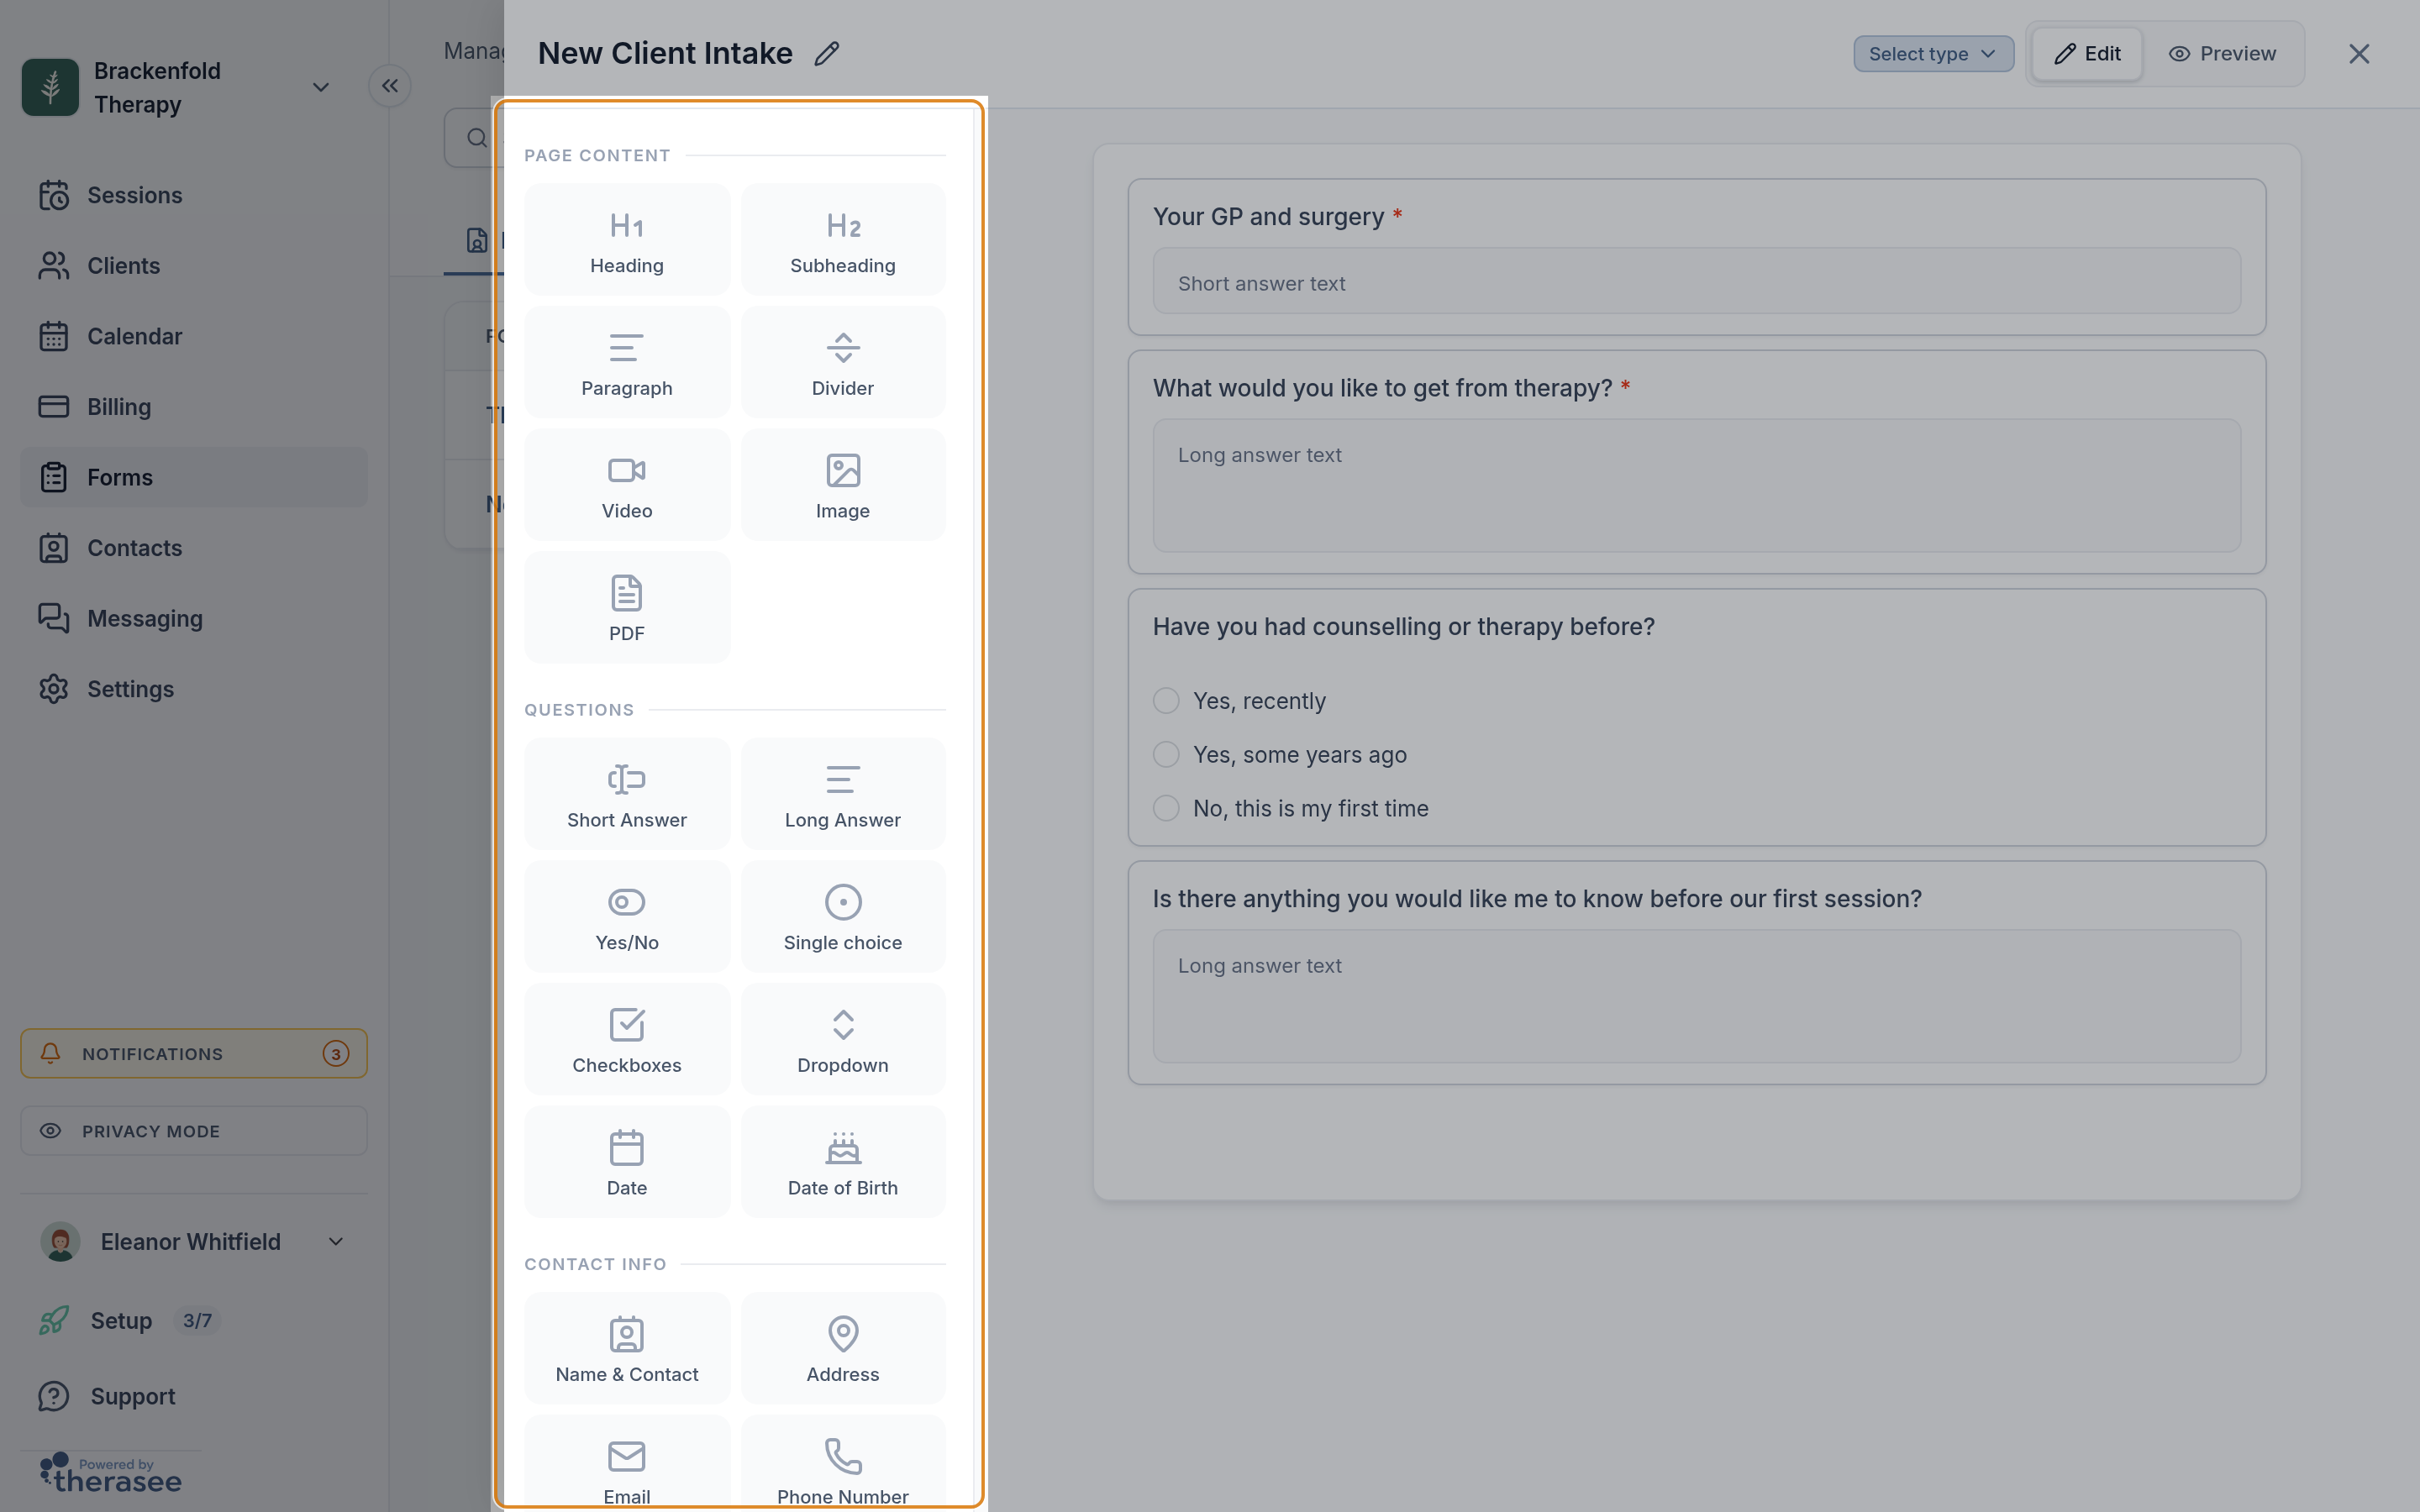
- Add elements from the panel on the left: select one to add it, or drag it to where you want it.
- Type the question or text. For choice questions, fill in each option and use + Add option.
- Turn on Required if the client must answer it, then select Done.
- Select Preview to see the form as your client will, and Edit to go back.
- Select Save. On Practice templates, Save keeps a draft and Publish makes it available.
Point at an element on the form to drag it to a new position, Duplicate it or Delete it.
What you can add
- Page Content: Heading, Subheading, Paragraph, Divider, Video, Image and PDF, for the client to read.
- Questions: Short Answer, Long Answer, Yes/No, Single choice, Checkboxes, Dropdown, Date and Date of Birth.
- Contact Info: Name & Contact, Address, Email and Phone Number.
- Legal & Consent: Statement (a sentence the client ticks to agree to), Client signature and Practitioner signature.
A form is one scrolling page. To divide a long form into sections, start each part with a Heading and separate parts with a Divider.
Signatures. The client draws their signature in a Client signature. A Practitioner signature is for you to sign after the client submits; the client can see it but not fill it in. Each comes with a date that fills in when someone signs. Select Remove beside the date if you do not want it.
Bringing in a paper or Word form
You can rebuild any existing form with the steps above, or let the AI Form Assistant do most of the work:
- Someone who manages your practice's settings turns it on in Settings, AI Assistance (Enable AI Form Assistant), ticks the acknowledgement and selects Enable AI Assistant. It is then available to everyone in the practice.
- In the form builder, select the sparkle button in the corner to open the Form Assistant.
- Drag in your document or use Attach file. PDF, Word, text files and images (such as a photo of a paper form) are accepted, up to 10 MB. You can also describe the form you need instead.
- The assistant builds the form on the canvas. Ask for changes in the chat, or use Undo or Regenerate.
- Check every question, adjust anything in the builder, then Save.
You are responsible for reviewing what the assistant produces before using it with clients. Client details are not shared with it.
Outcome measures such as PHQ-9 and GAD-7
There is no ready-made library of questionnaires on the Forms page; every form starts as one of your own templates. If the AI Form Assistant is turned on for your practice, it can add a standard measure for you:
- Select + (New template) to open a new, empty form.
- Select the sparkle button to open the Form Assistant.
- Under Assessment examples, select a measure such as PHQ-9 or GAD-7, or type the name of the measure you want (for example, Create a GAD-7 assessment), and send it.
- The questionnaire appears on the canvas with its standard questions and answer options, and the type is set to Assessment. Check it, then select Save.
Measures available this way include PHQ-9, PHQ-2, GAD-7, GAD-2, PCL-5, WHO-5, DASS-21, AUDIT and AUDIT-C. Ask for the measure on its own, in a new empty form, and check each question against your own copy of the measure before you send it. To include it in a larger form, create it first and then add your other questions around it in the builder. Without the assistant, you can build any measure yourself from Single choice questions.
Scoring. Forms do not calculate totals or scores. In measures added by the assistant, each answer option starts with its item value (for example, 0. Not at all to 3. Nearly every day, with reverse-scored items already numbered the right way round), so you can add up a client's score when you read their response and record it in your session notes.
Sending a form to a client
- Start from either place:
- The Forms page: select Share on the form's row, choose the client in Share form and select Continue.
- The client's profile: open the client from Clients, go to the Forms tab and select + (Add form). In Select a form, pick a template, or select New form to build a one-off form for this client.
- The form opens so you can check it. You can fill parts in yourself, or select Edit to change this client's copy only; your template stays as it is.
- Select Send now. (Or select Save for later to keep it on the client's record, marked Saved, and send it another time.)
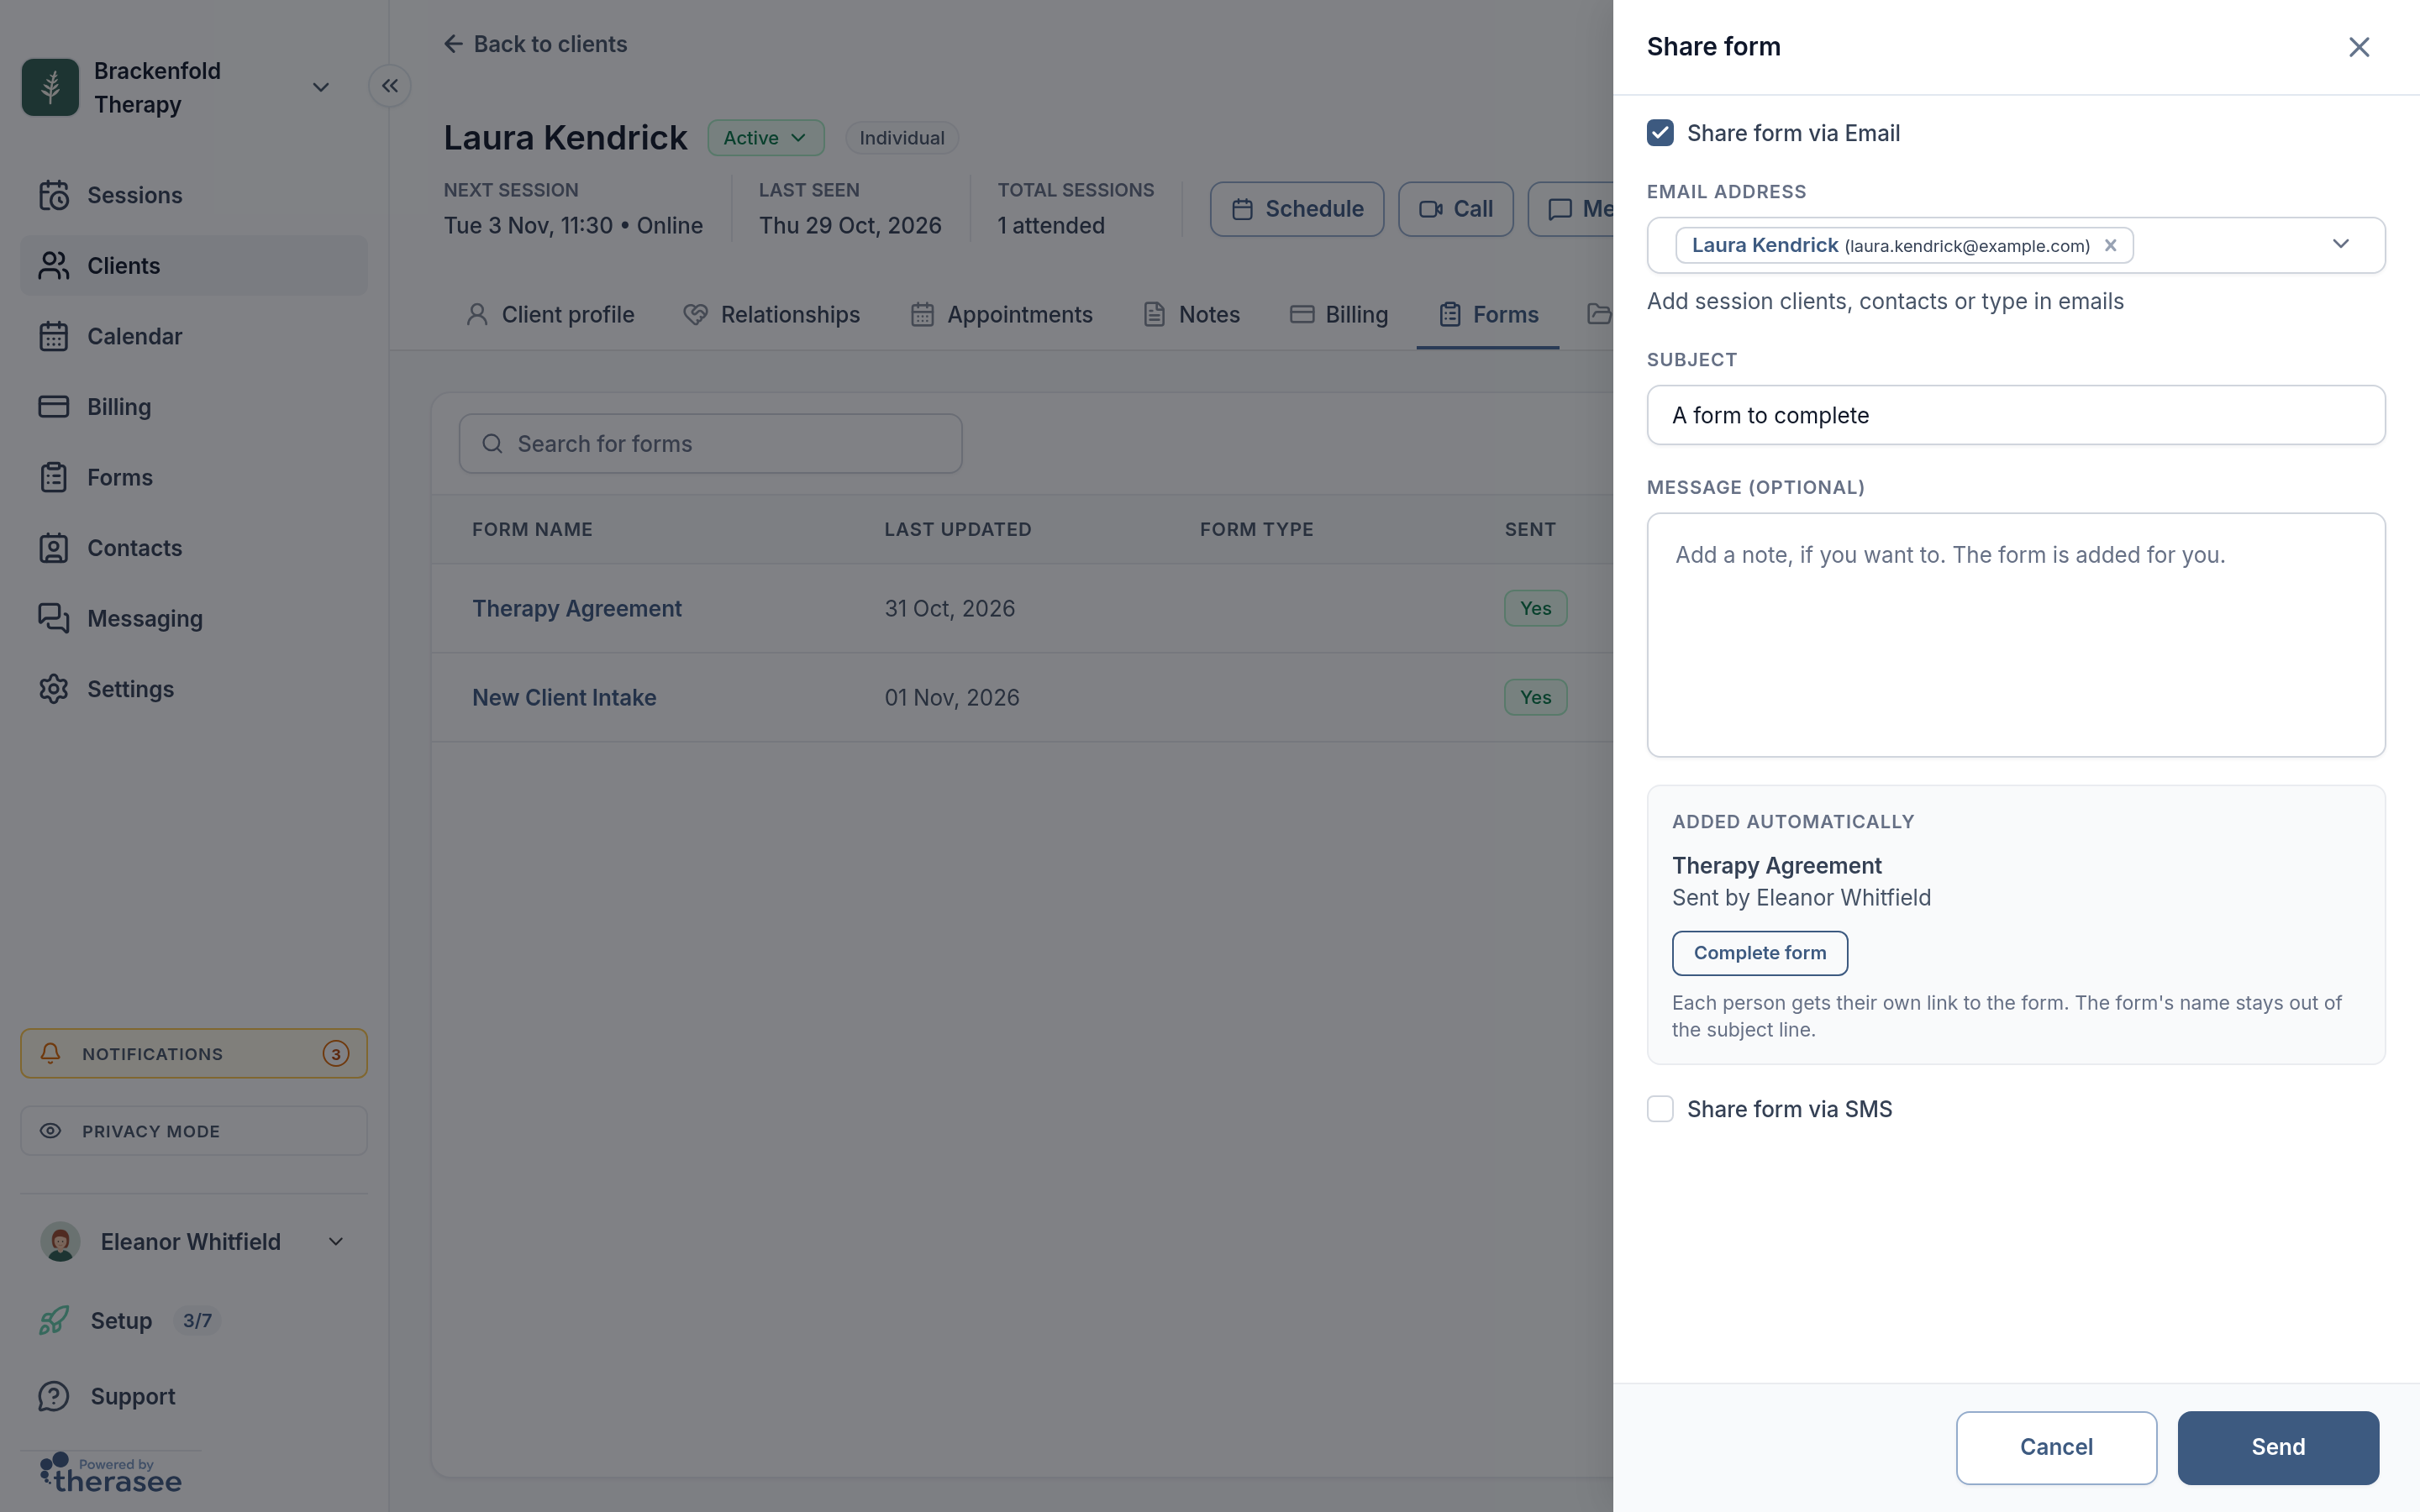
- In the Share form panel, Share form via Email is ticked and addressed to the client. You can add their contacts or type other addresses, change the Subject (it starts as A form to complete) and add a message. The form's name and a Complete form button are added for you.
- To text a link too, tick Share form via SMS. The text reads A new form: [form name], has been shared with you. followed by the link; you can edit the wording. Texts count towards your practice's monthly SMS allowance.
- Select Send. The form shows on the client's Forms tab as Awaiting client.
From Messaging. If the client has access to your client portal, you can also select Attach a form in your conversation in Messaging, tick forms in Add forms, select Add and send your message. The client is emailed about it if your practice sends email notifications for new portal messages. See messaging a client.
What your client sees
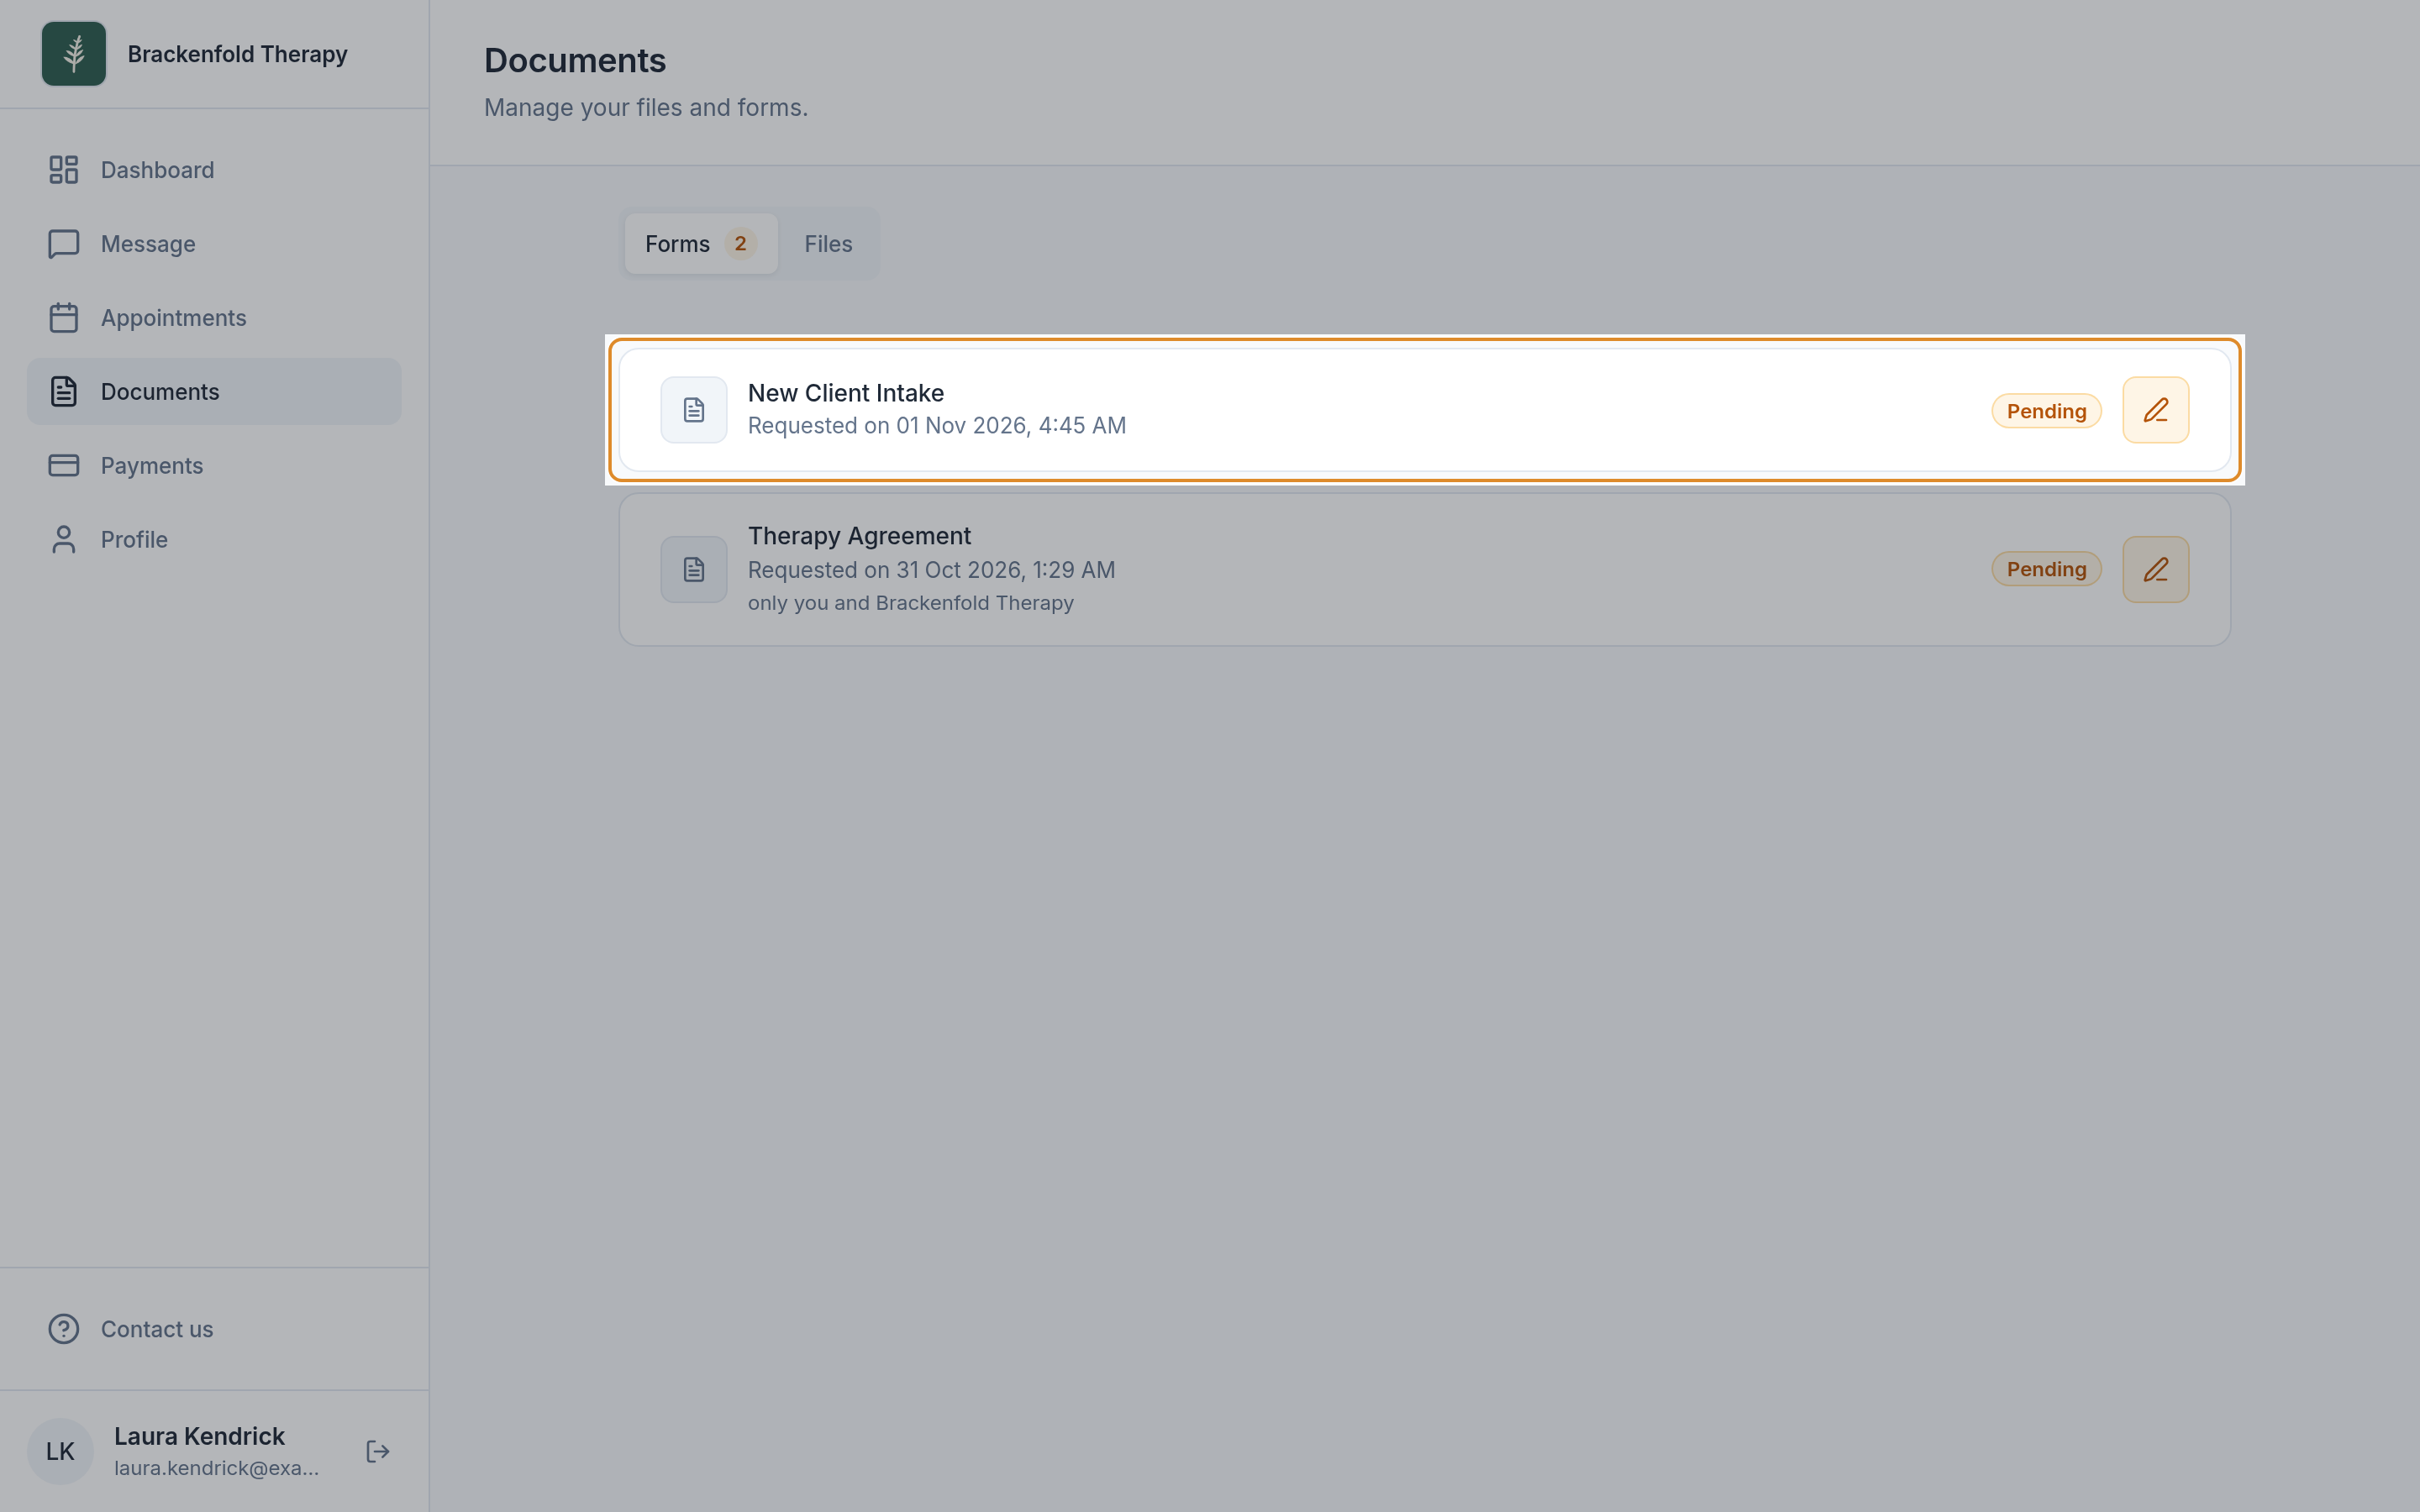
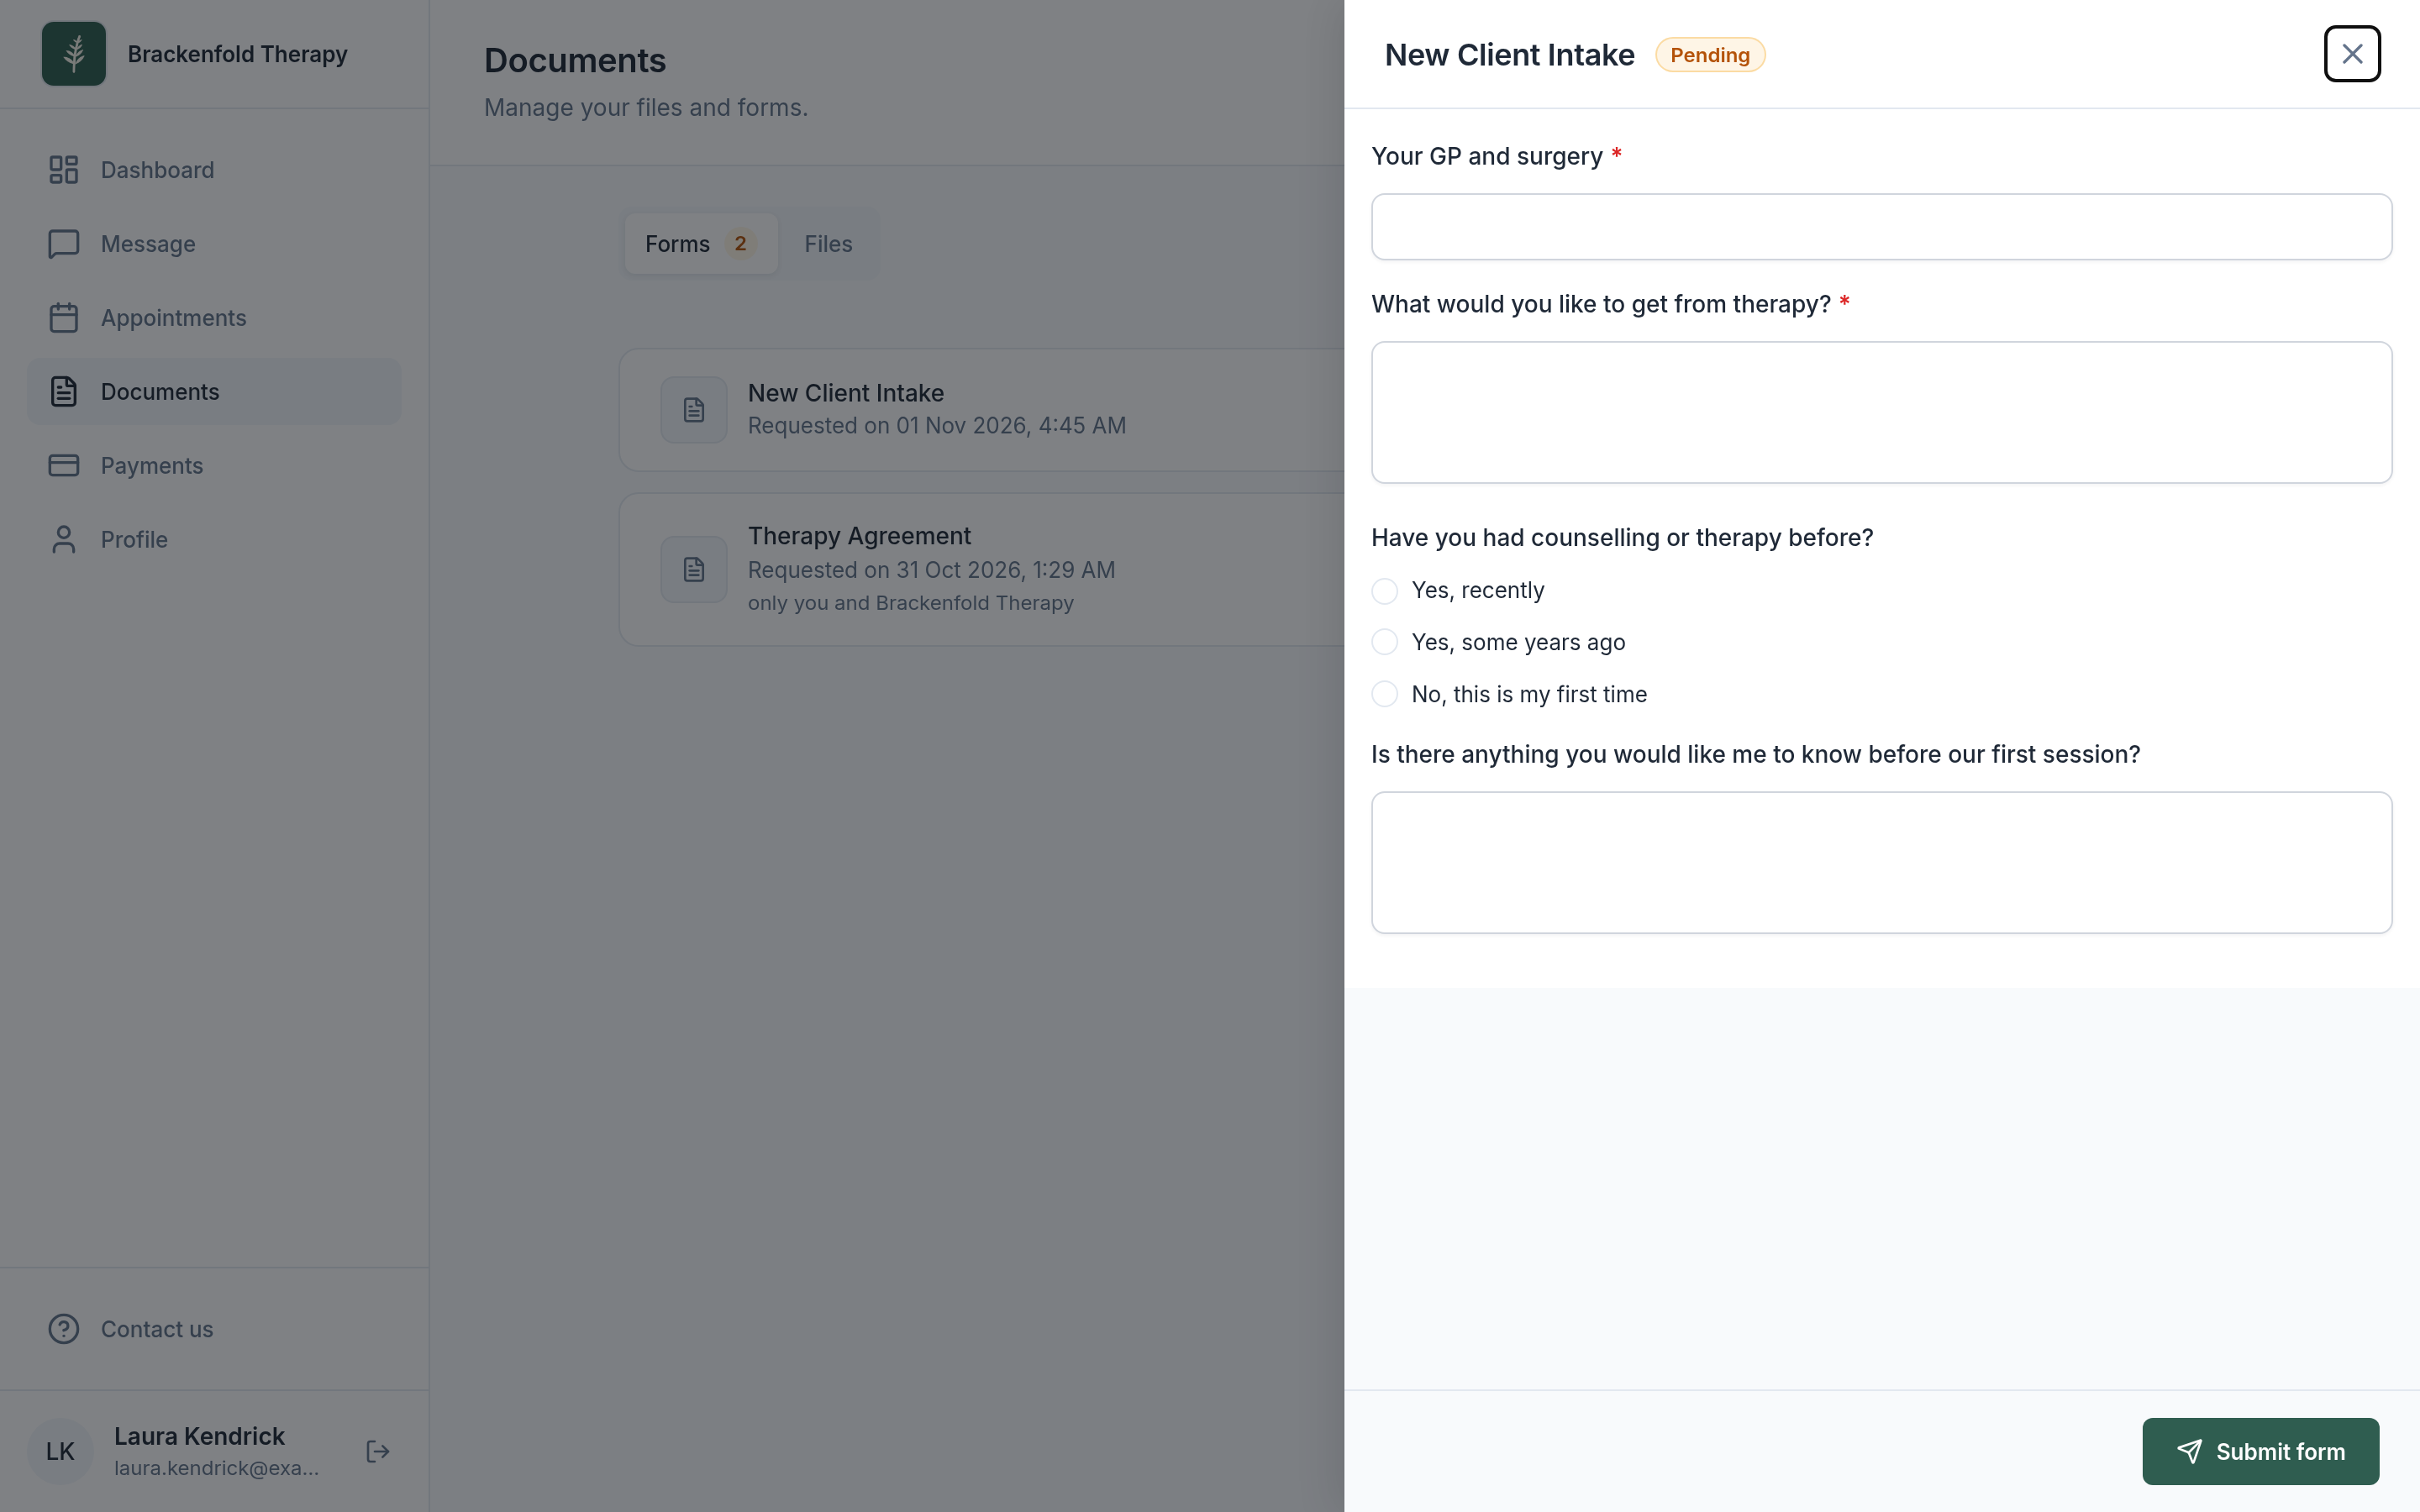
The email or text link opens the form in your practice's branding, without the client needing to sign in. Clients who use your portal also find it under Documents, Forms, marked Pending.
The client answers the questions (required ones are starred), signs, selects Submit form and confirms. Once submitted, they cannot change their answers. The client's side is explained in completing a form.
Couples, dependants and more than one signer
When you send a form to a couple or a dependant, you are first asked questions such as How should they complete it? (One form together or A copy each), Who completes this form? and Who signs this form?. This is how a form reaches a young person's responsible adult. Each signer gets a signature space with their name, and a personal link by email where they have an address. The row shows progress such as 1 of 2 signed. See working with couples and working with children and other dependants.
A parent or guardian completing or signing for a child. On a dependant's record, Who completes this form? starts with the responsible adults ticked, and Who signs this form? starts with the adults who have Parental responsibility ticked. Completing and signing are separate choices, so a parent can sign a form the young person filled in. Each adult signs their own box, using the link sent to their own email address. For someone with no email address on the record, use Copy signing link or Sign in person.
An open form lists its Signatures, with Copy signing link for anyone yet to sign. To have a client complete a form with you in the room, open it, select Sign in person, hand them the device, then select Complete & Submit.
Tracking, reading and downloading responses
The client's Forms tab shows whether each form was Sent and its Status: Saved (not sent yet), Awaiting client, Completed, or Action required (submitted and waiting for your signature).
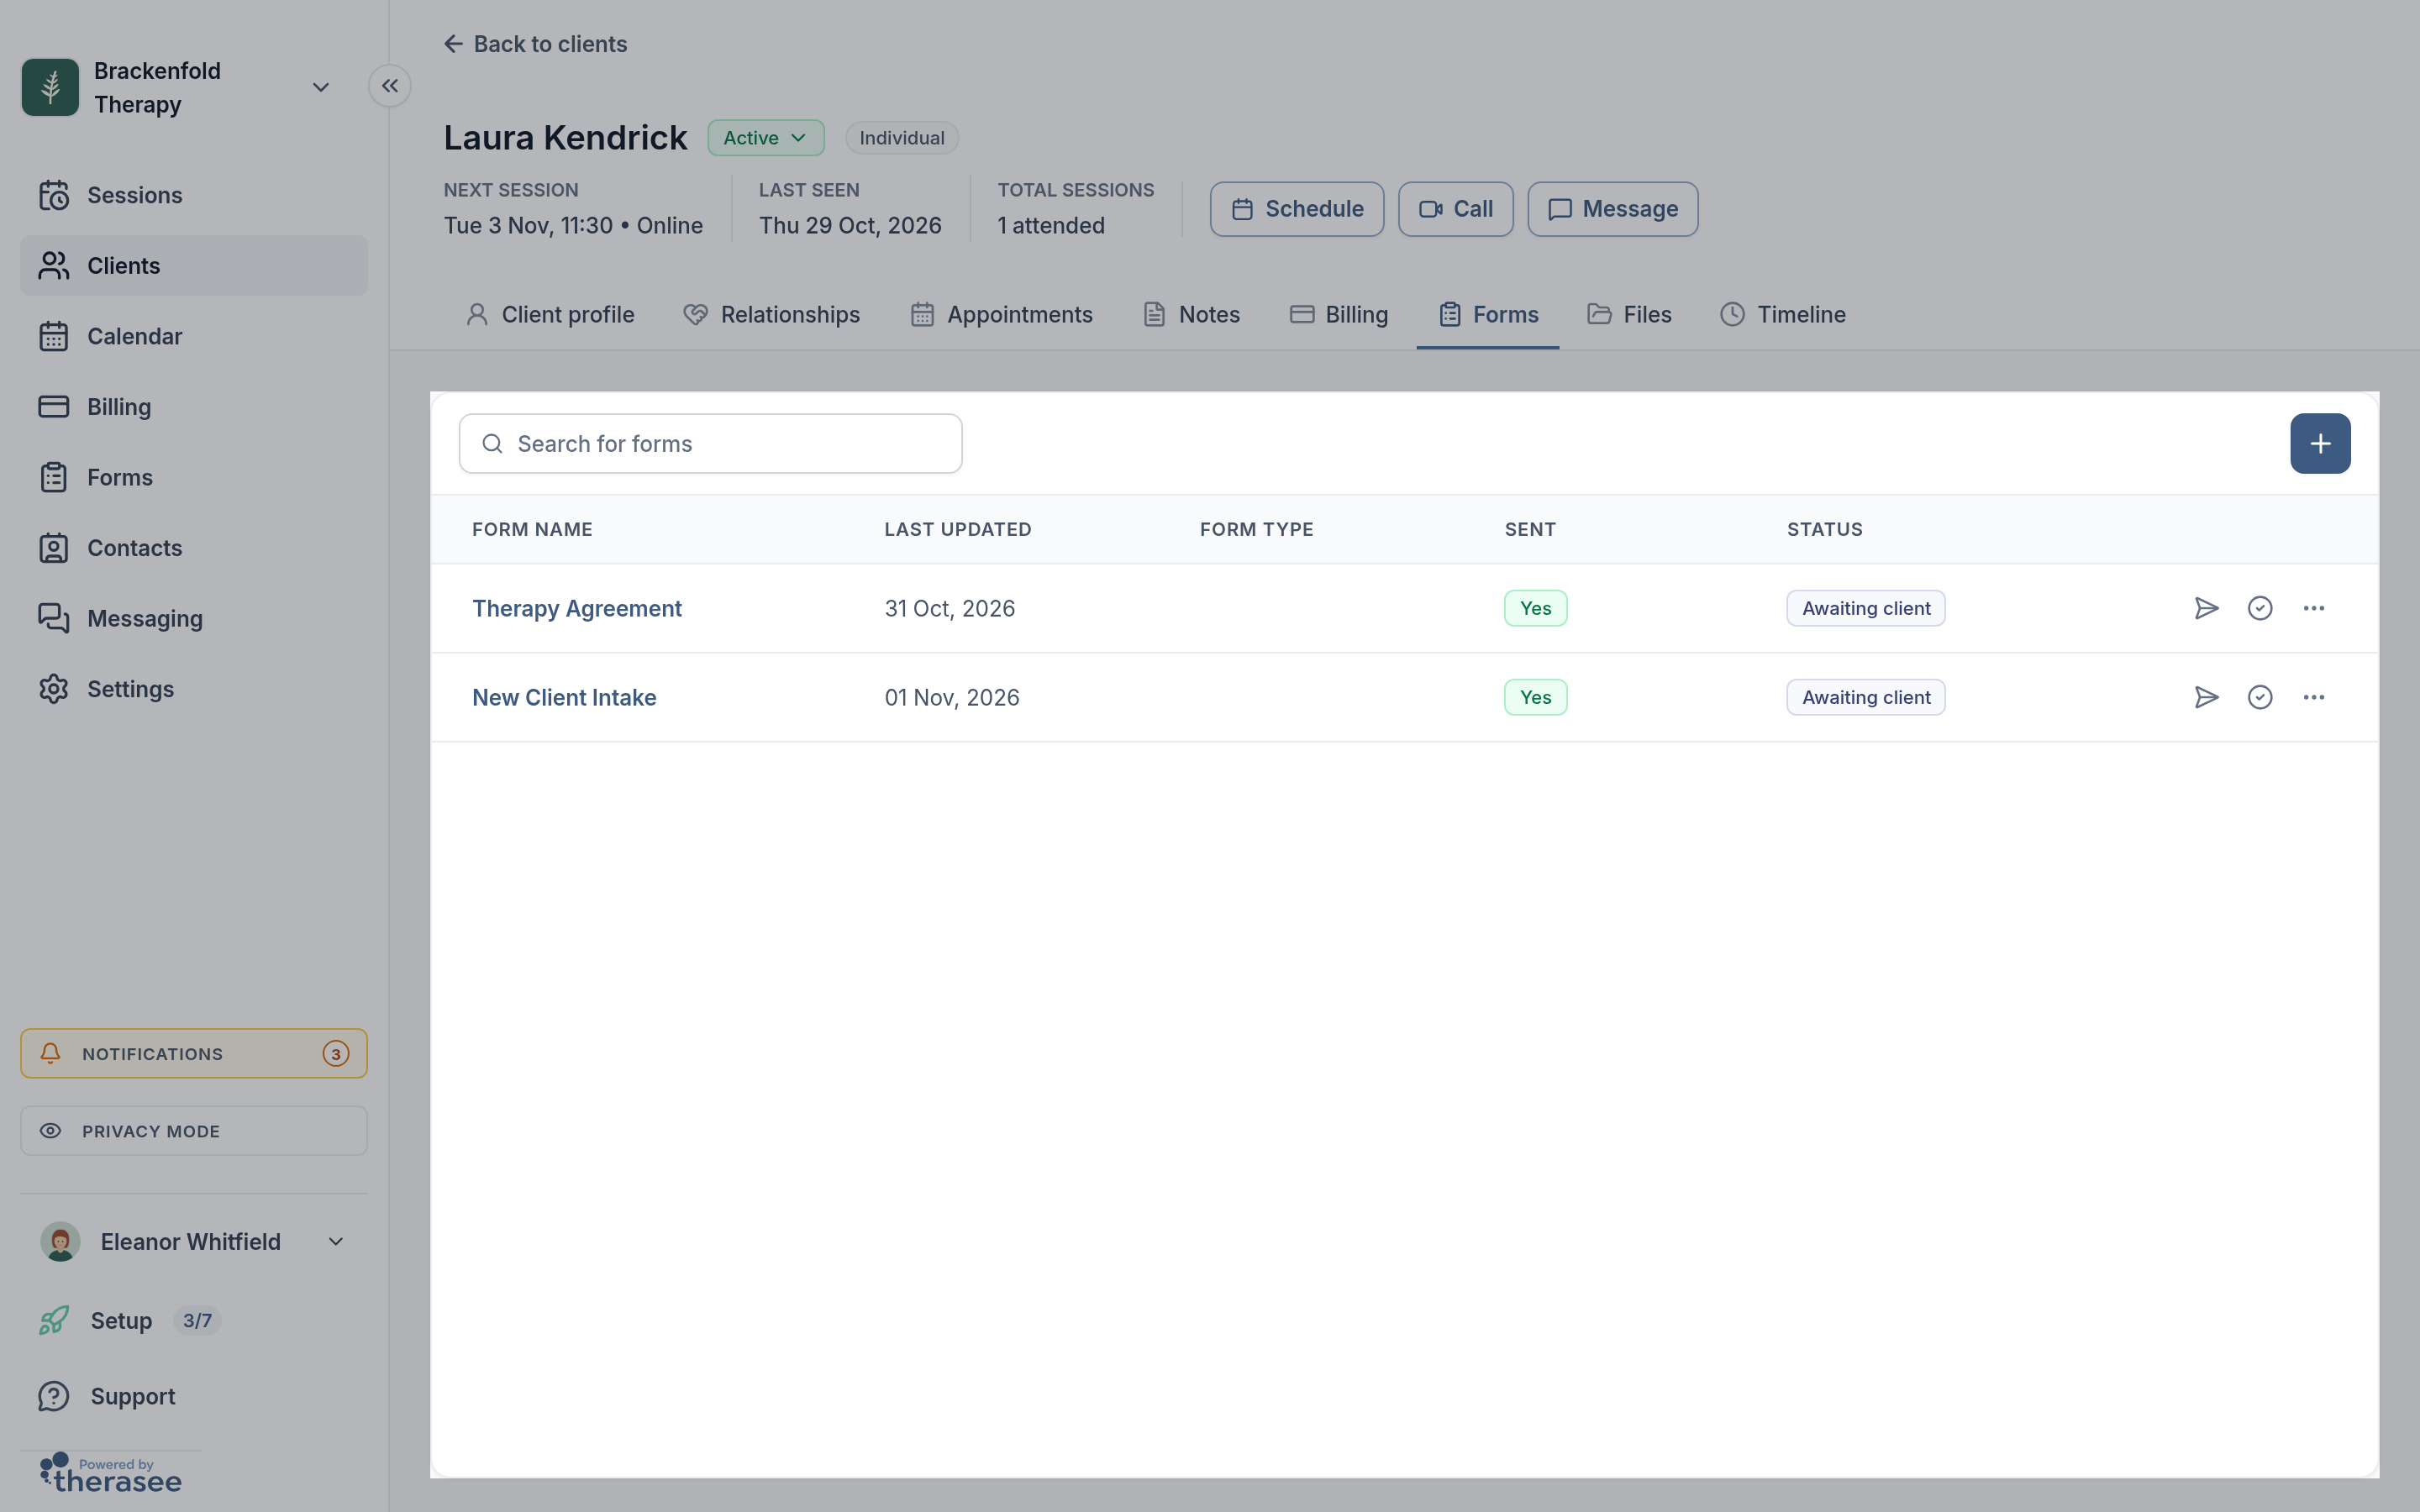
When a client submits, the practitioner assigned to them is notified in the app and on their devices, and by email if Form submitted is ticked (it is to begin with) in Settings, Notifications.
- Read: select the form's name on the Forms tab.
- Download: select Download PDF in the open form, or Download in the row's More actions menu.
- Sign: open a form marked Action required, select Signature, draw or reuse your signature, select Add, then Save to profile.
- Record a paper form: select the Mark as complete icon on the row.
Answers stay with the form. What a client writes in a form, including an intake form's Name & Contact, Address or Date of Birth, is kept in their submitted form and is not copied into their client profile. To add those details to the profile, open the client, select the pencil icon on the Client details card, enter them and select Save. See adding a client.
More actions also has Edit elements (until the form is completed), Lock or Unlock (once completed) and Delete.
Resending a form
If a client has lost the link, select the Resend icon on the form's row on their Forms tab (or Resend inside the open form). The Share form panel opens again; choose email, SMS or both and select Send.
Sending forms from your phone
You can send forms from a phone's browser in the same way. The menu bar at the bottom of the screen has Clients and Messaging; Forms is under Menu.
- On the Forms page, each template is a card with the same Share, Duplicate form and More actions buttons.
- On a client's Forms tab, each form is a card showing its status. Tap the card to open the form; the buttons on the card send or resend it, mark it complete, or open More actions.
- The form builder works on a phone too, with the elements panel shown below your form instead of beside it.
Changing a template later
Use Edit in the template's More actions menu. Each client gets their own copy when you send a form, so template changes apply to forms you send from then on. Forms already sent keep the version the client was given.
Was this helpful?