Seeing what your clients see
Open your booking page and public pages, preview your branding, sign in to your client portal as a test client, and see the emails and texts clients receive. Plus what a test client counts towards and how to tidy up.
Updated 8 November 2026
Before you share your booking page or invite clients to your portal, you'll probably want to see what they'll see. This page shows you how to open your public pages, how to sign in to your client portal as a test client, and how to see the emails and texts your clients receive. It also covers what a test client counts towards, and how to tidy up when you've finished.
Open your booking page and other public pages
Your booking page, contact form and practice front page are public, so you can open them just as a client would. There are two places to do it.
From your client links
- Go to Settings, Practice profile. The Overview tab opens.
- In the Practice URL card, find YOUR CLIENT LINKS. There's a row each for Booking page, Contact form and Client portal.
- Click the open icon on a row to open that page in a new tab. Click the copy icon beside it to copy the address.
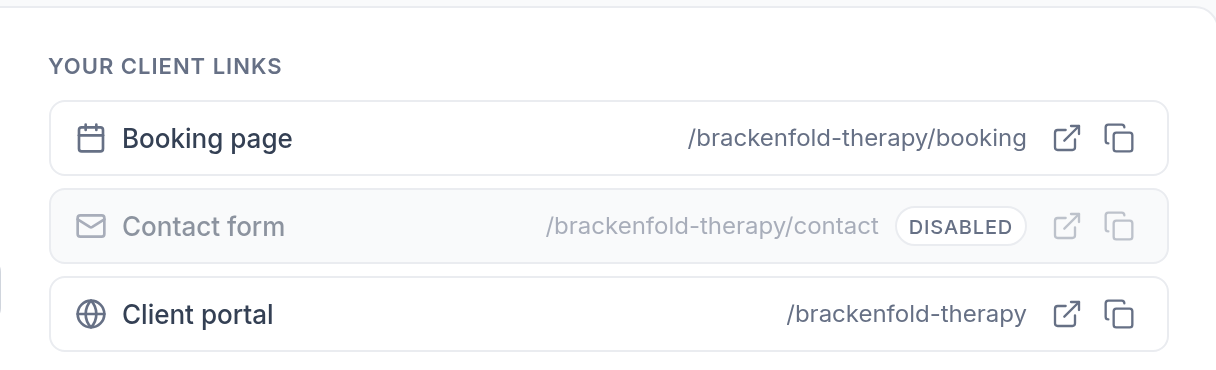
A row marked Disabled is a page you've switched off, so it can't be opened until you switch it on.
From Public Pages
Go to Settings, Practice profile, Public Pages. Each card has a link at the bottom: View booking page, View waitlist page or View contact page. It opens the page in a new tab. The copy icon next to it copies the address. Both work only while that card is switched on, so View waitlist page works only while your waitlist is on.
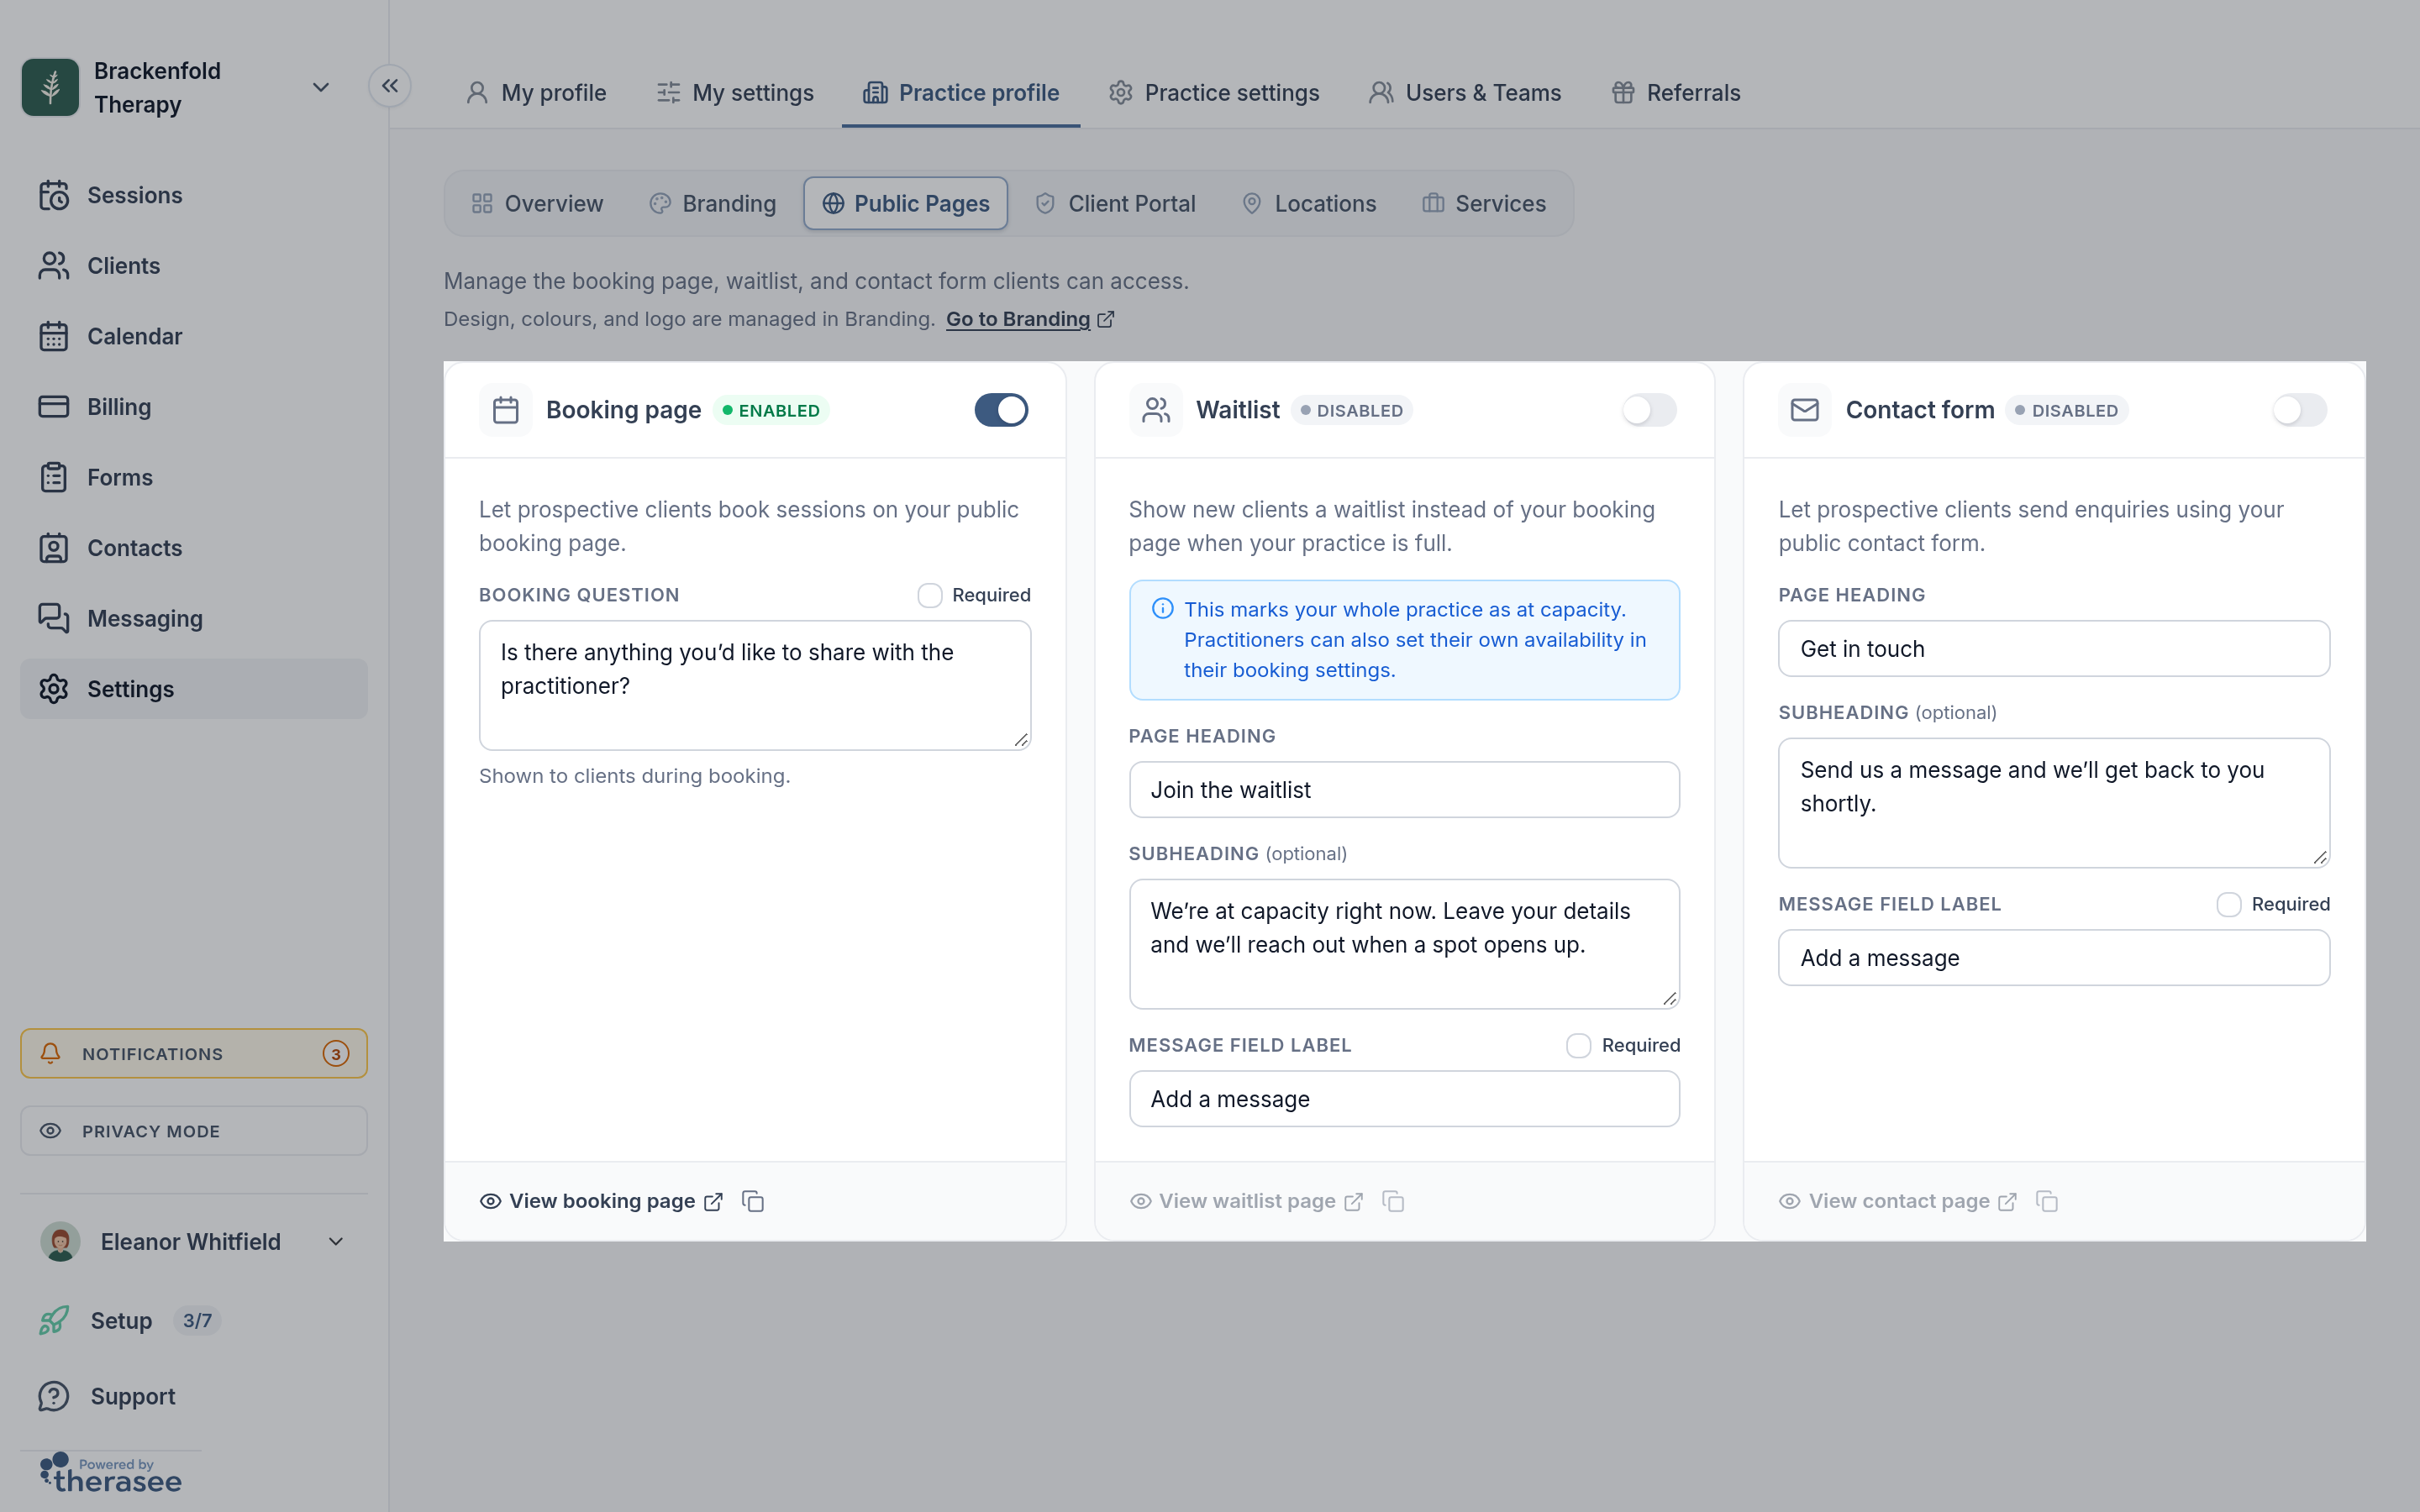
The waitlist doesn't have its own address. When your waitlist is on, new clients see it at your booking page address instead of the booking steps.
Going through a booking without making one
You can step through your booking page as far as the last screen. Nothing is booked until you click the button there: Book appointment on Review and book, or, for a service that takes payment at booking, the pay and book button on Review and pay. You can stop or go back at any point before that.
If you do finish a booking with a name, email address and phone number Therasee doesn't know, the person is added to your clients as a Prospect.
For more on the booking page itself, see Letting clients book online.
See how your branding looks
Go to Settings, Practice profile, Branding. The Preview card shows your logo and colour on a sample of each client-facing page. Use the tabs along the top to switch between Booking, Waitlist, Contact, Portal and Invoice.
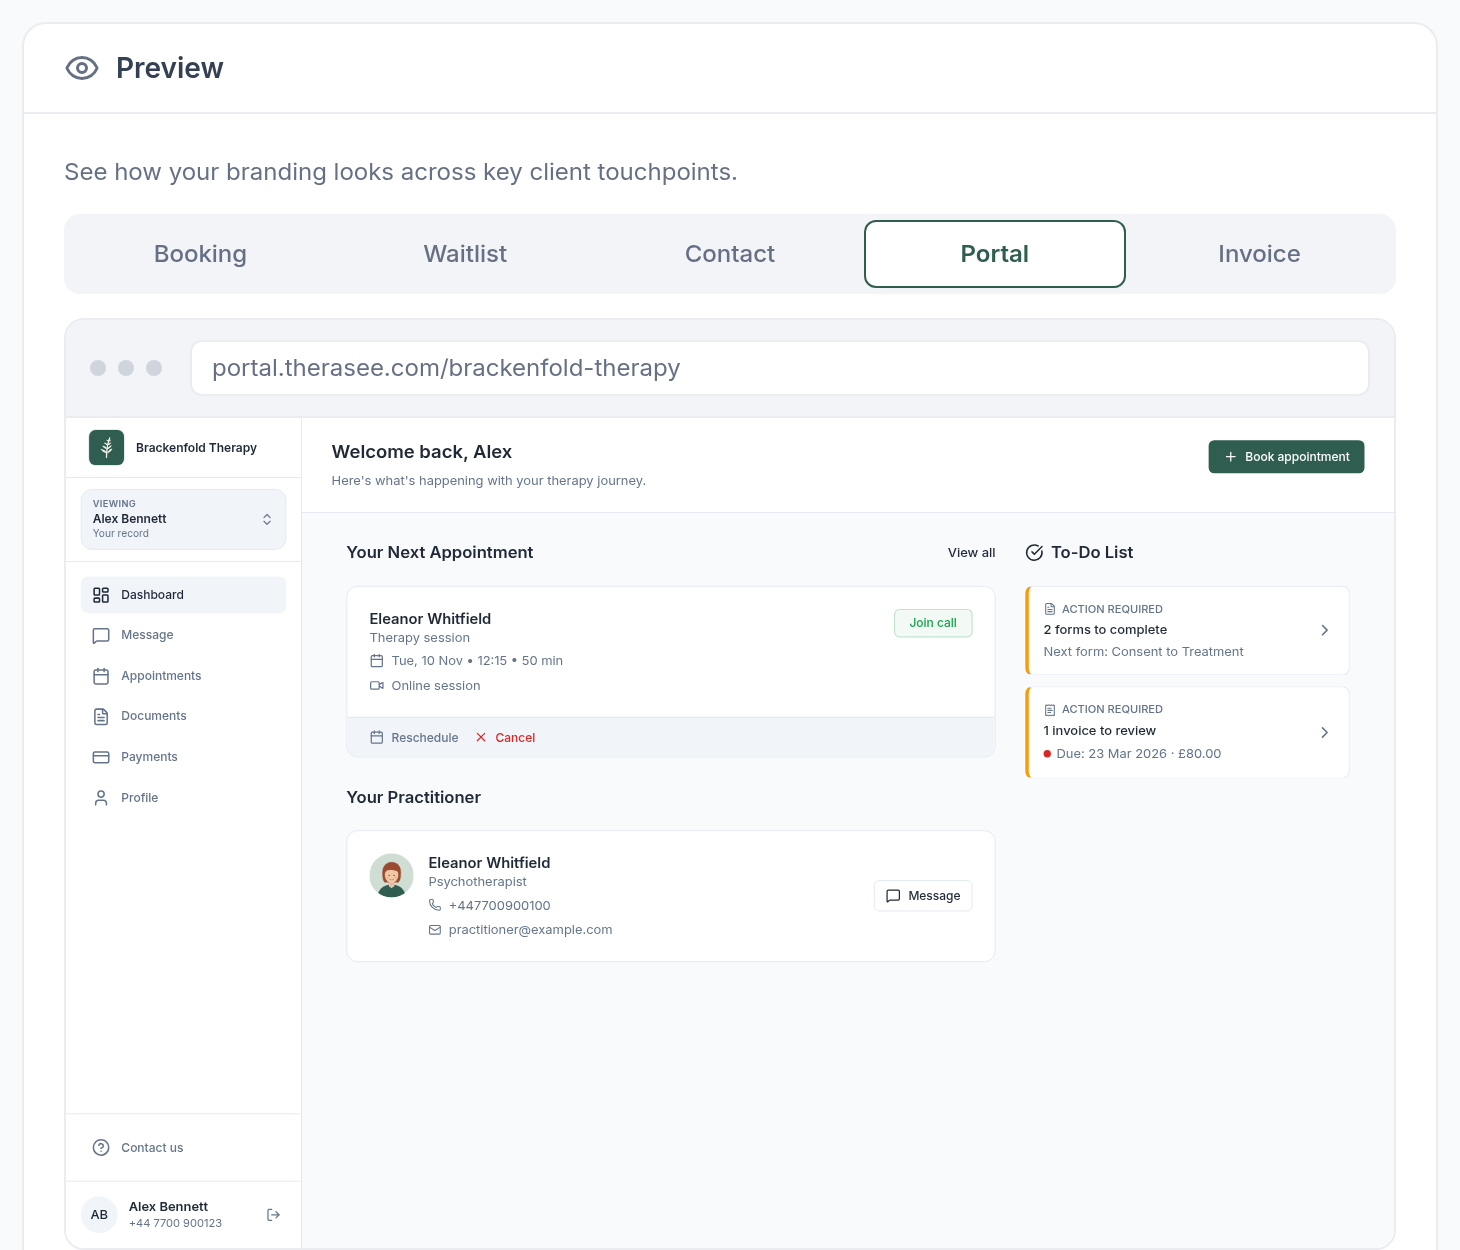
The preview is a picture drawn with a made-up client, so it's a quick way to check your branding without signing in anywhere. To see the real portal with your own appointments and messages, use a test client.
Use a test client to see the client portal
There's no "view as client" mode in Therasee. The client portal shows each client their own appointments, messages, documents and invoices, so the way to see it is to sign in as a client. You do that with a test client: a client record whose email address is one you can read.
Your practice may already have one
When a practice is created, Therasee adds a client called Test Client. It uses the email address, and the mobile number if you gave one, that you signed up with. It already has portal access switched on and comes with a sample past appointment, an appointment the next day, a note and a paid invoice.
If this client is on your Clients list with your email address, you can use it straight away, even if you've renamed it. It doesn't count towards the Free plan's client limit.
Adding a test client of your own
If you've deleted Test Client, or want another one, add a client in the usual way. Give it a name you'll recognise and an email address you can read but haven't used for another client, such as a second personal address. Each client in your practice needs their own email address. See Adding a client for the steps.
Give your test client portal access
For a client to sign in to your portal, three things need to be in place.
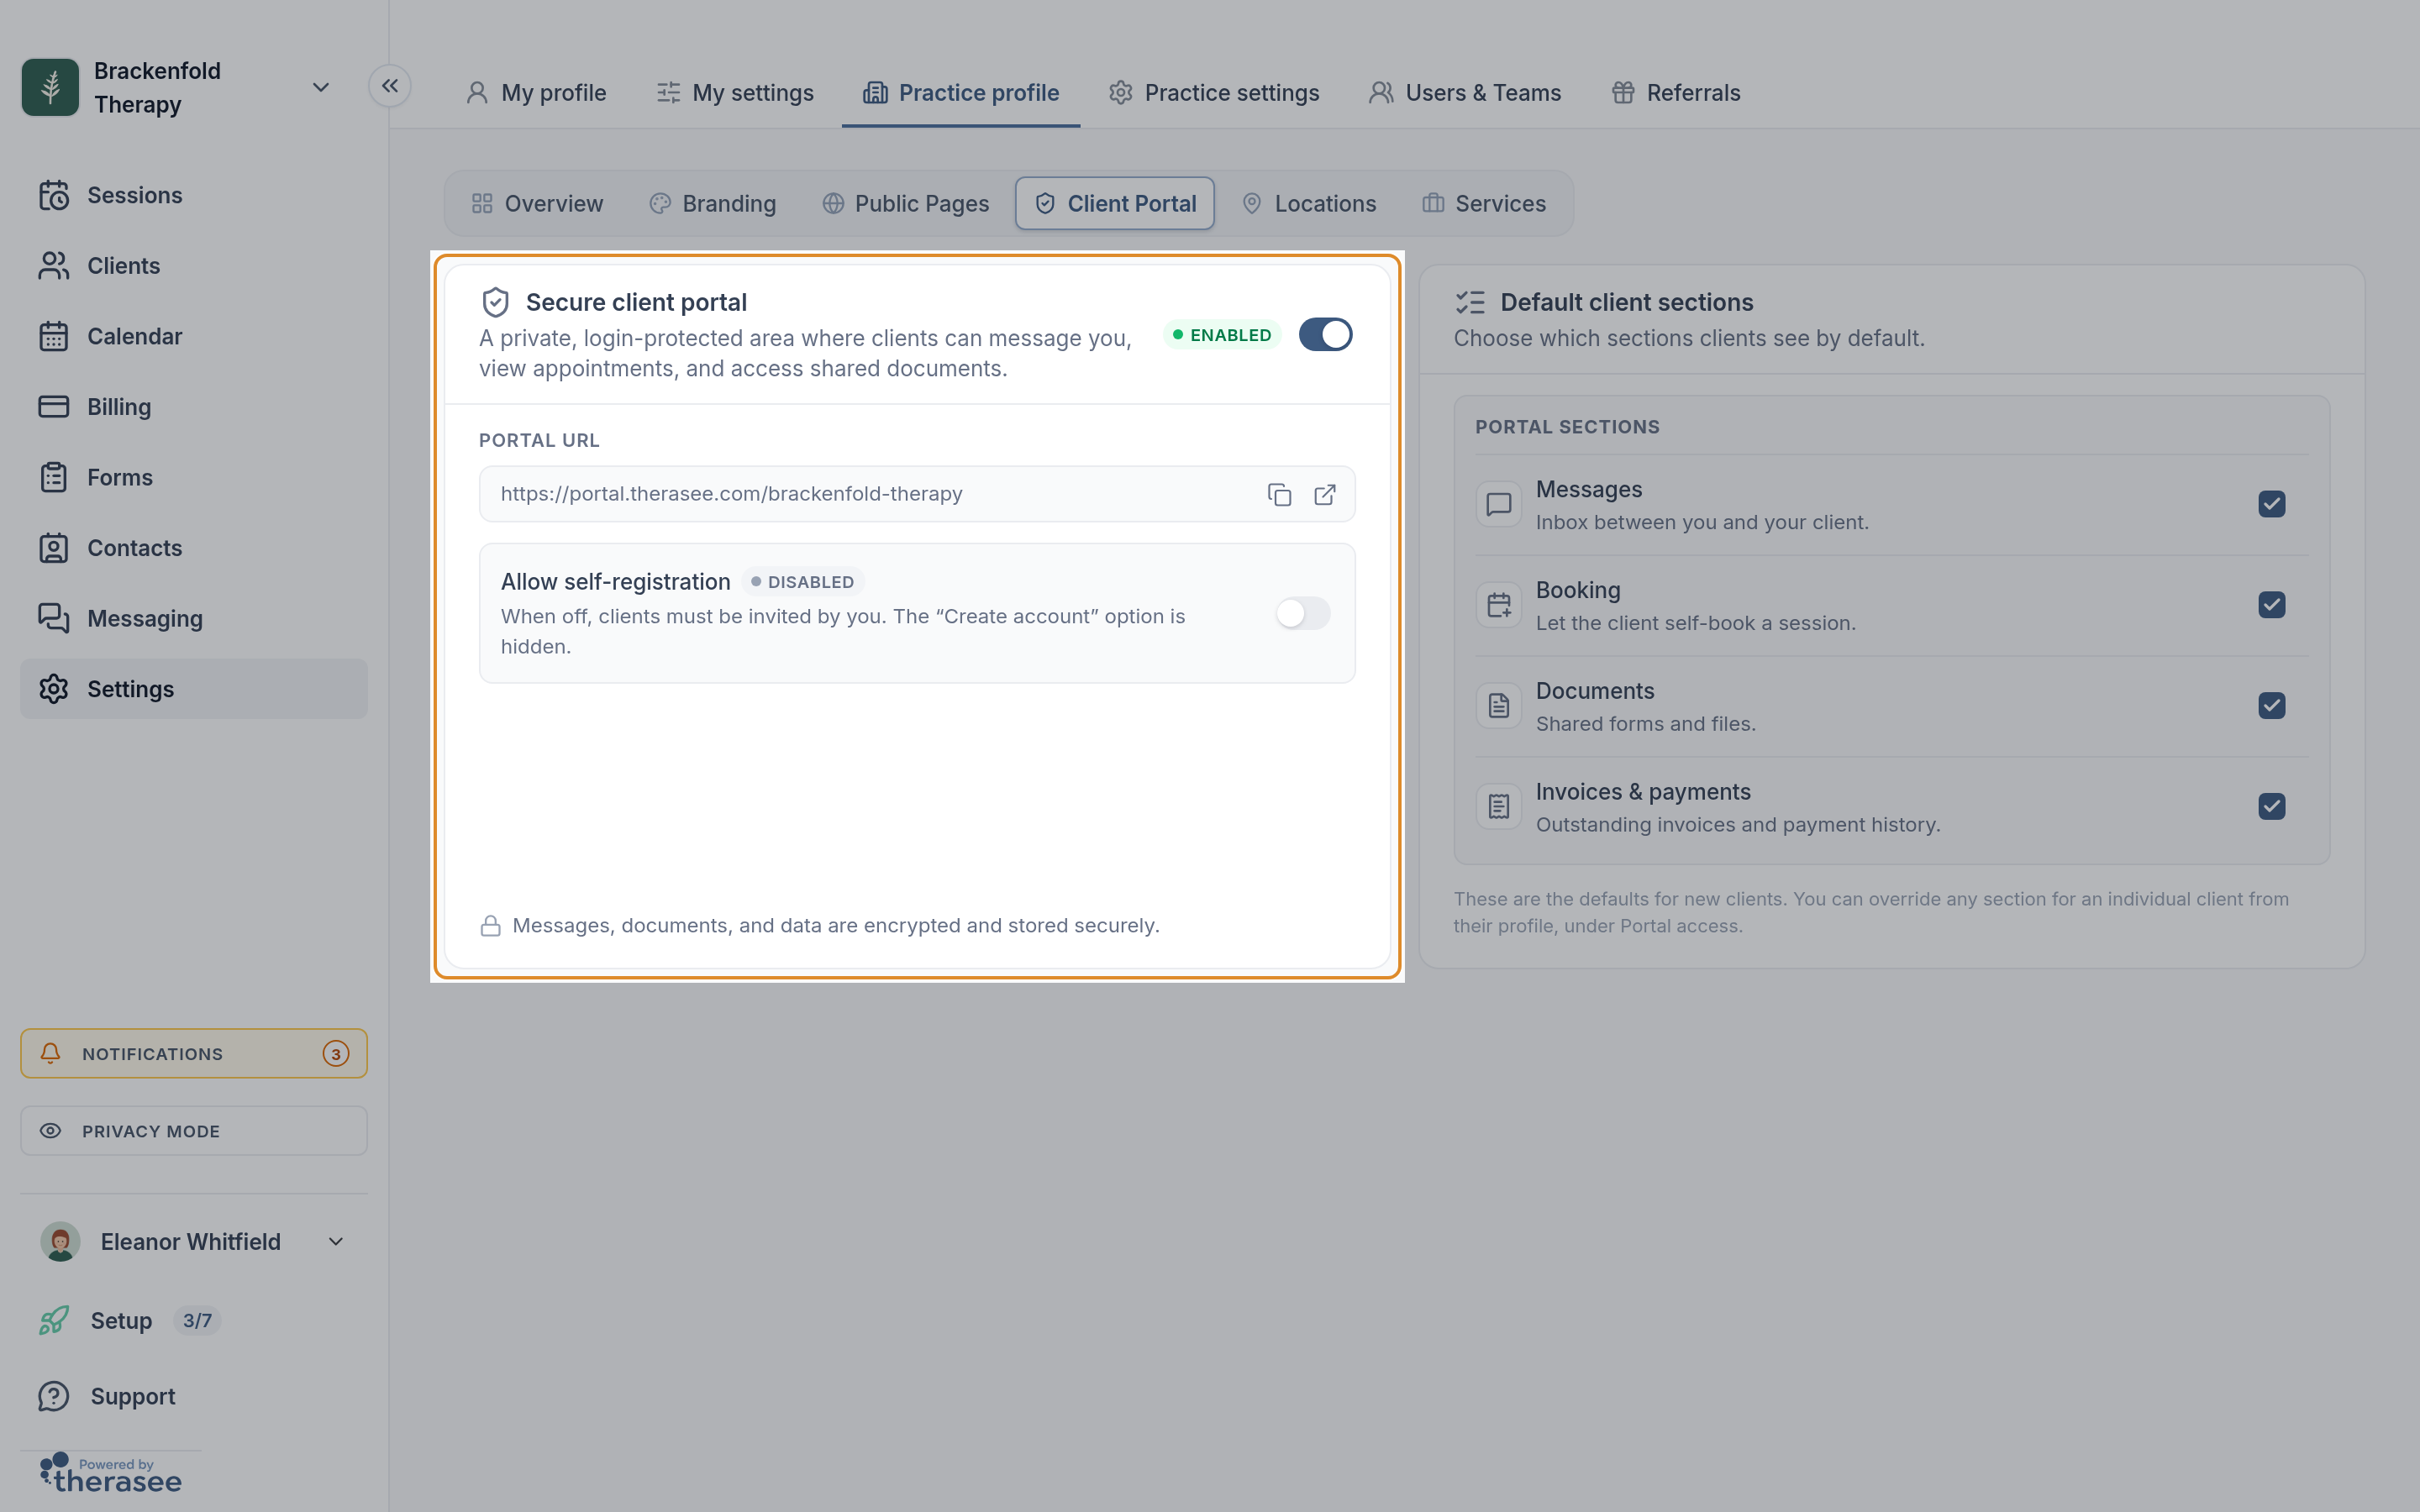
- The portal is switched on for your practice. Go to Settings, Practice profile, Client Portal. The Secure client portal card should show Enabled. If it shows Disabled, click the switch.
- Portal access is switched on for the client. Open the client from Clients. On the Client profile tab, find the Portal access card and click the switch. The card appears only while the portal is on for your practice.
- The client has an email address or phone number on their record. The switch can't be turned on without one.
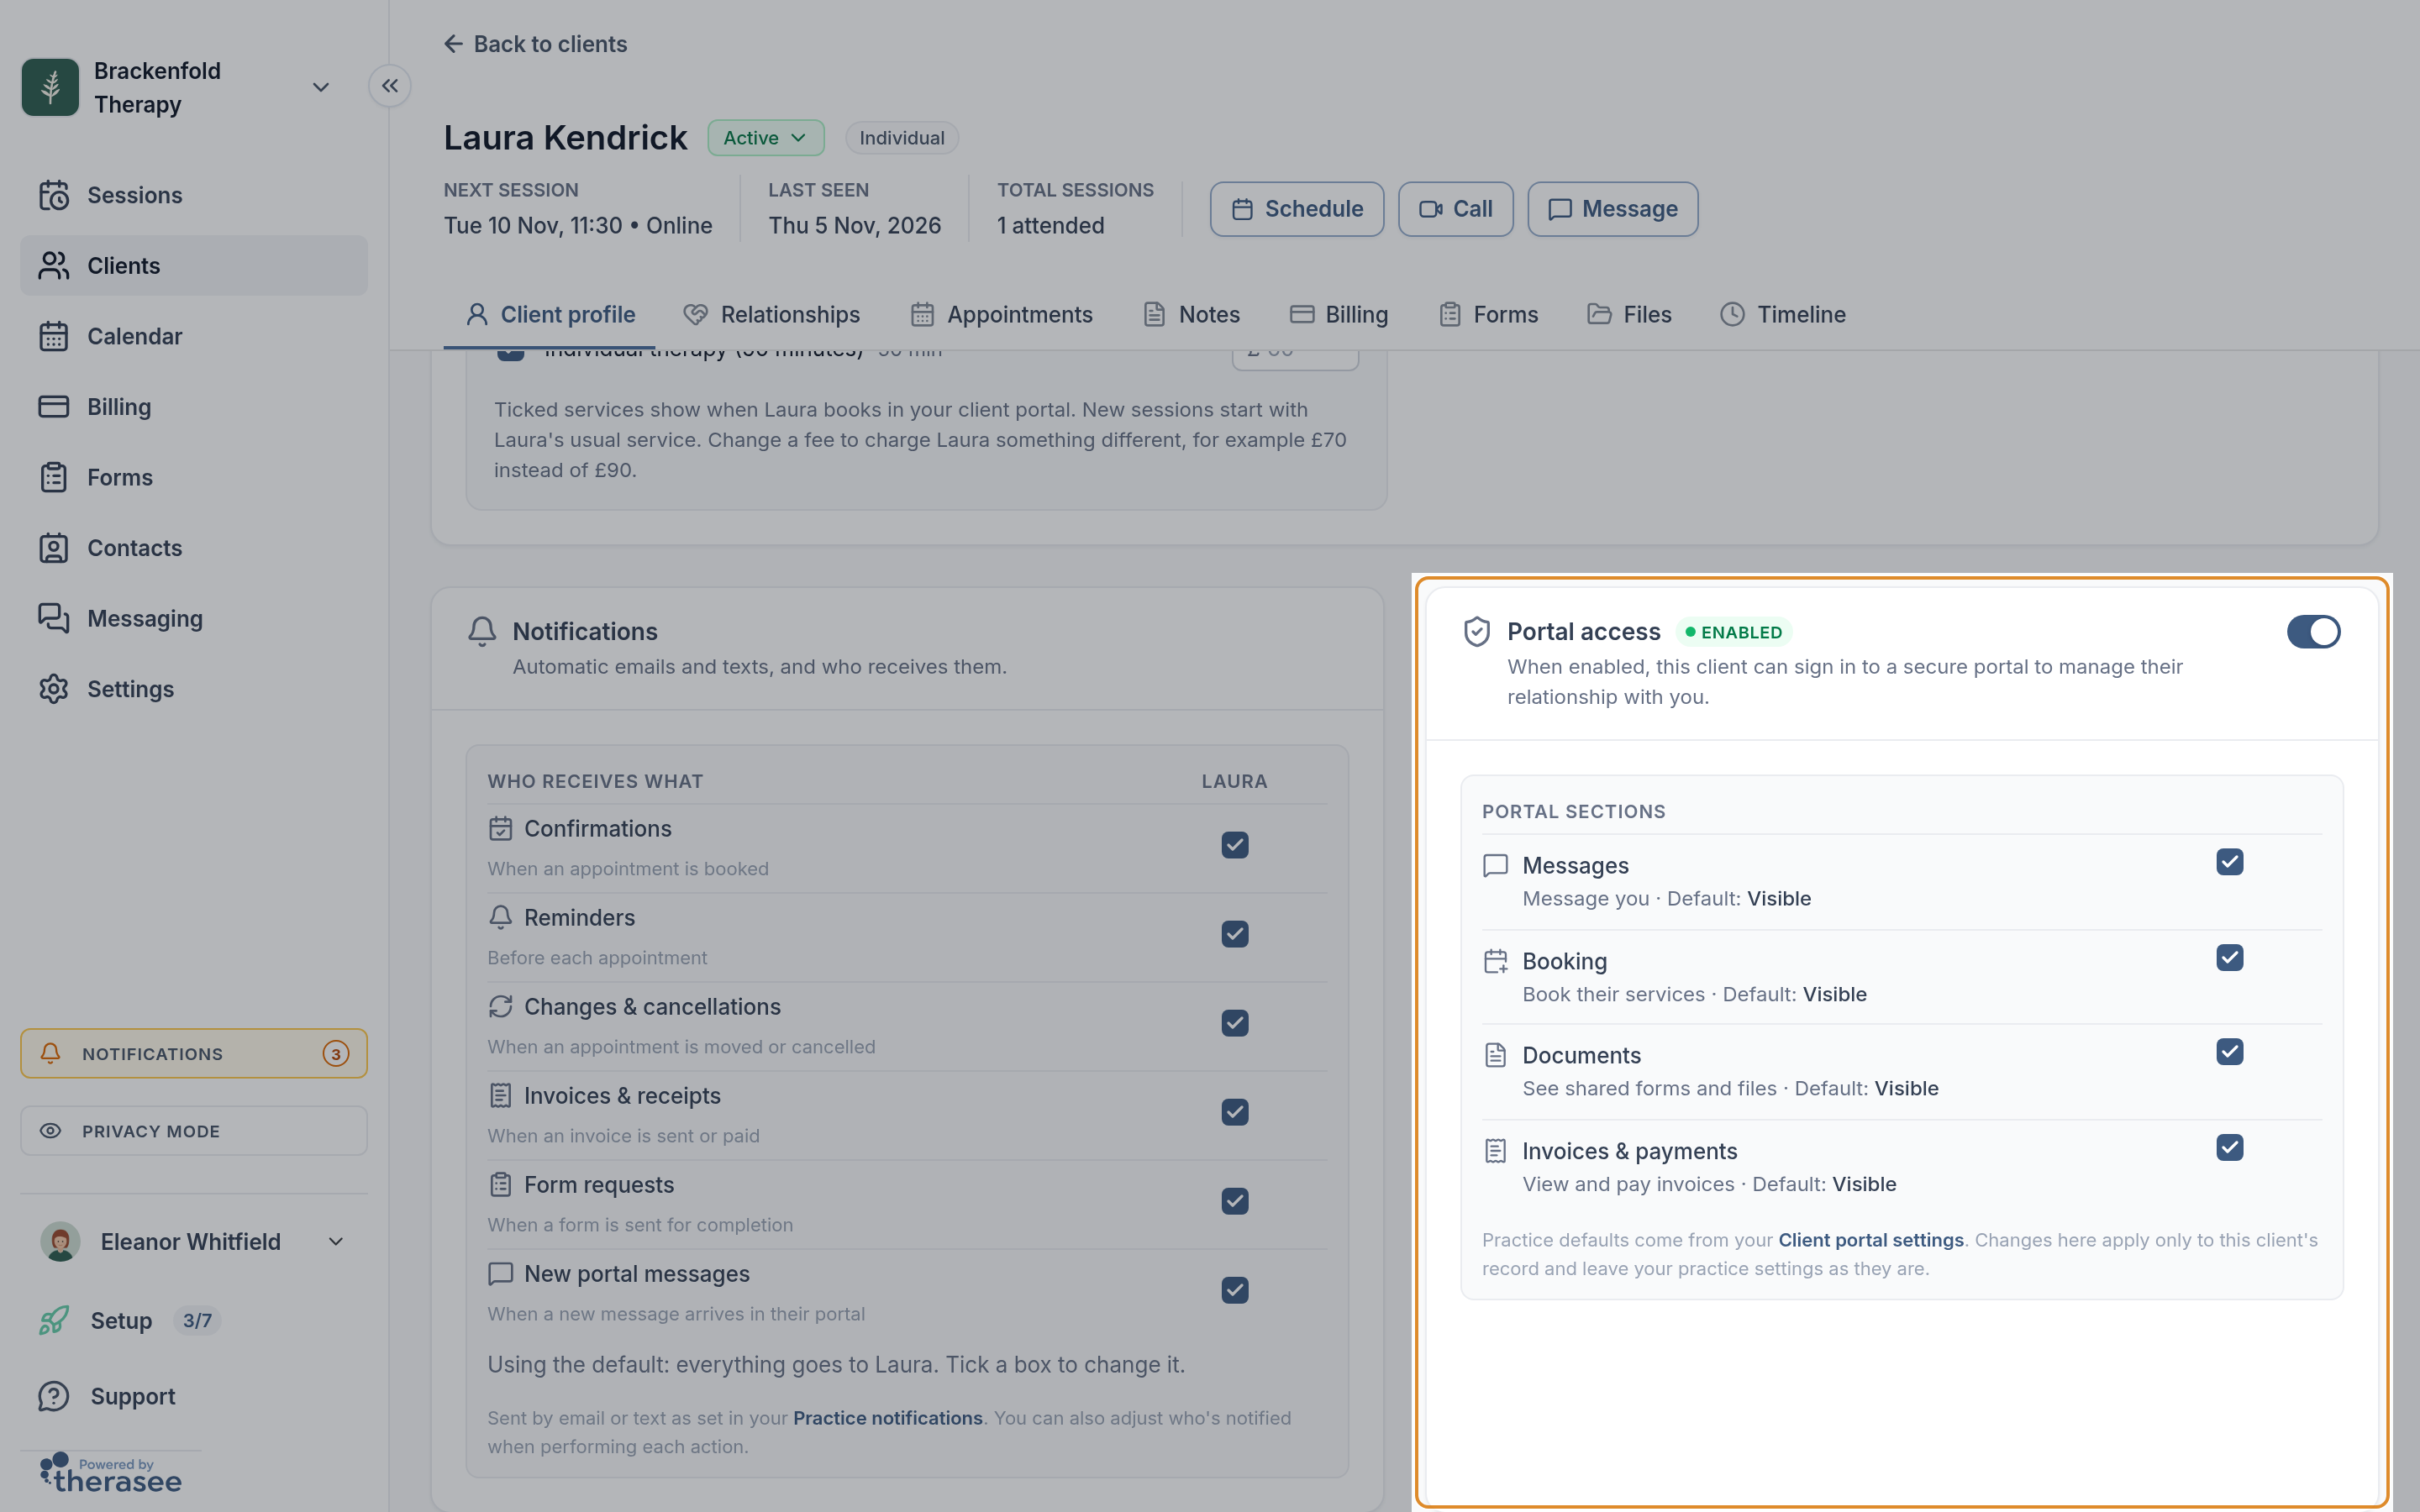
When you switch on Portal access for an individual client, Therasee asks Let [name] know they can sign in?. Turn on Send as Email and click Send to receive the invitation at your test address, so you can see that email too. Click Don’t send if you only want to switch access on.
If your practice works with couples and dependants, a couple's or dependant's record, or any record with a linked partner or responsible adult, shows a window listing each person instead, with a Can sign in tick for each. Only the people you tick can sign in. See Working with couples and Working with children and other dependants.
Sign in to the portal as your test client
- Go to Settings, Practice profile, Client Portal. The Portal URL box shows your portal address.
- Click the open icon to open the portal in a new tab, or the copy icon to copy the address and paste it into another browser or your phone.
- On your practice page, click Client sign in. If this browser is already signed in to the portal as a client, the button reads Go to portal instead.
- The sign-in screen asks for a phone number first. Click Email and enter your test client's email address, or stay on Phone and enter the mobile number on its record. Therasee sends a sign-in code there.
- Enter the code. It works for 5 minutes.
You're now in the portal exactly as that client sees it.
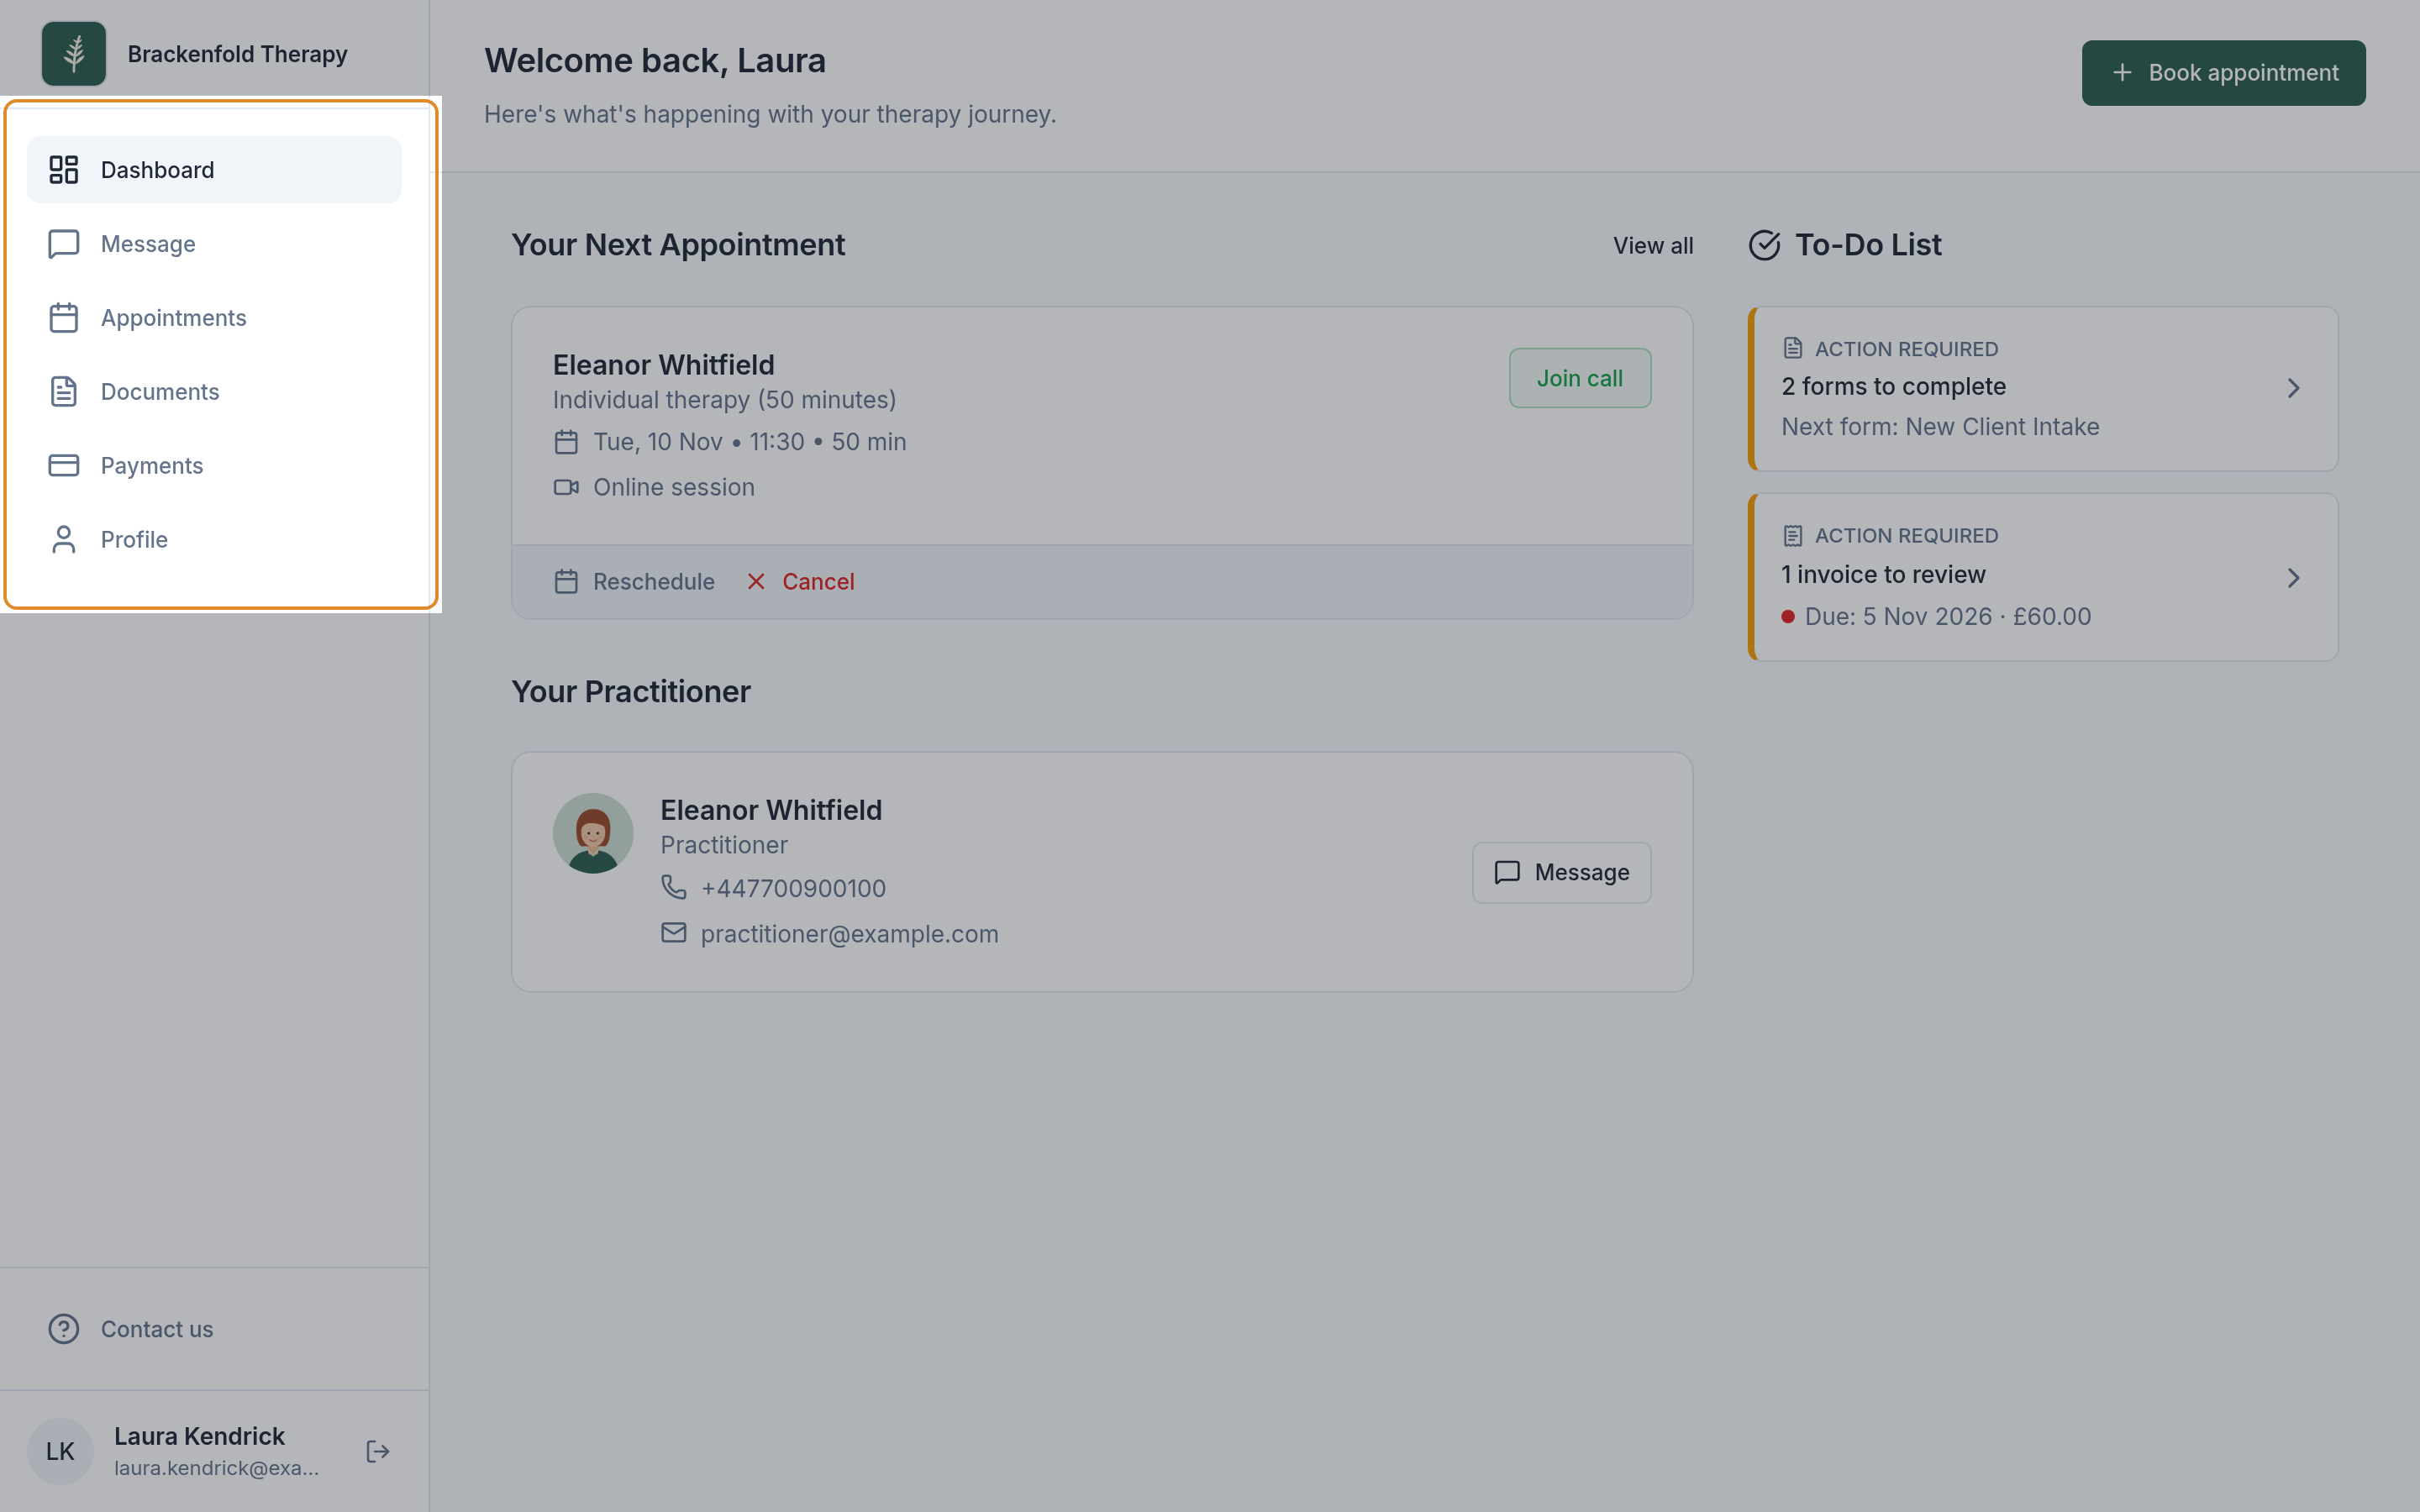
For what clients see at each step of signing in, see Signing in to your client portal.
Using the same browser as Therasee
You don't need a private window. The client portal is at a different address from the practitioner app and keeps its own sign-in, so you can stay signed in to Therasee in one tab and be signed in to the portal as your test client in another.
A browser holds one client portal sign-in at a time. To try a second test client, sign out of the portal first, or use a private window or another browser for the second one.
See the emails and texts your clients receive
There's no way to send yourself a test copy of a client email or text. To see what your clients receive, send it to your test client. Because the email address on the record is yours, everything arrives in your own inbox:
- Booking confirmations and reminders: book an appointment for your test client from the calendar. When Therasee asks Send confirmation?, choose email, text or both and click Schedule and send. Reminders follow your settings in Settings, Practice settings, Notifications.
- Messages and message templates: send your test client a message, or one of your message templates. See Messaging a client, and what they actually receive.
- Forms and invoices: send a form or an invoice to your test client. To look at a form without sending it, click its name on the Forms page.
To see texts, make sure the test client's record has your own mobile number. Texts to a test client come out of your monthly text allowance in the same way as texts to any client. Sign-in codes don't.
For the full list of what clients can be sent, and how to choose what goes out, see What your clients are sent, and when.
Choose which portal sections your test client sees
The portal has four sections you can switch on or off: Messages, Booking, Documents and Invoices & payments. A client sees your practice defaults unless their own record says otherwise. You set the defaults in the Default client sections card at Settings, Practice profile, Client Portal, and can change them for one client under Portal sections in their Portal access card.
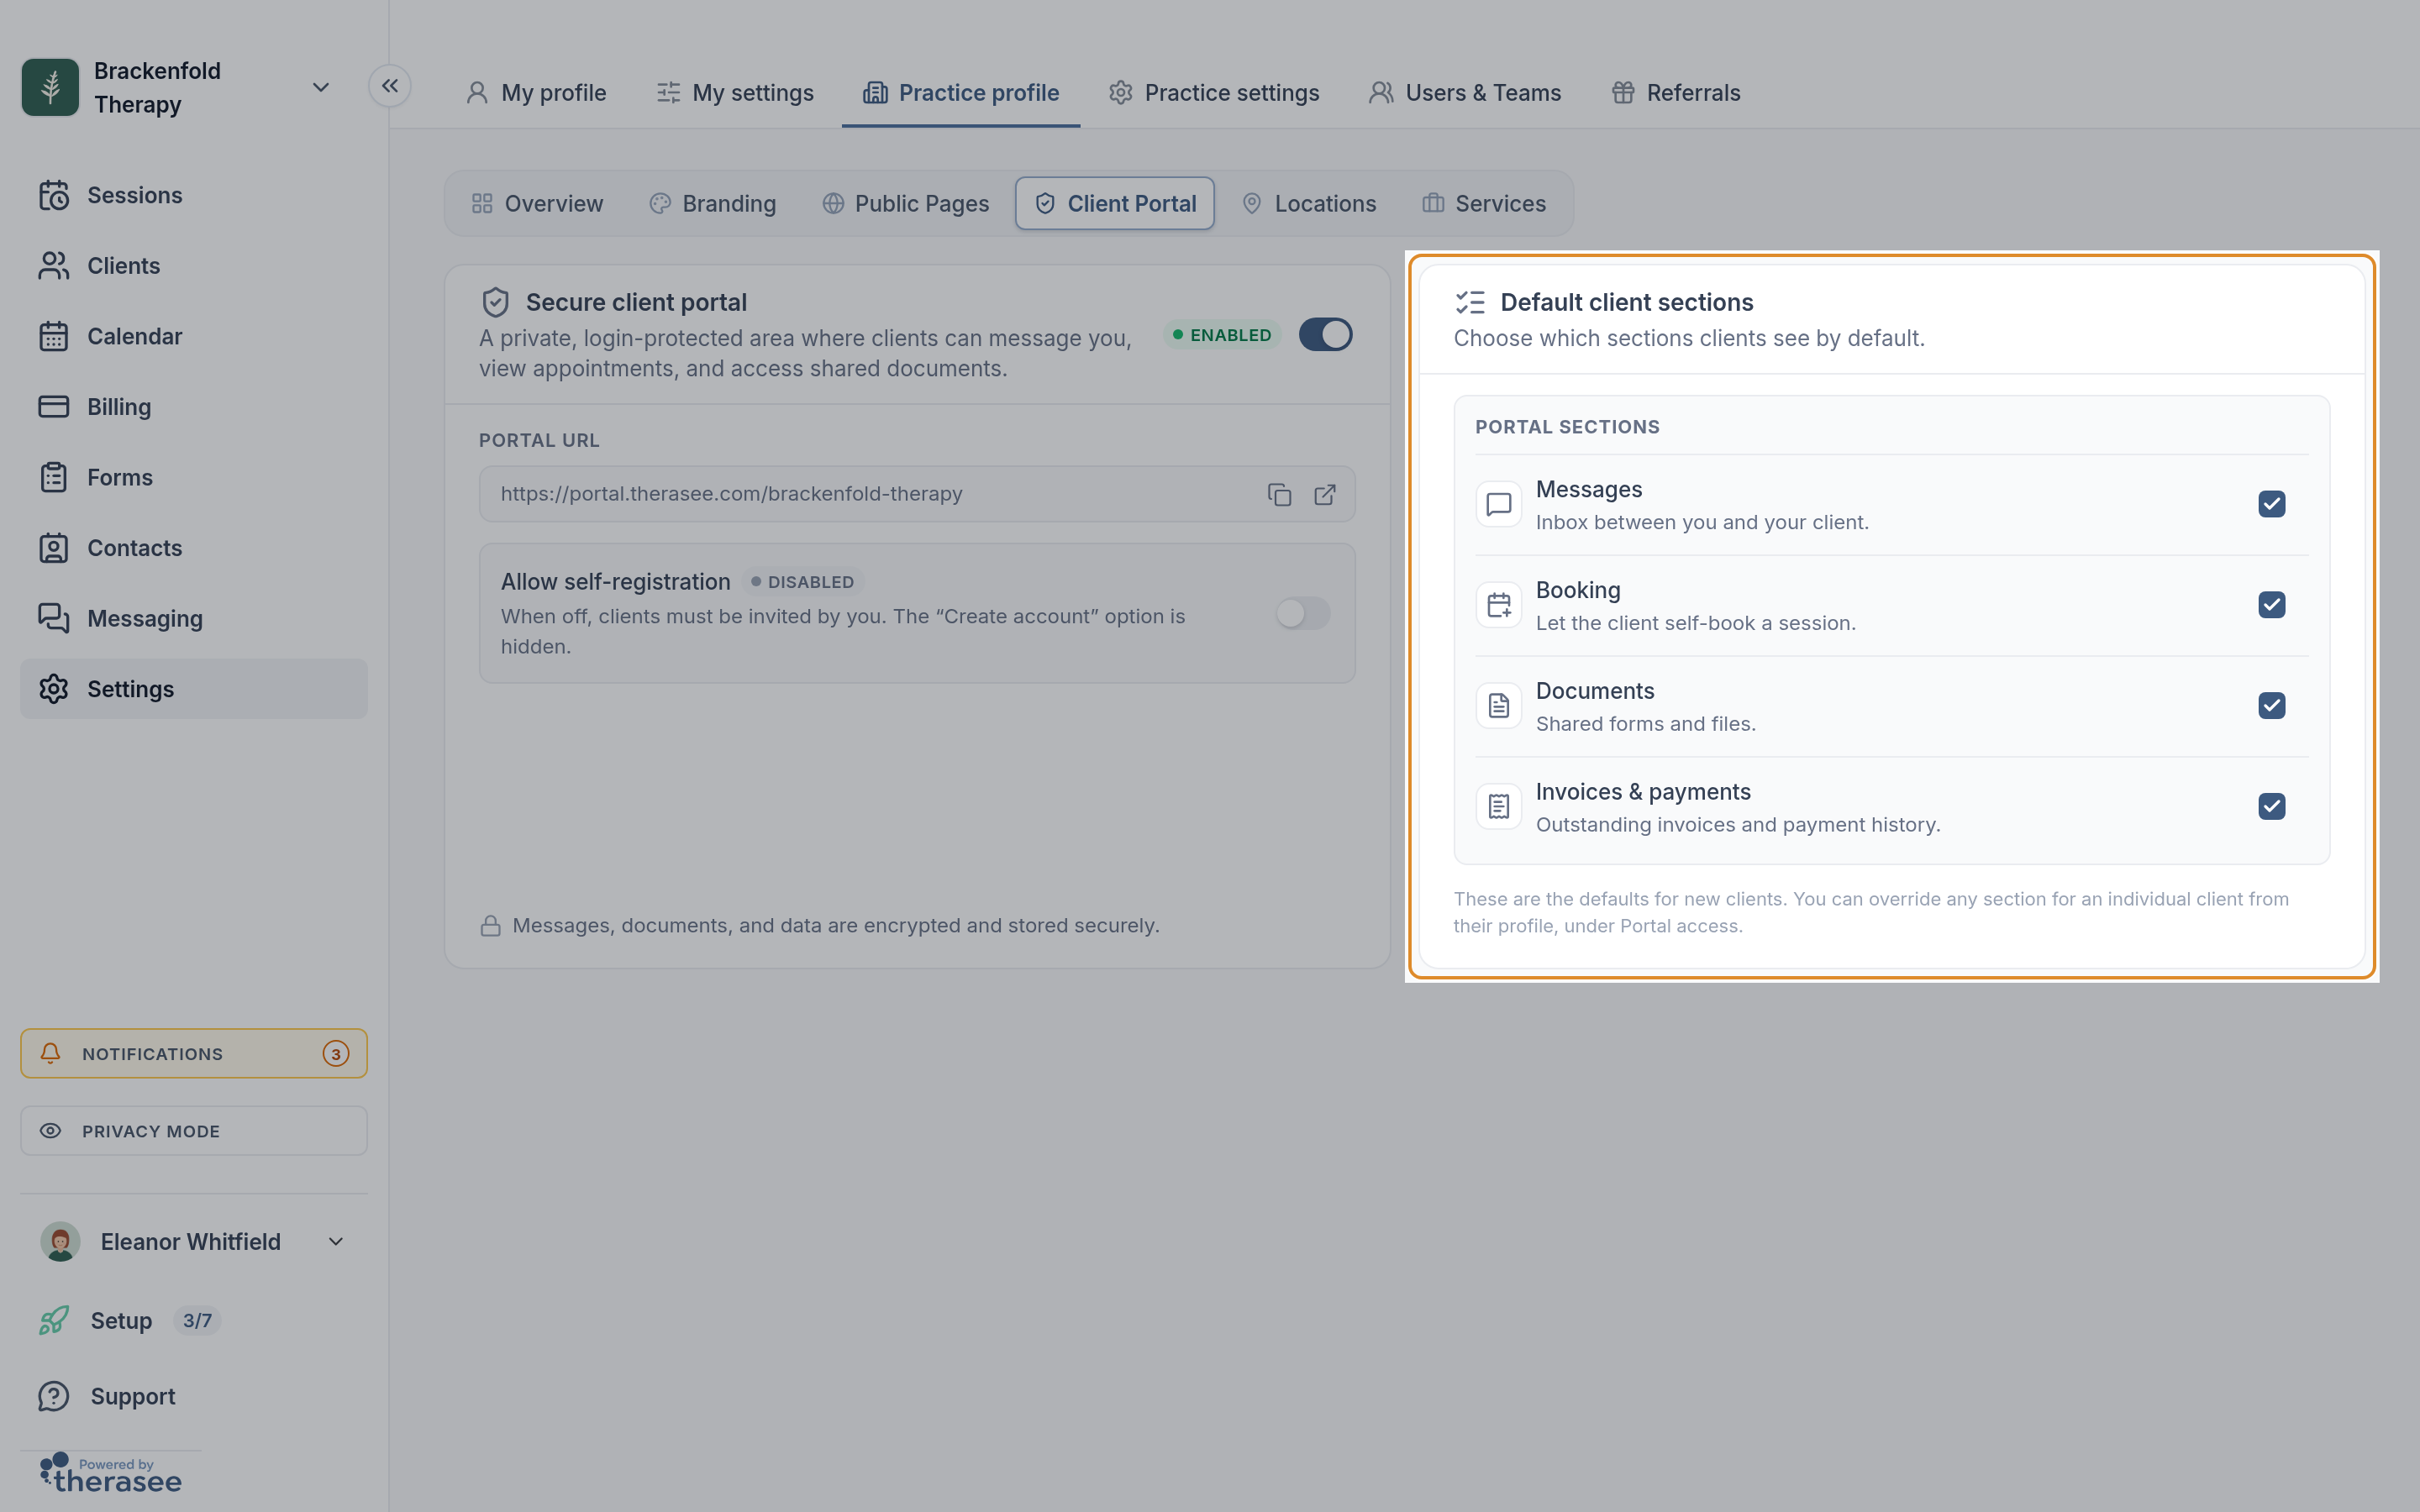
To see what a client with a given set of sections sees, change the sections on your test client's record and sign in as them. Changes on one record apply only to that client. See Turning on the client portal and inviting clients for more on sections.
What a test client counts towards
Apart from the Test Client Therasee adds for you, a test client is an ordinary client. Therasee treats it like any other, so keep these points in mind.
- The Free plan's client limit. The Free plan includes up to 3 clients. A test client you add yourself counts as one of them, and so does an Inactive client. Deleting a client frees the place. See Managing your Therasee plan.
- Your calendar. An appointment for a test client takes up that time in your calendar and shows on your Sessions list, like any other.
- Invoices. Invoices for a test client are real invoices and appear on your Billing page. Booking a priced appointment may create an invoice, depending on your automatic invoice settings and the invoicing choice on the appointment. Once your practice has issued an invoice, you can't change your practice currency yourself, so set your currency before you send a test invoice.
- Payment at booking. If a service has Process payments at the time of booking switched on, booking it from the portal or the booking page takes the client to card payment. To test booking without paying, choose a service that doesn't take payment at booking.
- Emails and texts. Everything your practice sends goes to the test client's email address and phone number, so only use details you own.
Tidy up when you've finished
You can keep a test client for next time or remove it. Choose whichever suits you.
- Cancel its appointments. Cancel any test appointments you no longer need, so the time is free in your calendar. See Cancelling, rescheduling and marking no-shows.
- Turn off portal access. On the client's Portal access card, click the switch, then Revoke access. They can no longer sign in, and you can turn access back on at any time.
- Mark it Inactive. Click the status badge at the top of the client's record and choose Inactive. Inactive clients are left off your Clients list unless you choose to show them. To stop the client signing in, turn off portal access.
- Delete it. On Clients, open the menu on the client's row and choose Delete client. Leave Keep this client's data unticked, then click Delete client. Deleting can't be undone. It removes the client from your lists, stops them signing in to the portal and frees their email address, so you can use it for a new test client later.
Was this helpful?