Running a video session
Start an online session from Sessions, the calendar or a client's profile, check your camera and microphone, let clients in from the waiting room, share your screen or blur your background, and end the call. Also covers adding an interpreter or other third party, using Zoom or Google Meet instead, and what to tell a client who cannot get in.
Updated 4 November 2026
Online sessions run on a video call that opens in your web browser, with nothing to download. Clients always wait in a waiting room until you let them in, so nobody can walk in on a session.
Before the day
A session is a video session when its location is Online. When you book it, choose Online as the location, and the Video platform field shows which call it will use (the built-in call is listed as Therasee video). See Booking an appointment.
Your client's confirmation and reminder emails carry a Join session button. See What your clients are sent.
Start the call
You can start the call from several places. They all open the same call in a new browser tab.
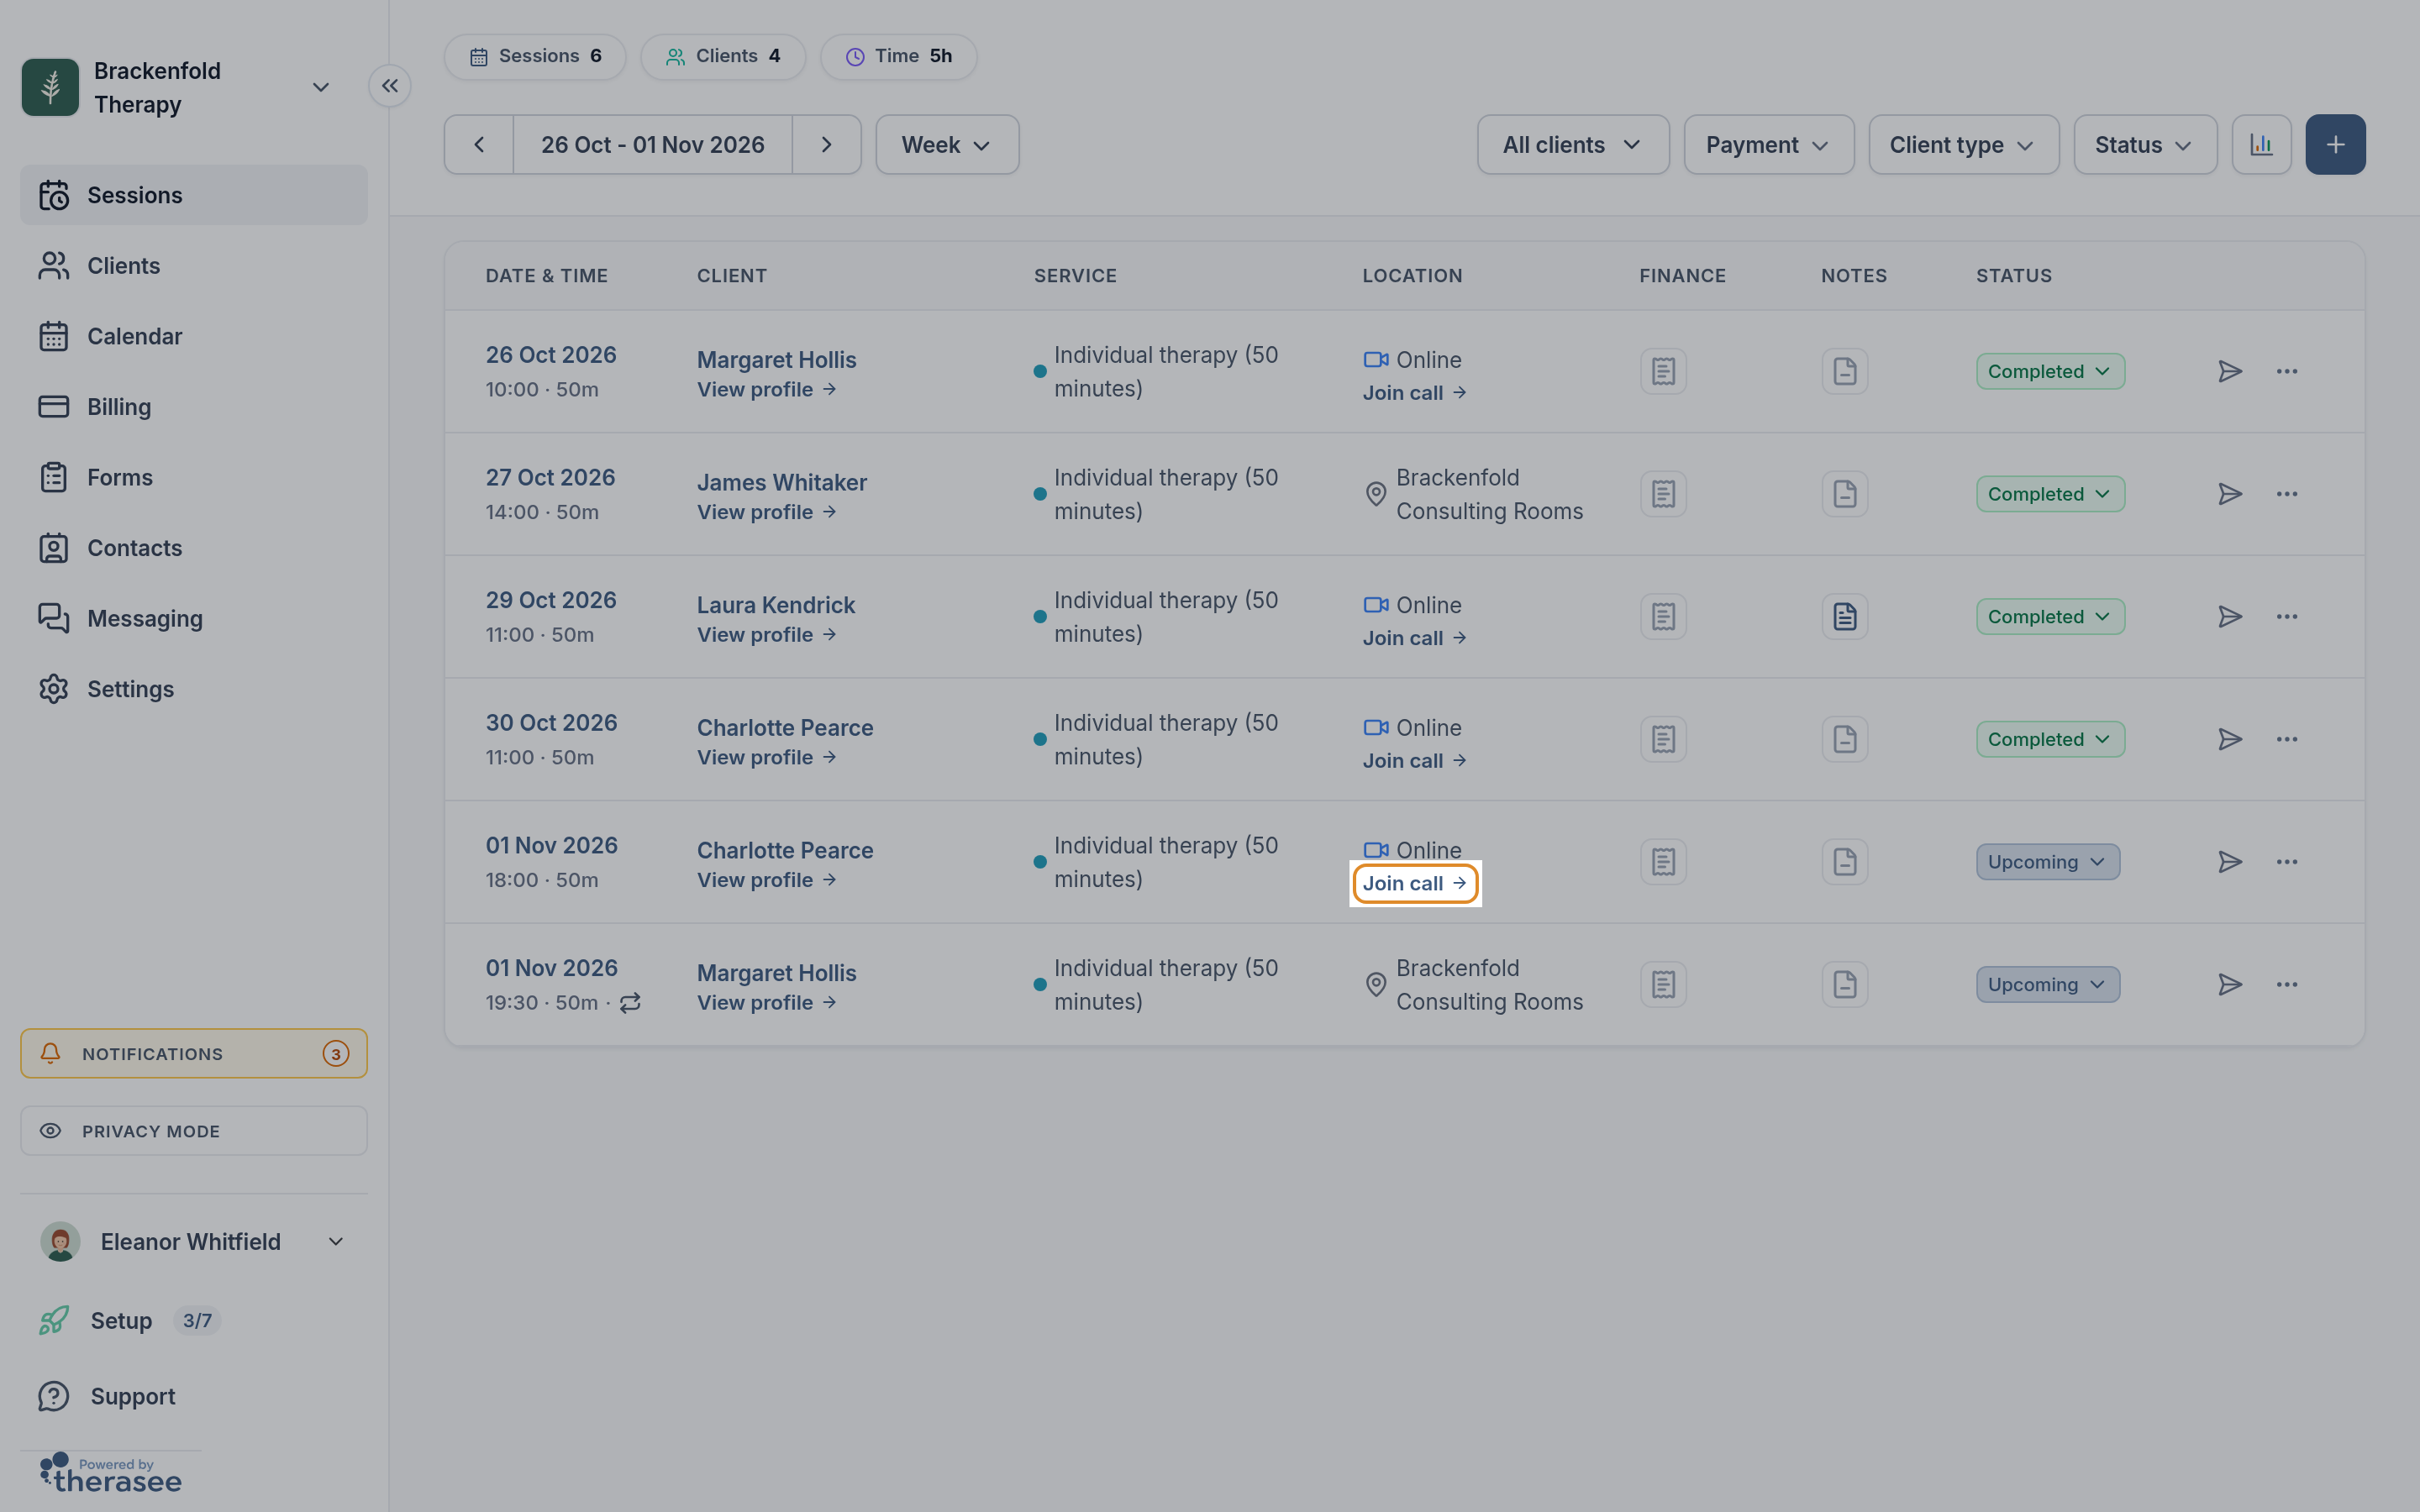
- Sessions list. Go to Sessions. In the Location column, online sessions show Online with a Join call link underneath. Select Join call.
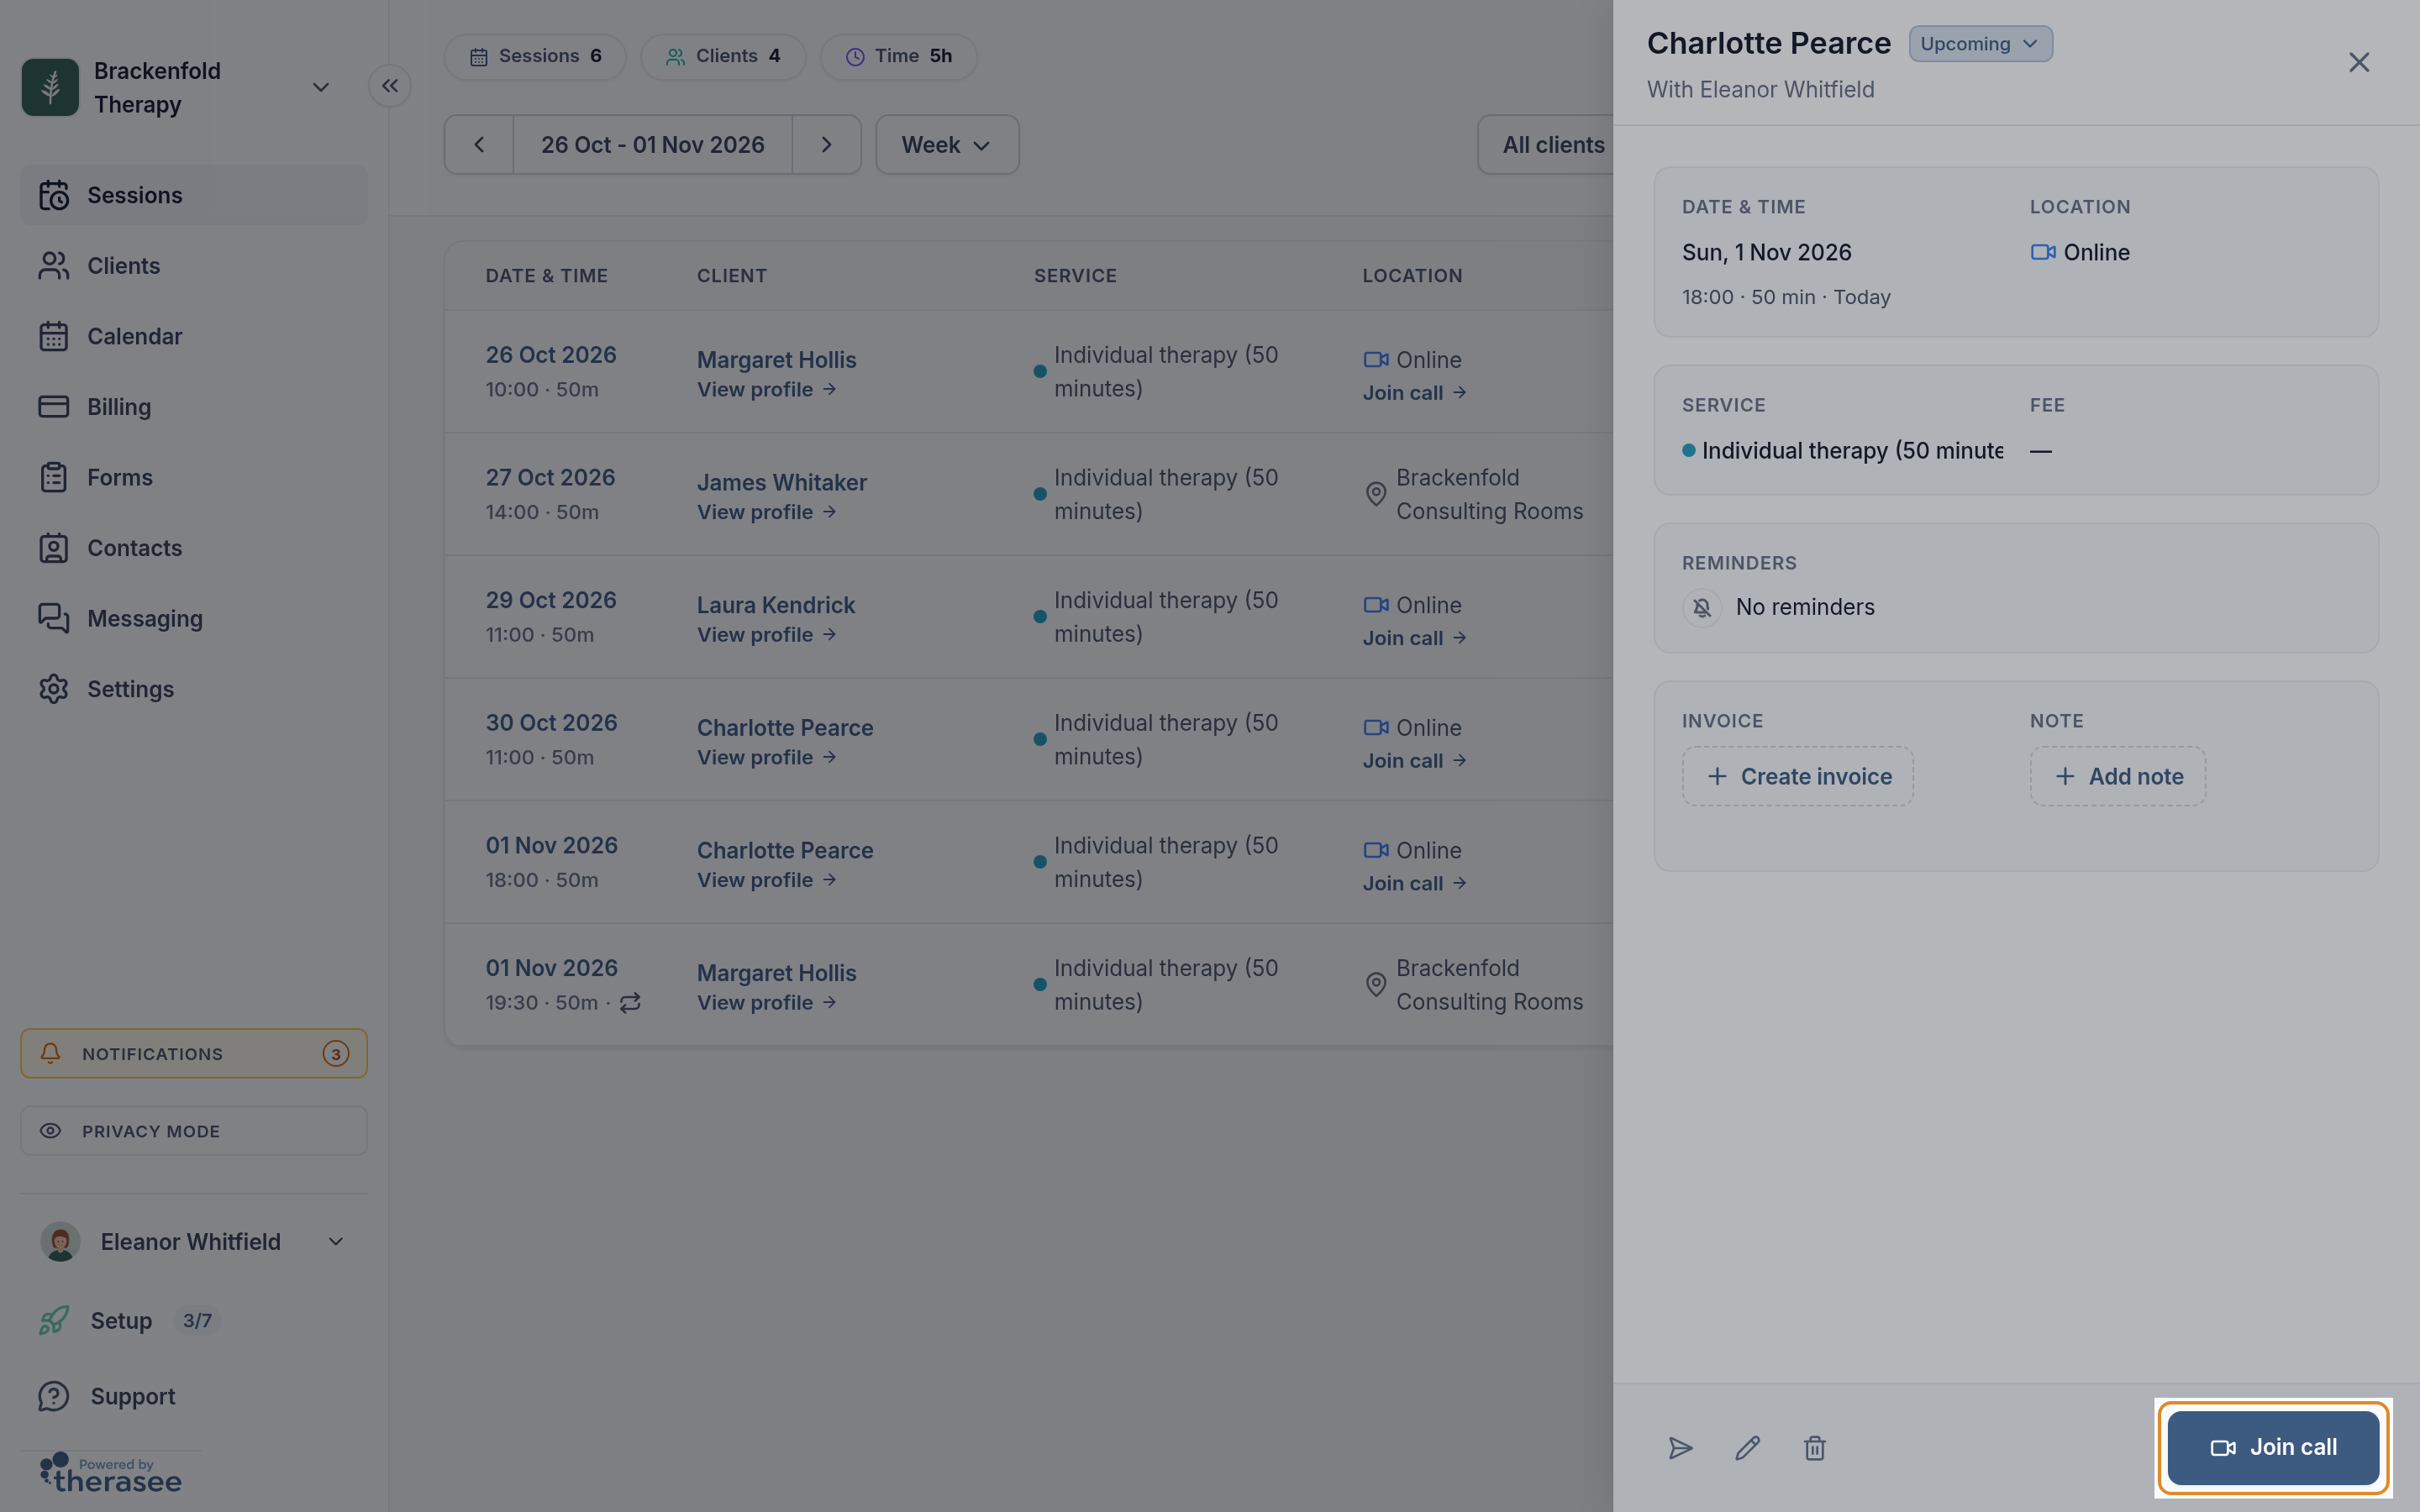
- Session details. Select a session's date and time in the Sessions list, or select the session on your Calendar. The details panel for an online session has a Join call button at the bottom right.
- Client profile. Open the client from Clients, go to the Appointments tab, select the session and then select Join call.
- The starting-soon notice. Up to 15 minutes before an online session, a Session starting soon notice appears in the corner of the portal (it changes to Session starting now at the start time). Select Join, or View to see the session first.
The call can be opened at any time before the session, and up to a day after it ends. Cancelled sessions cannot be joined.
Check your camera and microphone
- Your browser asks to use your camera and microphone. Select Allow. If you are not signed in to the portal in this browser, you are asked to sign in first and then brought back to the call.
- You see a preview of yourself, with Appointment with and your client's name, and the service, above it. Only you can see the preview.
- Use the camera and microphone buttons under the preview to start with either one off. When the camera is off, the preview shows Camera is off.
- Select the settings (gear) button to choose your Camera, Microphone and Speaker, for example if you use a headset. Next to Connection, select Test for a quick check that you are online.
- Select Join Visit. As the practitioner for the session, you go straight into the call; you never wait in the waiting room.
If you see Camera and mic access blocked., allow access from the camera icon in your browser's address bar (in Safari, Safari > Settings for this website), then select Retry. Camera or microphone unavailable. means another app or tab is using your camera: close it and select Retry. Continue without checking lets you join and sort out devices inside the call.
Let your client in from the waiting room
Your client can open the call before you, and whenever they arrive they are held in the waiting room. They see Asking to join meeting… and You'll join the meeting as soon as someone accepts your request.
- When a client is waiting, a notice appears in your call with their name and Wants to join the meeting. It stays on screen until you act on it.
- Select Admit to let them in. Reject turns the request down. Chat sends them a message while they wait, for example to say you are running a few minutes late.
- If more than one person is waiting, the notice shows how many people are waiting and Want to join the meeting. Select View lobby to open the participants panel, where the Lobby section lists each person with Admit, and Admit all lets everyone in at once.
If a client's connection drops and they rejoin, they come back through the waiting room. Admit them in the same way.
Couples, families and other attendees
Everyone except you waits in the waiting room under their own name, so admit them one at a time or use Admit all. For a couple, or a young person with responsible adults, open the session's details, select Send invite (the paper plane) and pick the people: each named person gets their own join link and joins under their own name. See Working with couples and Working with dependants.
Adding an interpreter or another professional
Someone who is not your client, such as an interpreter, a psychiatrist or a family member in another house, can join the same call from their own device. They join as an attendee of the session, with their own link, so they appear in the call under their own name and wait in the waiting room like everyone else.
- Link them to the client. Open the client from Clients and go to the Relationships tab. Select + (Add relationship), choose Existing contact or New contact, fill in their name and email address, set the Relationship (choose one or type your own, for example Interpreter) and select Add.
- Add them to the session. When you book the session, or when you edit an existing one, find Attending and use Search contacts to add them. They are listed alongside your client.
- Check they will be told. When you schedule, the Who gets notified list has an Email tick for them, ticked when they have an email address. Keep it ticked.
They are emailed An appointment invitation, which says they are invited to join your client's appointment and has a Join session button carrying their own link. Their appointment reminders carry the same link. They open the call from it with no portal account, check their camera and microphone, and wait for you to admit them. Adding someone to Attending doesn't change who receives your client's own notifications.
To give a third party their own way in, always add them to Attending rather than forwarding your client's email. Your client's link joins the call under your client's name.
During the call
The toolbar at the bottom of the call has your microphone and camera, chat, screen sharing, the participants panel and device settings. On a narrow window or a phone, some of these move into the More actions menu (the three dots). The call has no recording button and no whiteboard.
Share your screen
- Select the screen-sharing button (Start screen sharing) in the toolbar.
- Your browser asks what to share: a browser tab, a single window or your entire screen. Pick one and confirm. Sharing a single tab or window keeps the rest of your screen, such as your notes or email, private.
- Everyone in the call now sees what you are sharing. To stop, select the same button (Stop screen sharing) or use your browser's own stop button.
To play a video with its sound, share the browser tab it is playing in and tick your browser's option to share the tab's audio. To work through a worksheet or diagram together, open it in a tab or app and share that. Screen sharing is made for computers: phone and tablet browsers generally cannot share their screen.
Blur or change your background
- Select Select background. If it is not on the toolbar, open More actions (the three dots).
- Under Virtual backgrounds, choose Half Blur or Blur to soften the room behind you, or one of the pictures to replace it. Add background lets you use your own image, such as a plain wall or your logo. None turns the effect off. Select OK to apply your choice.
Only your own video changes; the others see you against the background you chose. Select background isn't offered while you are sharing your screen. If it isn't offered at other times, your browser or device doesn't support background effects: try an up-to-date Chrome or Edge on a computer.
Your client has the same toolbar, so they can share their screen or blur their background too.
End the call
- When the session is over, select the red hang-up button. You leave the call straight away; there is no separate step to end it for everyone.
- You see Your session has ended, with Rate video quality if you would like to give feedback.
- Under Add notes for this session now?, select Add notes to open the note for this session on the client's profile, or Maybe later to go back to your client list. See Writing session notes.
Your client leaves by selecting their own hang-up button, and they then see Your session has ended. If you leave first, your client stays in the call until they hang up; if you open the call again, you go straight back in.
Using Zoom, Google Meet or another platform
You can hold online sessions on another video service instead of the built-in call. When you do, Join call (for you and your client) and the Join session button in your client's emails open that link instead, and the waiting room and device check described above are replaced by whatever that service provides.
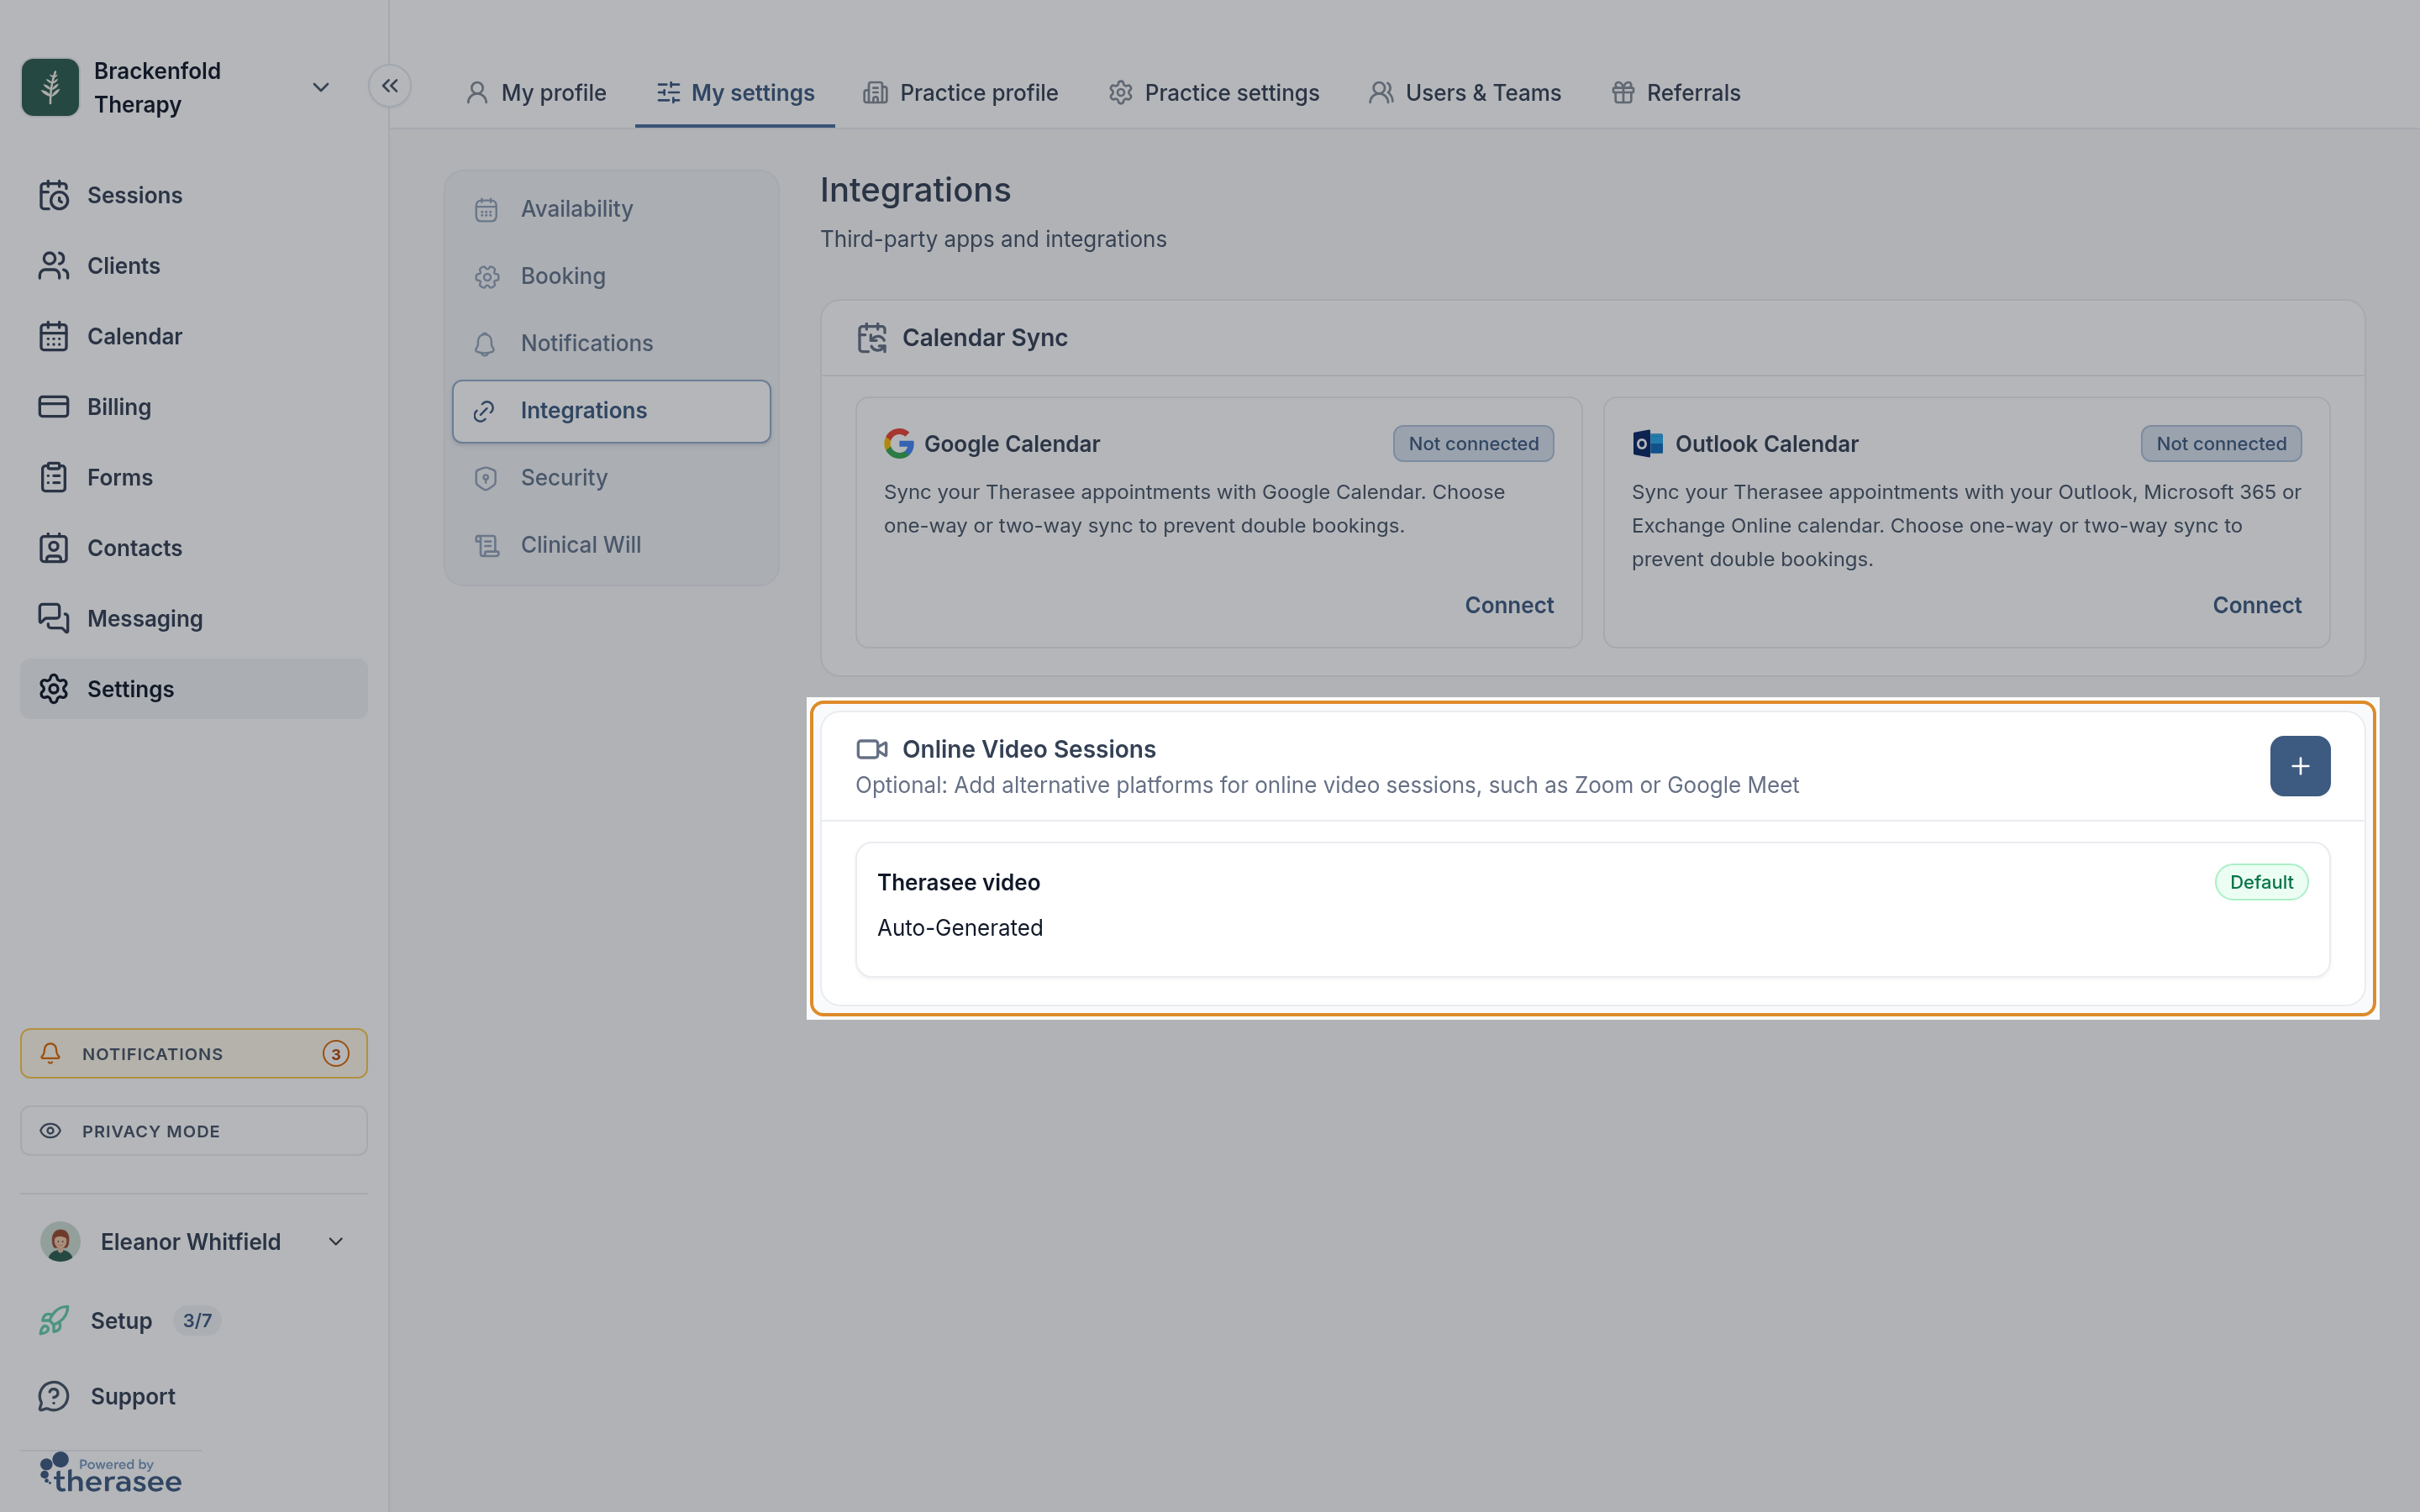
- Go to Settings, My settings, Integrations. The Online Video Sessions card lists your video options; Therasee video (the built-in call) is there already.
- Select the + button (Add link).
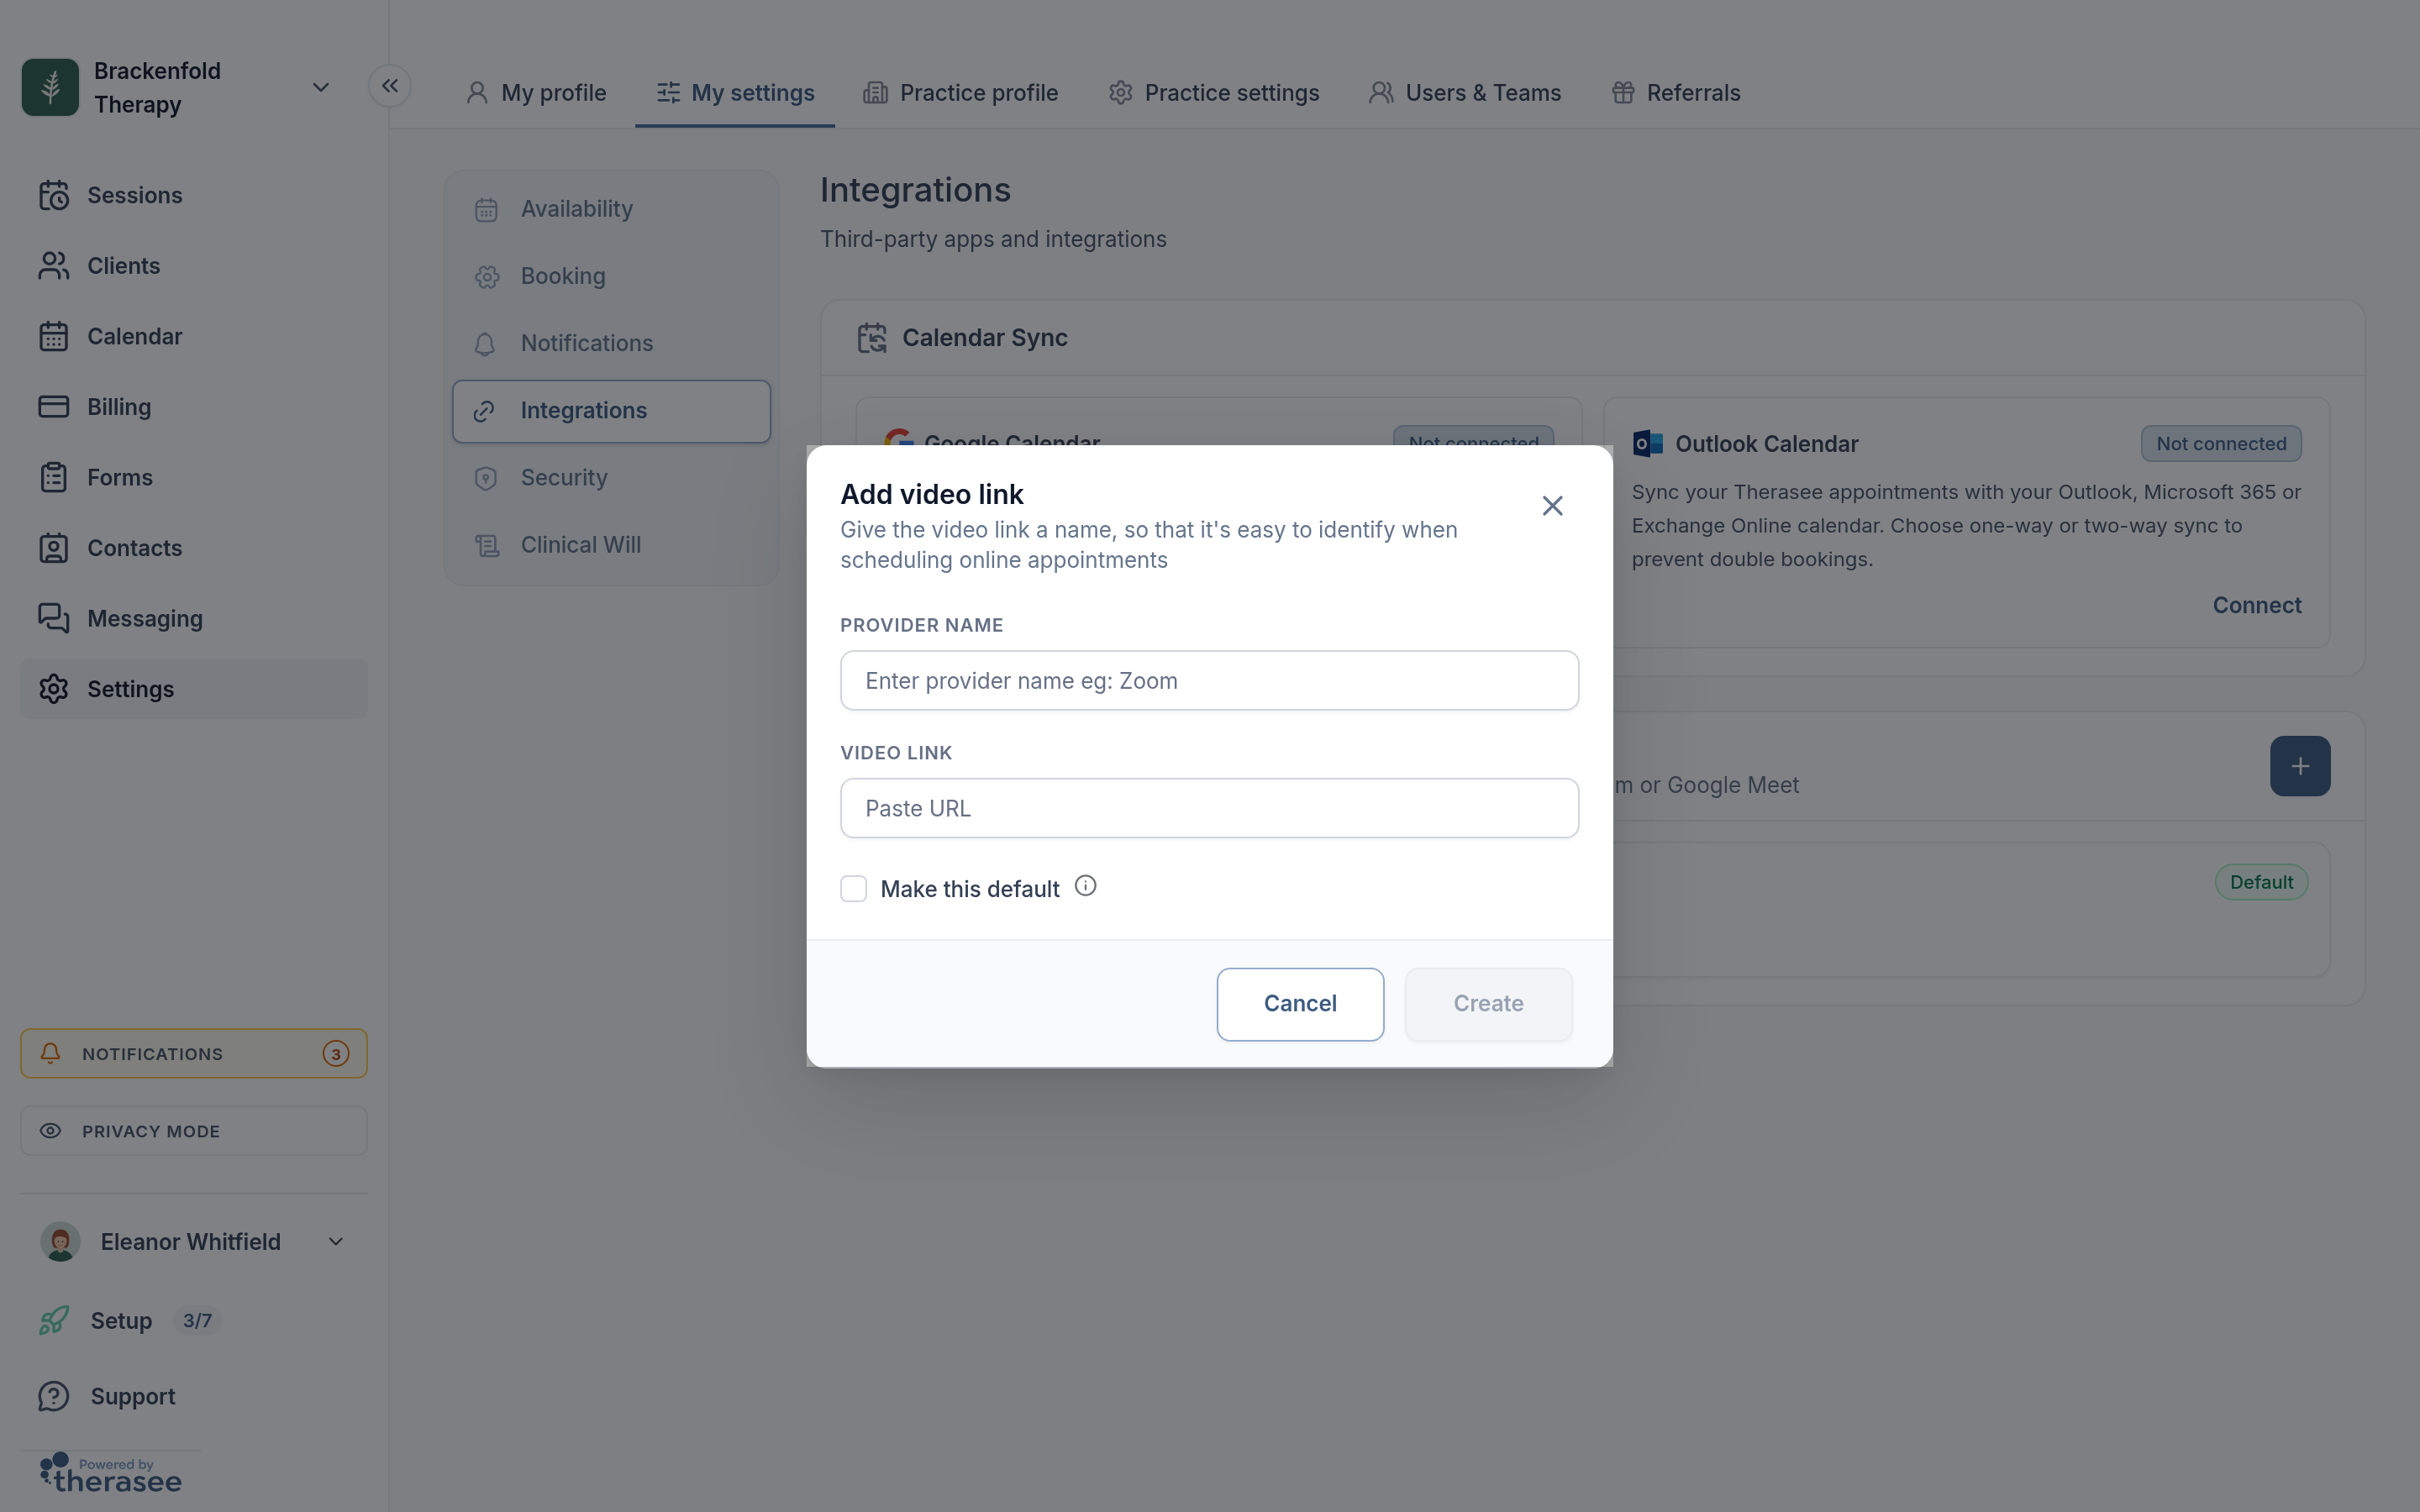
- In Add video link, enter a Provider name (for example Zoom) and paste your meeting link into Video link.
- Tick Make this default if you want this option picked for you whenever you book an online session and whenever a client books one online. Select Create.
Change the default later with Set as default on another row. The platform is saved on each session when it is booked, so a new default does not move existing sessions; to change one, edit it and pick a different Video platform. Each practitioner sets up their own links.
What your client sees
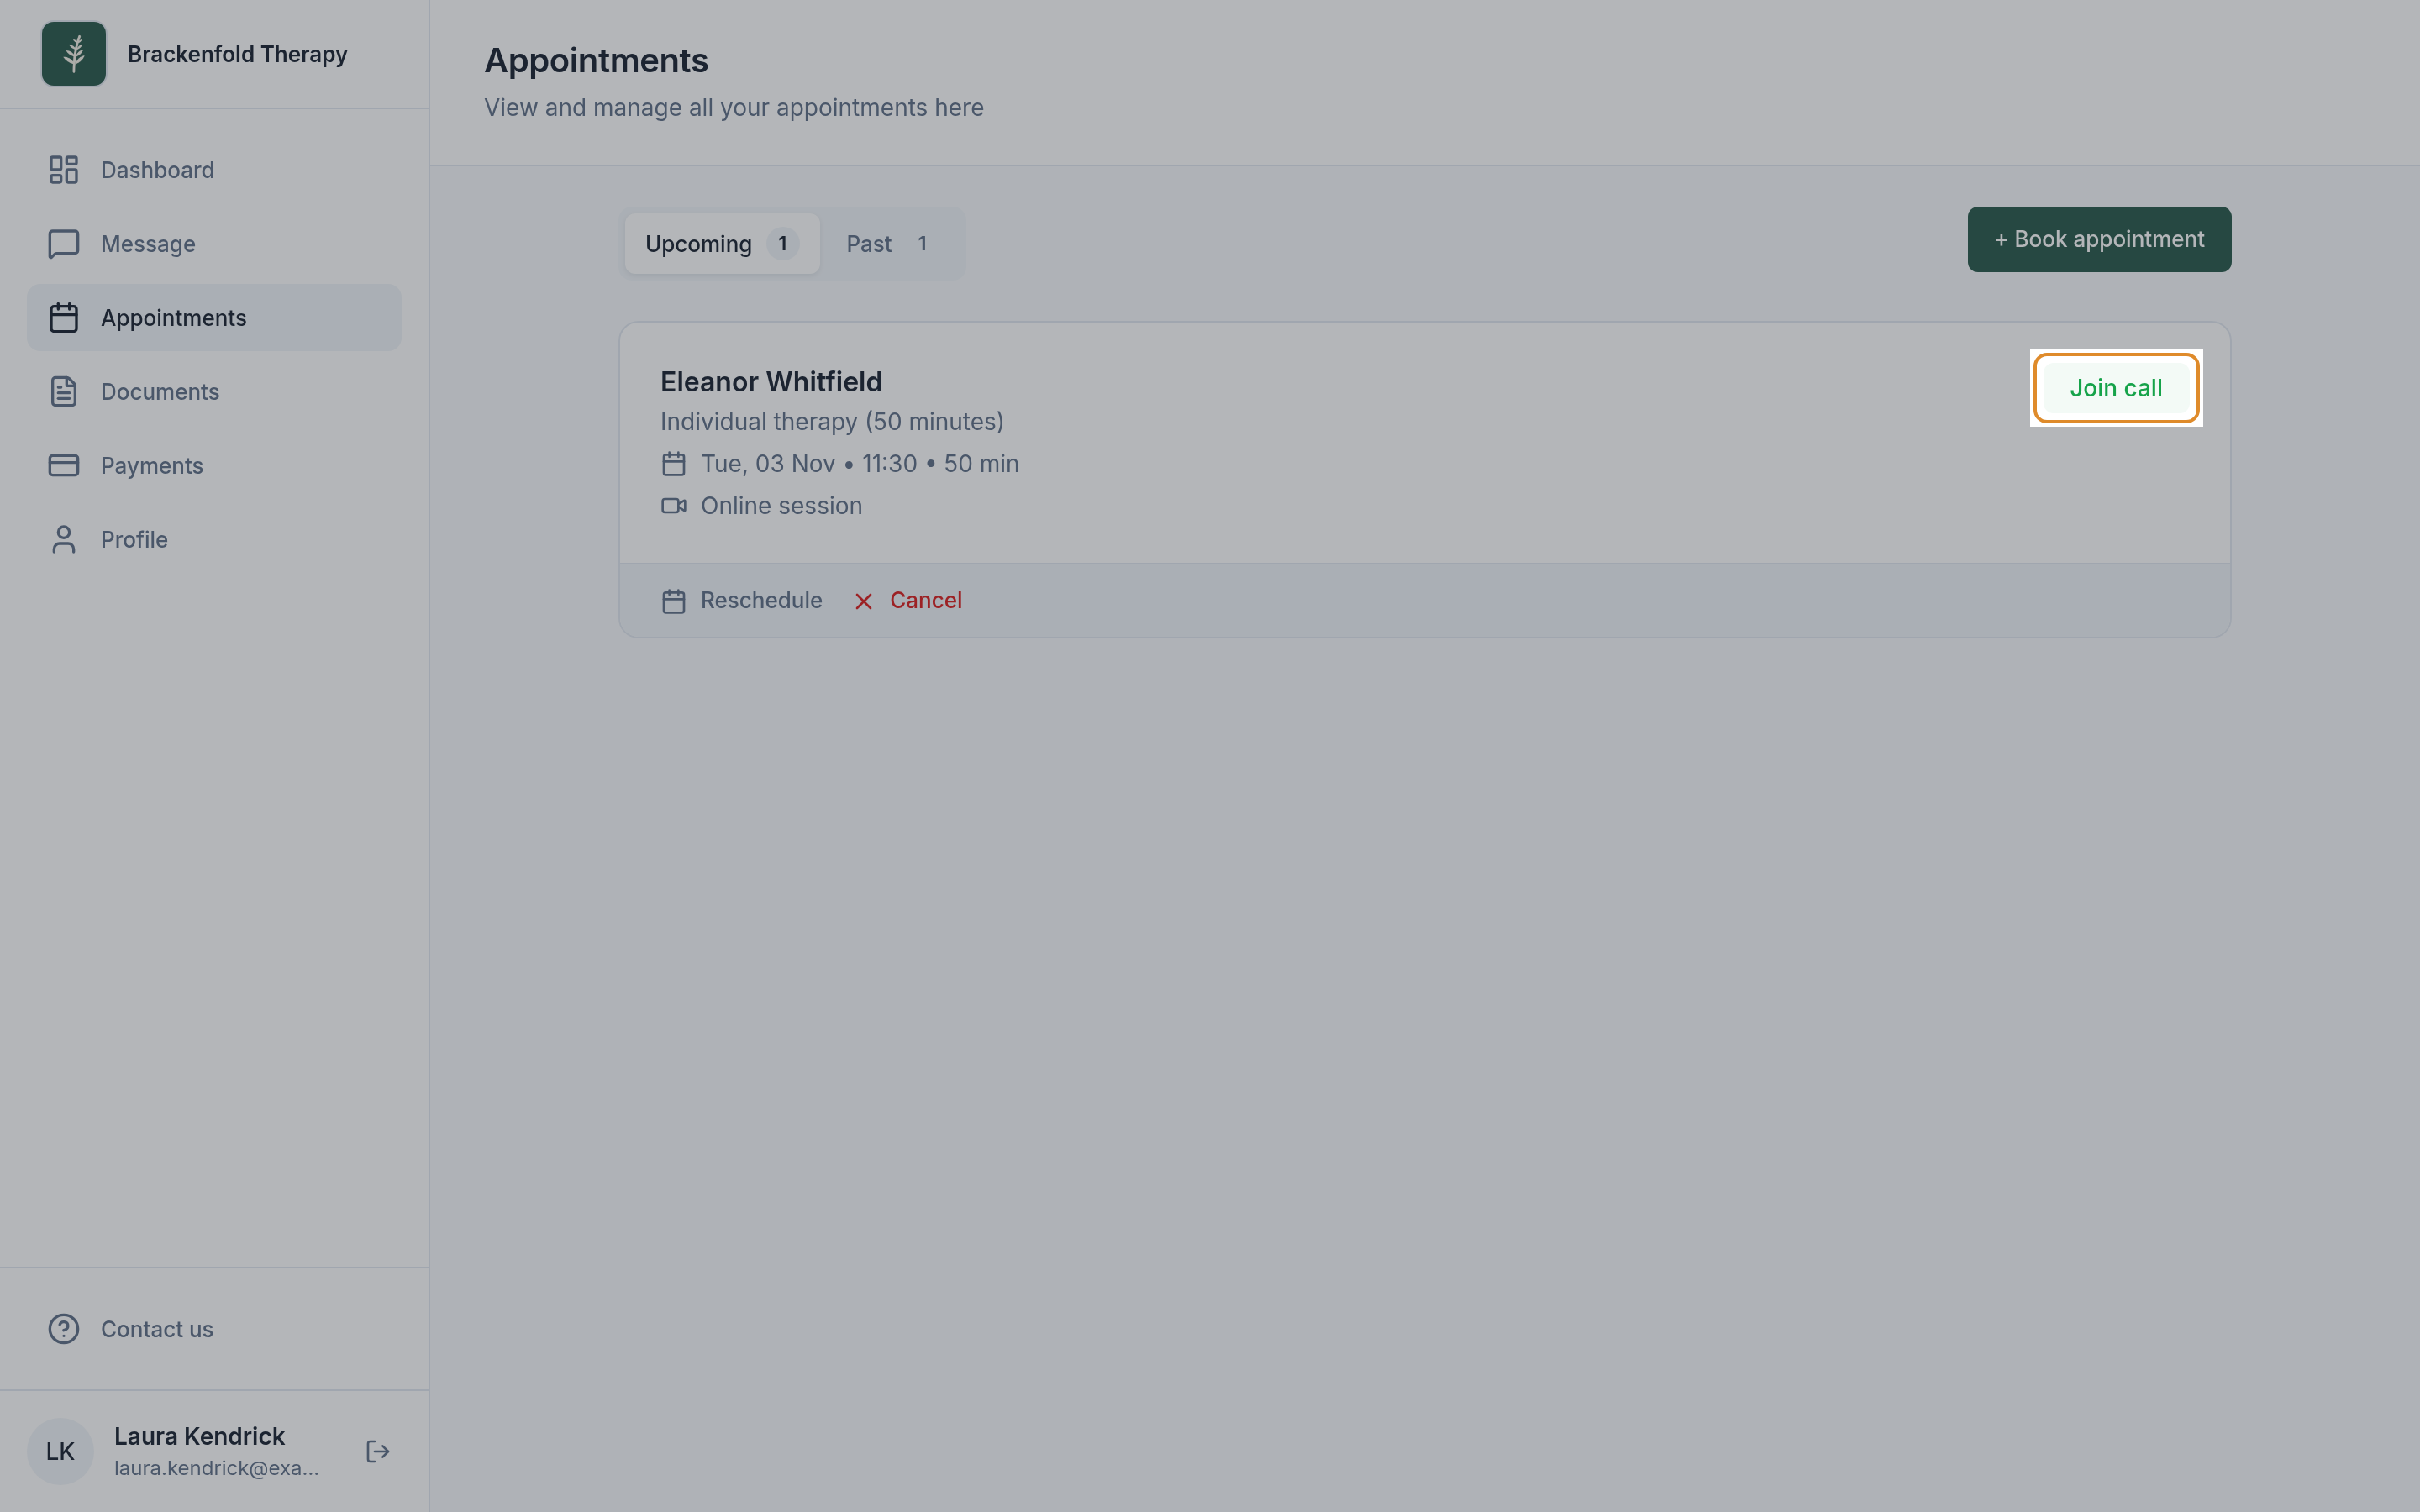
Your client joins from Join call in their portal or the link in their emails. The call shows your practice's name or logo; they check their camera and microphone, select Join Visit and wait for you. If you ask for payment before online sessions, they see Make payment until it is paid. Their side is explained in Joining a video session, which you can send to clients.
If a client cannot get in
If nobody appears in the waiting room, the client has not reached the call yet. Suggest:
- Allow the camera and microphone. Camera and mic access blocked. means the browser is blocking them: allow access in the browser's site settings, then select Retry.
- Close other video apps. Camera or microphone unavailable. means another app or tab is using the camera.
- Use an up-to-date browser. Chrome, Edge, Firefox or Safari; Safari on an iPhone or iPad, Chrome on Android. If the link opened inside an email app, open it in the phone's main browser instead.
- Try another connection. Move closer to the router, or switch between Wi-Fi and mobile data.
- Start again from the portal. Close the call tab and select Join call again.
If the link itself does not open the call, the client sees Oops! This link seems to have expired. (the session was cancelled or ended more than a day ago) or Hmm. We couldn't find a call in the link you've entered. (part of the link is missing). Joining from the portal avoids both. To reach a client while you wait, see Messaging a client.
Opening a call for a colleague's session
Only the practitioner the session is booked with can host its call. If you open a call while signed in as someone else, you see You do not have permission to access as a host to this visit. Select Log out and Continue and sign in with the account the session belongs to.
Was this helpful?